Amazing Pulse Gadgeteer Device

image

Scarlet put me on to this amazing device that transforms internet data into a graph. It was made using six servos which are driven by a .NET Gadgeteer processor. You can use it to show you the weather forecast, how busy your Twitter feed is, or anything that you can pull from the web and make into numbers.

You can find out more about the Pulse device here.

Gadgets at St. Bede’s

DSCF8305.jpg


DSCF8304.jpg

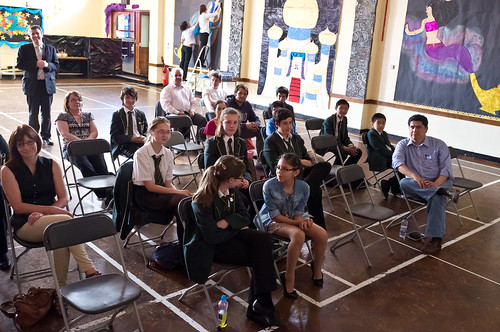
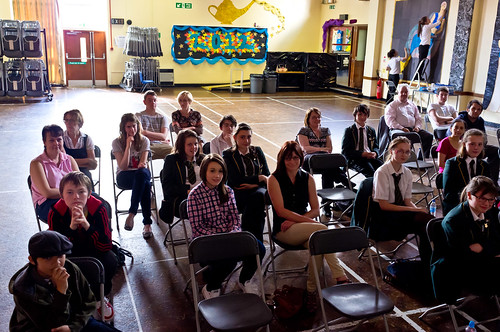
This is the audience, thanks too much for to the volunteer who helped me build the camera.

Did a school visit today. For the last couple of years we’ve been doing talks at St. Bede’s about computing and good stuff, Today I was showing some of the fun and games that you can have with Gadgeteer and 3D printing.

IMG_0340.jpg

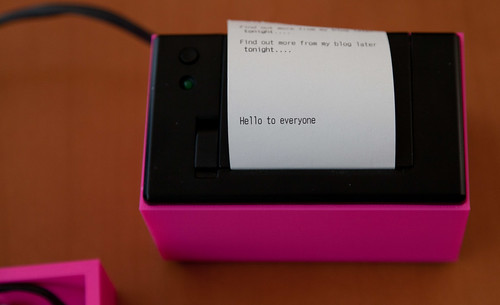
This is the output from my “Tweet Printer”. It connects to the internet and prints out my tweets. And it works.

IMG_0341.jpg

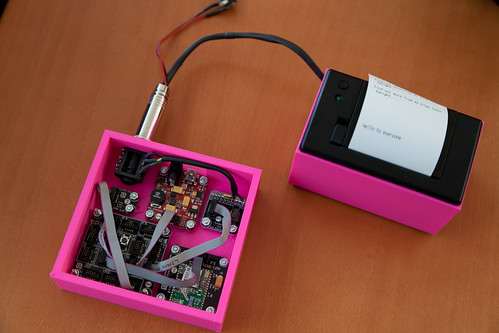
These are the working components, a FEZ Spider, WiFi board and custom printer connector, based on the only plug and socket that we had in stores, which is probably a bit big (and would sound really funny if you plugged headphones into it…

IMG_0344.jpg

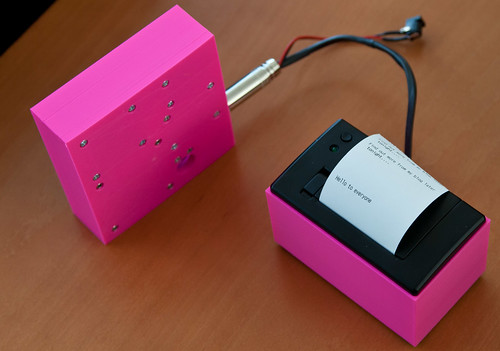
Another view, at the bottom you can see the hole for the GHI 7 led display which shows the progress as the device finds a WiFi network, connects to it, sends a web request and then decodes and prints the tweet.

It even works by using my Lumia 900 in Internet sharing mode, which means that I can see my tweets immortalised on paper everywhere I go. If I fancy doing something different, for example a printed weather forecast or shopping list, then I just have to change the software. All I need to do now is print a lid for the box. And find some smaller plugs, and make a new printer box with room for the power supply socket.

If you were at the talk and want the slide deck, you can find it here.

Making Boxes for Gadgets with an Ultimaker Printer

IMG_0302.jpg

Ultimaker and Gadgeteer would seem to be a match made in heaven. Gadgeteer gives you a bunch of hardware devices that you can connect together and program using .NET and Ultimaker gives you a way of making a box to put them in. I’ve spent today finding out just how easy it is to do this, and just how much fun. I spent some time last week printing my name, which was fair enough I suppose, but today I wanted to get started making some boxes for gadgets.

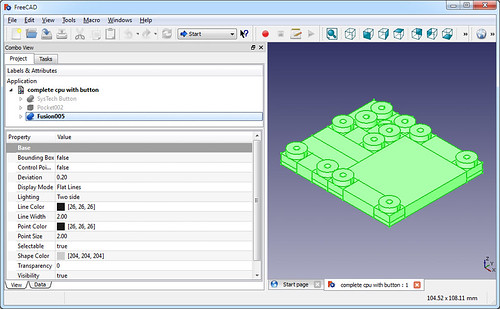
I started off using the AutoDesk 123D software but in the end I gave up on it. It is a great program for making ornaments and trinkets, but didn’t seem to make it easy to create engineering type drawings. I wanted everything to be just the right size and correctly positioned, and the program didn’t seem to make it easy to do this. So I switched to FreeCAD, following up on advice from Andy in a comment on the post last week. This has the feel of a proper CAD program (although I’ve never used a proper one, so I don’t have much to compare it with). Finally I figured out that the best way to make something complex was to use the Sketch view to draw something on a plane, and then extrude that into the model. That way I could cut quite complex shapes.
FreeCad.jpg

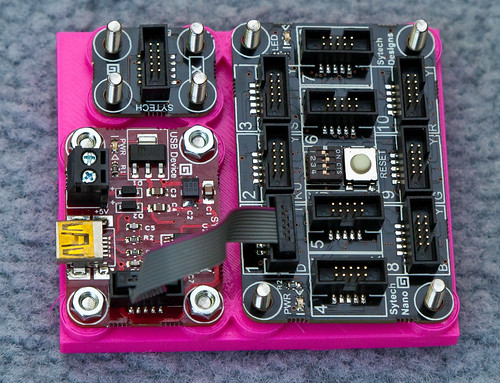
This is the view of my finished product, It has mounting blocks for a Sytech processor, power connector and button. The blocks are all individual components which I can assemble on a grid any size. The nice thing about the Gadgeteer devices is that they are all based on a grid mounting, with everything happening on 1cm boundaries. This makes it very easy for me to create some pins that I can use anywhere. The design above needs a little work, as the round mounting pillars are a bit too wide for the Gadgeteer standard, but for most of the devices I’ve found they work just fine.

Once I had made my design I had to convert it into an STL file (no problem, FreeCAD just does this) and then make the set of printer instructions. I used Cura for this. Finally I put my design on a memory card and turned the Ultimaker loose. I’m slowly getting the hang of 3D printing. Now that I’ve fixed all the leaks my problem is that sometimes the very first layer is not sticking to the printer bed. This means that the printer just extrudes plastic into the air and nothing gets made. I think I know how to do it now though, you have to adjust the print head so that when it is closest to the surface there you can just about pull a single piece of paper back and forth underneath it. And you have to make sure that this is the case across the entire printer surface.
IMG_0307.jpg

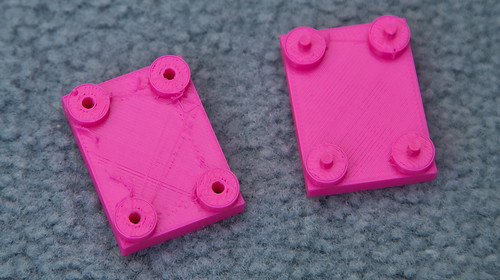
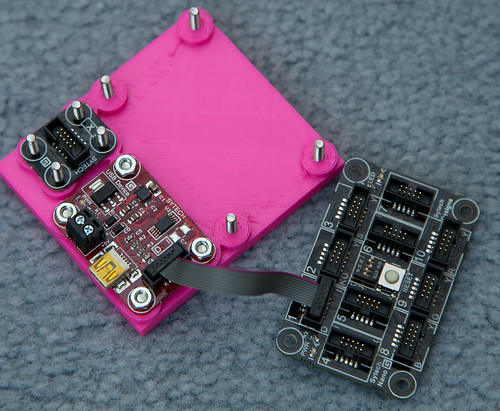
These are my early prototypes. For the first one, on the right, I tried to extrude pillars that I could just drop the board onto. I had a theory that I could just tighten a nut down onto the pillar and it would just self tap a thread into the pillar. Didn’t work. The pillars are not that strong and they snapped off. But for me the really amazing thing was that the Gadgeteer board just fitted onto these pillars. All the dimensions I had carefully put into FreeCAD were being reflected exactly in the finished article. Kudos to the Ultimaker crew, they have made a printer that prints things exactly the right size. If anything had been even slightly out of whack nothing would have fitted. As it was, once I’d cleaned off the excess plastic, I could just drop the board on.
IMG_0306.jpg

Version 2, which is where I am now, has bolt holes through the plastic pillars which I can then use to screw the boards down onto. I’ve made a three board carrier which you can see above and again, everything just lines up. Astonishing.

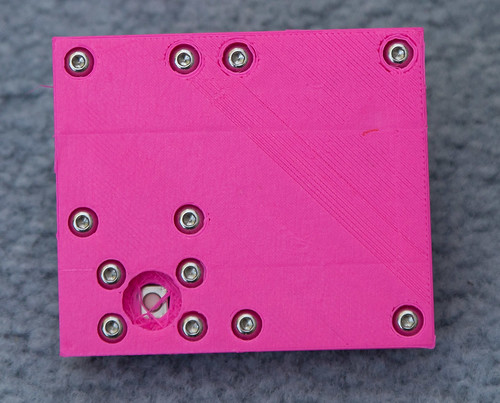
I’ve even managed to break one of the golden rules in 3D printing, and print overhangs that let me countersink the bolt heads in the surface underneath.
IMG_0309.jpg

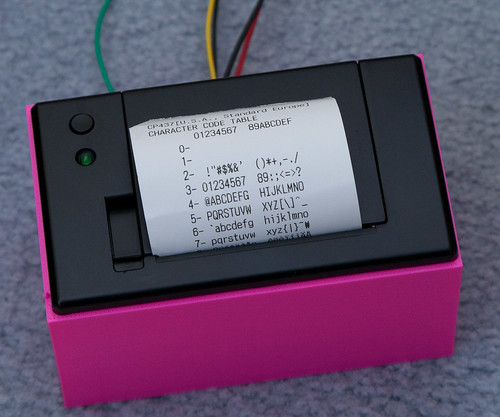
This is the view from the other side of the board. The heads are all countersunk. the big hole in the bottom is meant to be there, it is a push button. The idea was to make a round button to fit into the hole. Unfortunately, being an idiot, I’ve got the large and the small holes the wrong way round, so that my button will just drop onto the floor. Still, I’m very pleased with the results from just a day of playing with the software and the printer. Last night I also made a case for my thermal printer, which turned out rather nice too.
IMG_0298.jpg

Once I get everything sorted I’ll put the designs on the interwebs somewhere for anyone who is interested. Just a great way to spend a day….
Getting Started with Gadgeteer

image

WE had the folks from Microsoft Gadgeteer here to see us yesterday. They brought with them all kinds of cool interfaces that I’m looking forward to playing with, after I’ve finished marking. If you’ve not come across Gadgeteer before it is a .NET Micro Framework based platform for creating, well, er, gadgets.

If you’ve ever wanted to create a data logging, remote controlled, catflap. Or a GPS-enabled TV remote, or a motion detecting chicken counting camera, etc etc, then Gadgeteer gives you the modules to plug together to make the hardware and Visual Studio and C# to write the software, including in device debugging of your code.

There are a huge number of modules available now including camera, LCD panel, gyro, compass, lights, switches, multi-io boards, barometer, soil moisture sensors, heart rate sensors,  Bluetooth, WiFi, GPS, GPRS, infra-red, ethernet, USB Host and USB client. Plus you can bring out the individual signals from the processor and use them directly.

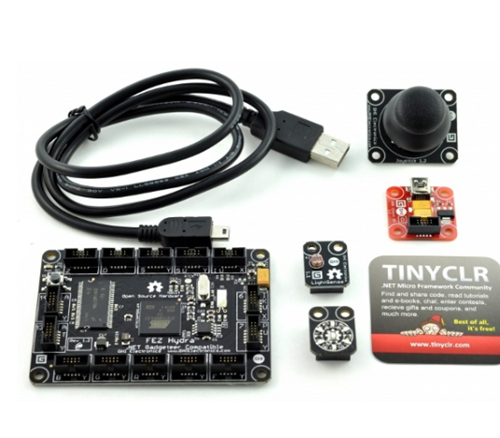
You can get started with the Fez Hydra Basic Kit, which you can see above. This costs around the same as a video game and a half. The sensors range from a fiver to quite expensive (for things like the VGA adapter, if you need it). If you want to get started in embedded development, or have an idea for a device and want to make it come to life, the Gadgeteer is a great place to start, particularly if you already have C# skills.

We have been using the Gadgeteer’s older brother, the .NET Micro Framework, for the last couple of years and it has been a very successful means of introducing students to the joys of making hardware do stuff. If you want to have a go with this kind of thing you should take a look.

If you are a student at Hull and you have have a really good idea for a device, and you want some hardware to play with over summer, then come and see me and I’ll see if I can find a kit to loan you.

Micro Framework Robots at Tech Days

DSCF6123.jpg

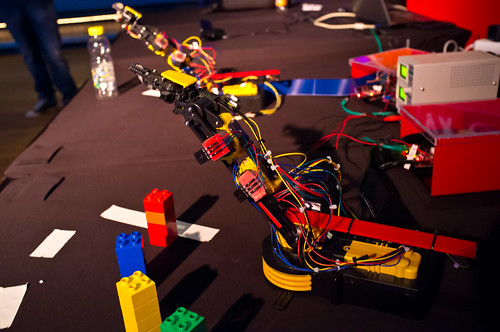
Straight after my complete “demo meltdown” last week I was greatly cheered by some robots that one of the chaps at Tech Days was showing off. He had taken a toy robot and make it properly useful by adding potentiometers to the joints so that the .NET Micro Framework controller could properly position the arm.

DSCF6124.jpg

These are the GHI controller boards that he built up.

He even had a demo where the robot was controlled by someone in front of a Kinect sensor. And his worked…..

Gadget Box

Gadgets

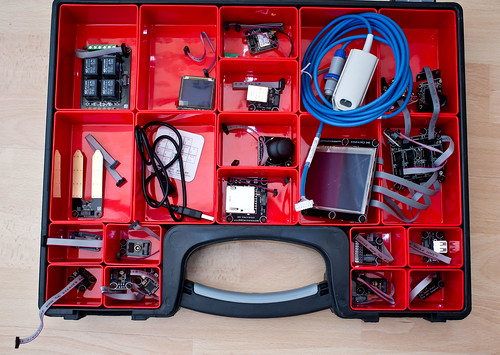
Yesterday I got a box for all the Gadgeteer bits and bobs that I’ve been lent to pay with. In amongst the cables we have a soil moisture sensor, barometer, a bunch of switches and multi-coloured lights, compass, gyro, GPS sensor, SD card reader, network interface, Joystick, LCD panel, OLED panel, network connector, processor board, video camera, power relays and usb host connector. I’ve already built a little camera (that’s the demo application). Now I just have to think of something else to build.

.NET Gadgeteer Fun and Games

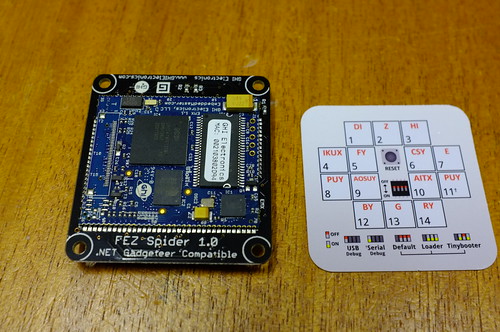
Gadgeteer Spider

I love getting parcels in the post. Particularly if they contain things like a complete set of .NET Gadgeteer devices and interfaces. There are loads of interface devices, including touch screens, GPS sensors, barometers, thermometers, gyroscopes, moisture sensors and even a thing that which looks like it will measure my heartbeat.

The potential for fitting things together and doing great things with them is wonder, wonder, wonderful. I’m going to take them home for Christmas and see what we can build. I foresee a return of the Blog Controlled Christmas Lights.

Rampant Robots

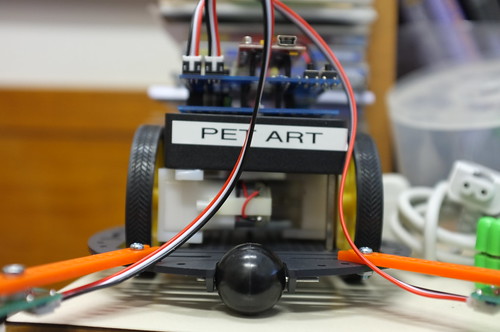
DSCF5281

We let the students give their robots names. As well as “Pet Art” above we have two Daves and one Eric.

We had a proper session of robot control today. We were making robots that don’t fall off the desk. We had a few miss-wired connections and people discovered that two motors told to go at full speed don’t actually go at the same speed. So the program can’t just assume that things will happen the way they should….

Next week we are going to see about making the control software multi-threaded so that we can drive the motors and monitor the sensors at the same time. Great fun.

Building a Robot Army

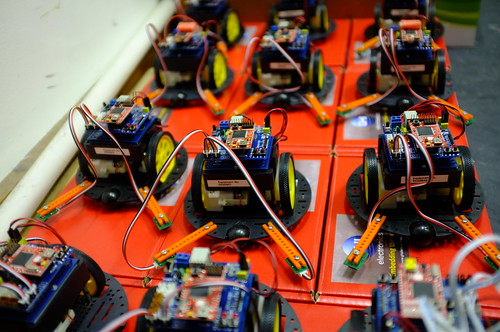
DSCF5252

Spent some time this morning building robots. Actually I didn’t, students on a hardware interfacing course did all the hard work. They are all Fez Micro Framework powered and great fun. They are based on the same platform as Oscar, who has been all over the place with me over the last couple of years.

Next week we are going to get some C# code into them and get them running around the desks and not falling off the edge. Then we are going to get another Micro Framework board running and see if we can control them via the internet.

Great fun.

Fez Ultimate Kits

Leaves

My apologies to those of you looking forward to getting your hands on Fez Ultimate .NET Microframework kits. Because of the need to collect deposits for the devices I think it is best if we do this at the start of the session, when all the Hull students are back on campus. This will also allow us to open up the offer to any first year students who fancy having a play with hardware. Keep watching the blog for details of how to get your hands on fun hardware.

Fez Ultimate Kit Last Chance

image

Apologies to those who have got in touch about the Fez Ultimate Kit. I’ve been a bit busy with other things, but I’m going to get it sorted as soon as I’m back in Hull next week, so that we can get the order out. I’ll be in touch later this week, once I’ve finished the Jump Start….

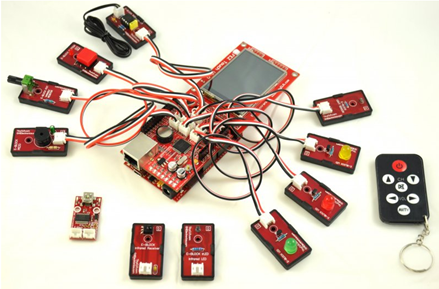
For those who aren’t sure what I’m on about, the Fez Ultimate Kit you can see above is a .NET Micro Framework device along with a whole bunch of sensors. You can program it in C# from Visual Studio and we use it in teach for our embedded courses. I’m really excited about the Gadgeteer too, which will be along later this year and will make embedded development on small devices even easier.

We are currently sorting out a cut price deal on the kit above, which usually goes for 150 dollars. I’m going to get a bunch sent to Hull for the labs, and anyone who can get to Hull and pick one up (I can’t resend anything out I’m afraid) is welcome to piggyback on the order. There’s still time to send me an email at ultimatefun@robmiles.com and I’ll let you know just how much you could save.

Amazing Micro Framework Offer

image

I was talking to Gus at GHI Electronics today about Gadgeteer (which looks totally wonderful) and he made a very interesting offer. The Gadget hardware is a little way off, and he is prepared to offer an amazing deal on the current Fez Ultimate Kit you can see above. This gives you a colour touch screen, a bunch of lights and switches, SD card storage, network connectivity and even a remote control keyfob. They are priced on the site at $150 but Gus is happy to offer a special “Robs Price” which is a lot less than this. A lot less. Snag is, I have to get a bunch of orders together so we can all benefit from this.

Actually, at $150 this would be good value, bearing in mind that you get a complete microcontroller development kit you can program in C# using Visual Studio. You can even spin up a web site on the platform if you want.

I’m looking forward to Gadgeteer, which will give us some slightly more powerful boxes, but I reckon at this price it is really hard to turn down this kit.

If you are interested in paying an amazing prize for this kit, and you will be at Hull some time in the future, send me a message at ultimatefun@robmiles.com and I’ll let you know just how much you could save. Then, when you get to Hull, we can get together and have fun making them do stuff.

Gadgets at Microsoft Research

Gadget 1

My first gadget. Zero to digital camera in around 10 minutes…

Anything with the with the word “Gadget” in the name is going to be a win with me. Especially if it also includes the .NET Micro Framework. Enter the .NET Gadgeteer. The aim of this project from Microsoft Research is to make it really easy to create embedded devices. It is based on work performed by them to make it easier to go from ideas to functioning hardware. The cunning stuff is not just in the underlying software, but also in the way that the different hardware elements can be quickly and easily connected to the central “spider” processor board, which you can see in the front of my picture. You can just about make out the switch that is used to take a picture, the LCD panel that displays the results and a camera (presently taking a picture of the desk…).

Your gadget programs are written in C# and deployed like any other .NET Micro Framework application, using Visual Studio and a usb connection to the target device. However, the Gadgeteer system makes it very easy to interact with complex devices like cameras and displays, providing a well designed object interface that sits on top. The bottom line is that if you can program with objects, you can now use their software representations of objects to create working embedded devices. Furthermore, since all the software is shared source (based on the Apache 2.0 licence model) it is possible for to make products based on this technology which you can sell or distribute how you like.

A number of hardware vendors are on board and will be producing the processor boards and the peripheral devices. The shape and form of the components has been standardised so that it is easy to make cases to hold them so creating very professional looking, but low volume, product using the new 3D printing technology is now easy. And fun.

I’m keen to be first in the queue to get some kits for teaching and playing with when the first devices hit the stores soon. If you have an idea for a thing you’d like to make, but are put off by the difficultly of plumbing the hardware together and creating a good looking finished product, you should take a look at Gadgeteer.

Using the Texas eZ430 Watch with the .NET Micro Framework

ChipworkX and Watch

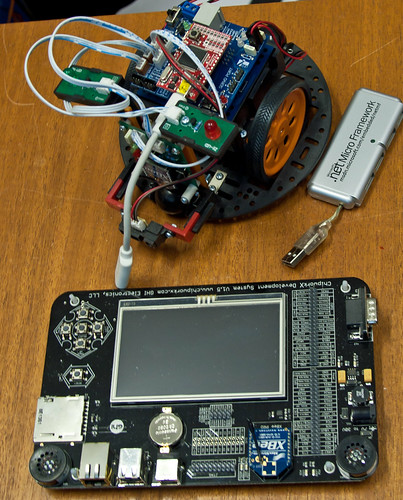
Some time back I got a Texas Instruments EZ430-Chronos watch. One of my better investments. For only fifty dollars you get an LCD watch which you can program. What’s more, it contains a whole bunch of sensors and can communicate with a host device over a wireless link. Around the same time I got a ChipworkX board from GHI Electronics.

So, one lunch hour I decided to try and make them work together. It turns out to be very easy. The watch has a wireless connector (you can just see the PCB at the top of the picture) that appears as a USB serial port to whatever you plug it into. Since the ChipworkX board has USB hosting and serial port support it was an easy matter to get the two talking. A bit of searching and I found the accelerometer protocol for the watch, and away we went.

If you are interested, I’ve created a Watch class that abstracts the watch behind an object that will fire off events when the watch delivers new accelerometer readings. You can find a sample .NET Micro Framework project here.

Rube Goldberg and the Micro Framework at Mix

Curious Cloud Poster

I’m going to try and watch the local news over the next few days. I’ll be looking for reports of folks performing strange contortions under street lights and near air conditioning vents. If I do see any, I’ll know what it is about though. They’ll be people taking part in the Rube Coldberg Curious Cloud Contest. The idea is simple enough. You get a magic device that responds to temperature, light and motion. By getting the right conditions of these you can get three lights on the device to come on. This makes you a winner.

It turns out that, with a bit of experimentation, anyone can get the lights to come on (particularly if they take a look at the C# code that powers this .NET Micro Framework based contraption). So the biggest prizes go to those who can make them come on in the most interesting way. Dressed as a chicken perhaps, or using a robot, or on the street. Or all three.

Curious Hardware

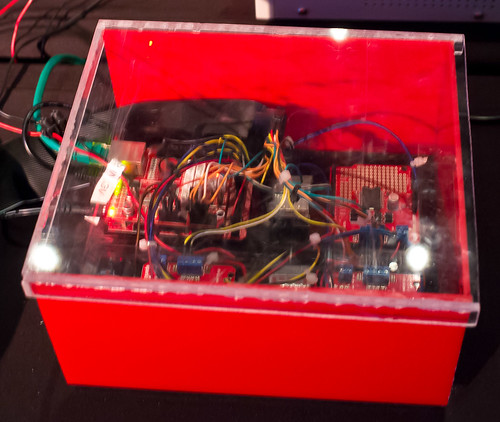
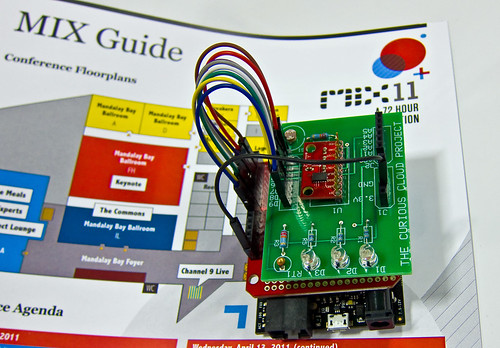
The hardware doing all this is pretty impressive. A netDuino board sits at the bottom, talking with a WIFI adapter and a sensor/display board. It captures readings from the sensors to an on-board memory card. When the device is able to detect a WIFI signal it will upload all the recent readings to the Cloud, where anyone can take a look. So, in a package around the size of a cigarette pack we have a .NET capable processor, sensors, data logging and wireless networking.

I got to have an early play with one of the kits, you can find my sensor readings here:

I’ve not found the magic values yet, but I reckon the fun is in the journey.

Colin Miller, of the .NET Micro Framework team, is dishing out complete kits to lucky Mix delegates who want to form a team and want to have a go. He will be on hand from tomorrow in the Connect Lounge (at Shorelines A) dishing out kits for you to play with.

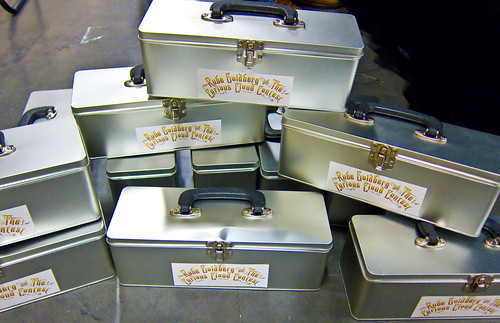
Curious Cloud Box

The kits are beautifully presented, with all you need to get started, including a battery pack so you can take your sensors out and about.  You could even use a Windows Phone app to visualise your results.

Find out more at http://curiouscloudcontest.com when the competition opens tomorrow.

The Rob Miles Roadshow

Next week I’m doing a Mix session all about game development in XNA, stay tuned for some brand new examples and sample code, but unfortunately no new jokes. I’ve just found out that I’m also doing Ask the Experts on Tuesday evening starting at 6:00 pm  (and for once I’m not going to be doing the asking).  They are using a “speed dating” arrangement where we meet up with a bunch of folks for 20 minute slots where we get over the gist of what we are at Mix for. I’ll be doing Windows Phone games (of course) and I’d love to meet you if you come along. Strange this, nothing for years and then two sessions of speed dating in a matter of a weeks.

image

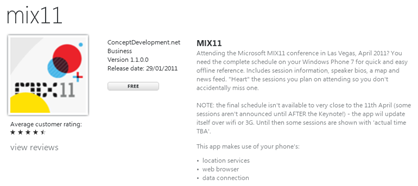
If you are lucky enough to have a Windows Phone you can download the official Mix application which is great. And also mentions me. Search the marketplace for “Mix 11”.

The “Rob Miles Roadshow”™ then rumbles on to TechDays later this month. They also have a really good Windows Phone application too, although this one works best if you can speak Dutch. Search the marketplace for “Techdays”.

DevDays Speaker

I’m doing a session on Windows Phone games, another on the .NET Micro Framework and a third (deep breath) where I’m going to be talking about Windows Phone development in rhyme, just for Geek Night. And I’m also making an appearance at one of the keynotes too. Now, if that’s not a reason to buy a new pair of jeans, I don’t know what is… Find out more here.

Fun at Microsoft Days

Sofia Badge

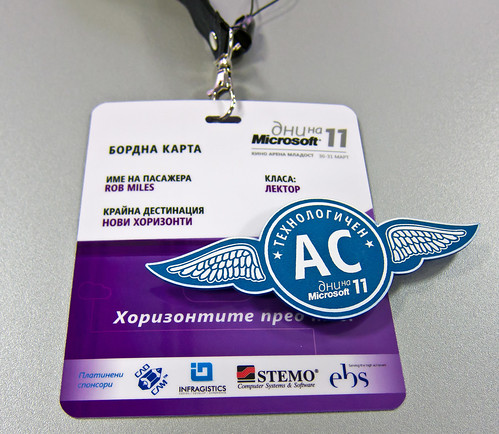
Got my conference badge this morning, along with a very fancy pin which marks me out as a speaker at the conference. I got in and got set up and then went and watched one of the keynote sessions. The first part was in Bulgarian, which was pretty much lost on me I’m afraid, but the main talk was by Mingfei Yan, who talked about the cloud and how it is going to change everything. I reckon all of our students should see this, lots of food for thought about the way that computing is going.

Mingfei Car Juggling

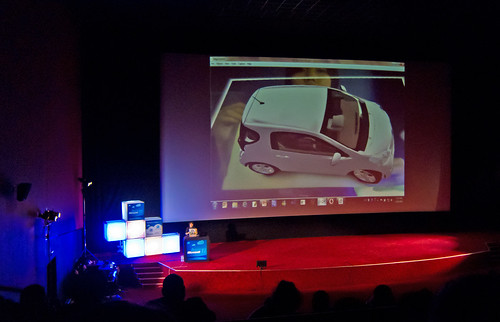
At one point she showed some augmented reality, where a 3D car model was streamed down onto a marker on a piece of paper. Great fun.

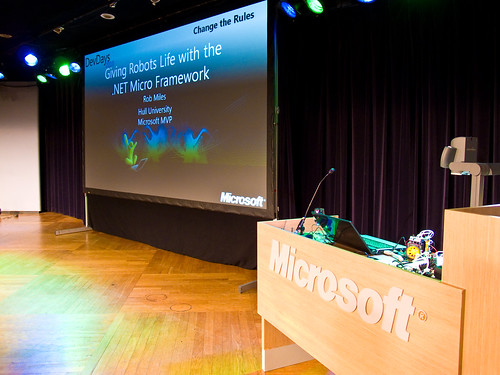
Then it was time for my Micro Framework session.

Micro Framework Audience

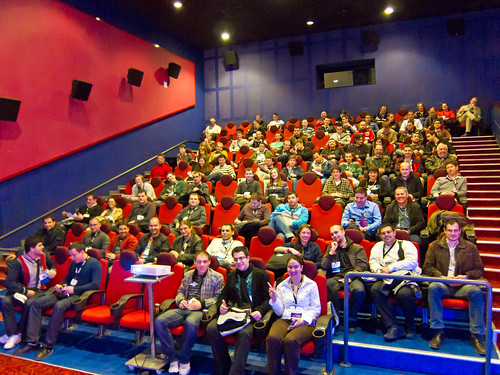
Everything worked and I had a great audience. This is some of them as the room filled up. Some great questions and a round of applause at the end. Although it was probably for the robot.

I’ve put all the resources for the talk here.

On now to experts lounge and then the Windows Phone talk.

Geek Night Files

DevDays 2010 Geek Night Setup
My name in lights…

After the fun and games of Geek Night I’ve now put all the source files and the presentation up.

  • You can find the presentation here.
  • You can find all the sample code here.

There are also some more audience pictures on Flickr. Click on the picture above to find your way to my photostream and take a look. I’m off to find a tram, a train and a plane now…