Using Bolt Inserts in 3D printed objects

I assembled the 3D printed camera today. I used the fittings I got last week. It turned out to be quite straightforward. I popped the special tip on the iron and set the temperature as low as possible (200 degrees). Then I picked up the fitting with a pair of pliers, popped it on the end of the tip and pushed the fitting into the hole in the 3D printed camera body.

Above you can see the result. I can now screw a bolt into this fitting to hold the lens in place. This is a really great way to screw things together. I’ve had a lot of success just using bolts in 3d printed holes, but this should be stronger and won’t wear out if I need to remove and replace the bolts.

This is the finished fitting in place with the lens attached. It turns out to look quite tidy. Next thing to do is make the handle and then take some pictures.

Bolt inserts for fun and profit

These arrived today from Amazon. I’m looking forward to having a go with them. And no, they are not bullets. They are for placing brass inserts into 3D printed plastic. You put them on the end of a soldering iron and heat them up so that the plastic melts around the insert. The inserts have screw threads in them. If I can get this right I can make 3D printed objects which I can screw together properly.

These are the inserts. They take m3 bolts.

Blackfinger

I’m 3D printing a camera at the moment. I’ve discovered that one of my early design decisions was not the best. It turns out that white PLA is not the most opaque colour I could have chosen. Cameras that let the light in are not optimal.

So today I decided to remedy that by painting the inside of the camera with matt black paint. I bought a spray can of the stuff, found a place in the garden as far away as possible from everything else and set to. It worked rather well. I’ve put on two coats and it is now looking a lot darker inside the camera, which is a good thing. The only snag is that it has turned out to be impossible to stop the black paint getting onto the outside of the camera (at least for me) so the next part of the plan is to paint the outside of the camera black too. That way I also get even more opaqueness.

The really good news is that the paint I’m using seems to stick really well to PLA. The only other snag has been that I now have a black finger (the one that has been pressing the button on the spraycan)…

Printing a Will Travel camera

I’m printing a 4x5 print camera. I fancy some hand held large format camera action. I started the printing around 7:30 am this morning. We are now eleven and a half hours into the print. It is supposed take around 14 hours, but I’ll be very surprised if it is finished before we go to bed. The good news is that all is well so far. I put some glue onto the print bed (just a thin layer of Pritt stick) and that seems to have stopped the corners from lifting too much, which is nice.

White might not be the most sensible colour for a camera, but the plan is to line the inside with black felt to reduce reflections and keep the light out. And it should look cool…

The return of Una

A while back I was given a lovely lens. Today I’m starting the process of 3D printing a camera to go behind it. I’m using the Will Travel design from Morten Kolve. This looks like an excellent starting point. Morten was kind enough to send me through the designs for a build which will match my lens.

Today I put the designs into Cura and sliced them for Edna the Ender to print. This showed a print time of 23 hours. Which Is quite a long time. And I’m not keen on running a printer overnight. So I tried slicing them for Una the Ultimaker and got a time of 13 hours, which was a worthwhile saving. Even if it took me 5 hours to get Una going I’d still be ahead of the game.

Unu is an original Ultimaker 1 which I first built 2012. I’ve built her again several times since then, most recently when I swapped the the print head for one from an Ultimaker 2. However, once I got the Edna the Ender-3 I’ve not used Una that much because Edna is a bit better at detail. However, I don’t really care about detail for this print. I just want a camera body. So I spent a few minutes cleaning Una up and making ready and off she went. So far she is working rather well. I’ll do the big print tomorrow, which should be fun.

Double Z axis trouble

I’ve been working on breaking my 3D printer. It’s going quite well. I’ve fitted a new direct drive printhead (which was really easy) and added a second lead screw for the z axis (which was really stupid). The principle is simple enough. Initially the printer had a single motorized screw on the left hand pillar which lifted the print gantry up and down. Thing is, when the print head moves all the way over to the right it is less well supported, so the gantry sags a bit. I thought it was a good idea to put a motorized screw on the other gantry so I bought the kit and fitted it. Which was a stupid idea. The problem is not so much with the drive system. That works fine. The problem is that if the two lead screws get out of sync (which they do) then the gantry tilts. When the printer is powered up the two screws are locked together by the stepper motors but when the power is switched off the weight of the gantry turns the two lead screws different amounts, putting the alignment out of whack.

The solution is to add a synchronisation belt at the top of the lead screws. This is what the latest printers have. So I’ve ordered one.

Direct drive 3D printing

My 3D printer has been working reliably for ages. I can go from an idea to a printed artefact with a minimal amount of messing about. So I’ve decided to upgrade it. It turns out that I can get a complete direct drive print head for a very tempting price. I was thinking of changing the nozzle, so I might as well change everything. The replacement head arrived today. You really do get everything, rollers, heater, thermocouple and wires.

The idea behind direct drive is that the filament feed mechanism (the bit which pushes the filament into the heater) is right next to the head itself. In the current configuration the feed motor is mounted away from the head and the filament goes through a tube (called a bowden tube) to the head. This adds friction and elasticity to the filament feed. Doing away with the bowden tube should improve print quality and let me print more exotic filaments.

It looks like an easy fix so I’m going to make it more difficult. The one thing I’m not happy about is the way that the print head now weighs a lot more than it did because it now has the drive motor on it. So I’ve ordered an extra Z axis drive screw so that the bar the print head moves along can be supported on both sides, rather than just one. It should arrive later in the week.

3D printing lots of colours

Following my success making a version of the MIDI CheeseBox on a surface mount PCB I now have to make a case with coloured buttons. I’m going to need red, blue, green and yellow. Some of which I don’t have. The good news is that there are folks who will sell you a pack of short lengths (10 metres) of a range of colours at a reasonable price. I think these are intended for use in 3D printing pens, but they should work OK in Edna the Ender 3.

Clip Iteration

One of the great things about 3d printing is the way that you can iterate your designs very quickly. The picture above shows my progress towards a little plastic clip that will hold the led panel onto the front of the case for the “Chocolate Synthbox” that I’m building. The first one (on the far left) was a bit too large. Over the next three I refined the hole size and the height of the “claw” part of the clip until it fits and can be tightened down. Great fun.

Printing Monday

A lot of today was about printing. I set out to print the top of the box I designed yesterday. I fired up Edna the Ender and she just got on with it. I’ve only just started using the printer after quite a long break. I figured the best thing was to not fiddle with anything, do an auto-bed level and then start printing. In olden days I’d have spent a while manually re-levelling the print bed and, after a lot of messing around, get myself back to the same place I was when I started. These days I’m older and wiser, so I just assume that nothing has changed and let the printer get on with it. It was one of my longer prints, at around 8 hours, but It seems to have worked well.

Print the box tomorrow.

PICO MIDI Cheese Box Constructed

When you put your ideas out on the internets and in magazines it is always nice to see someone actually build one. “viragored” has not just built a device though, they’ve also designed their own case because I forgot to publish the design files. I’ve put my designs on GitHub now. You can find them here. But I think I like that the new one is better. I like the idea of using “push pins” to hold components in place rather than screws.

The mystery of the haunted BL Touch probe

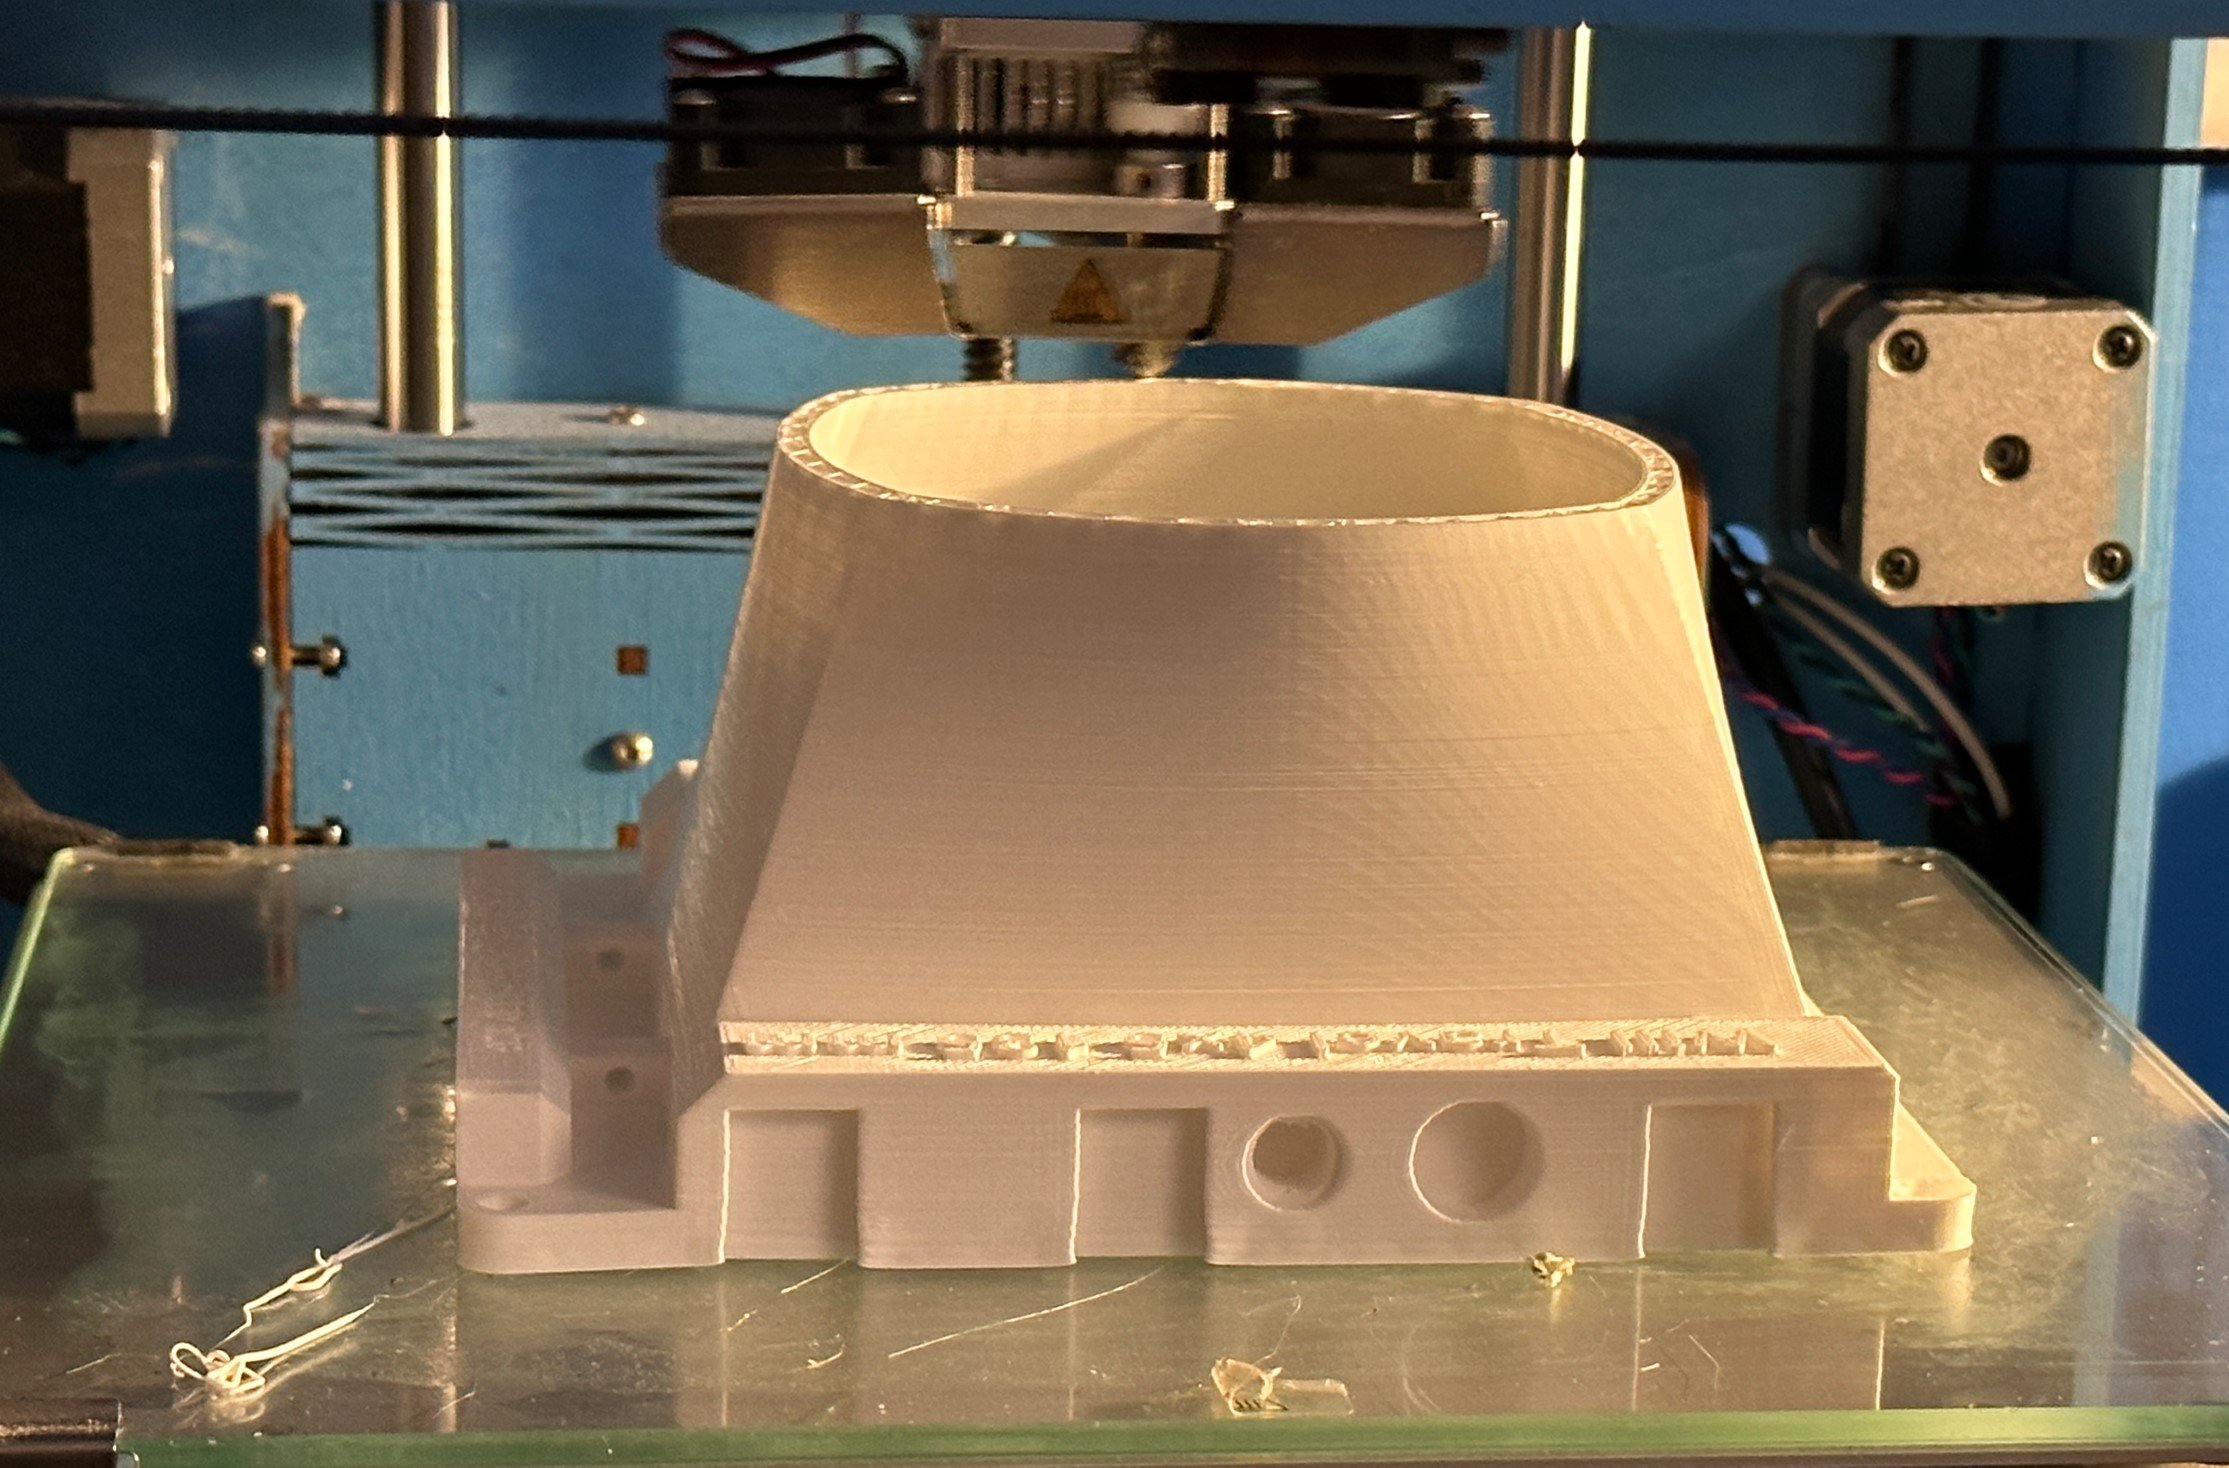
In my experience the worst thing you can do with a 3D printer is to think of it as an appliance. As soon as you do that it instantly finds a new way of breaking that you’ve not seen before. I’m making a new gadget and this morning I thought I’d print out the bottom of the case. I printed out the top yesterday and noticed that every now and then the printer was making a “ticking” sound. This was caused by the extruder (the thing that forces the filament through the print head) skipping steps. It means that either the printer nozzle is blocked or the nozzle is a bit too close to the print bed and stopping the molten plastic from flowing.

I checked the nozzle and it was clear. It was only happening in one region of the print area so I thought I’d level the bed, which was a good idea in principle but practice turned out to be a nightmare. I could not get the bed to level. I ended up replacing the springs that support the bed with ones that I bought a while back.

The new springs are yellow, which apparently is a good thing. They give a greater range of adjustment and are a bit more substantial than the ones that came with the printer which I think have got a bit tired. I now have the bed level enough to print with which is nice.

I did find out one interesting (at least to me) thing while I was doing this. I have a BL touch sensor on my printer. It’s the red thing in the picture above. At the bottom is a little motorised probe that is moved into the “down” position whenever the printer wants check the height of the print head above the bed.

While I was working on the bed I noticed that the probe kept dropping onto the print bed in a rather annoying and potentially breakable way. For a while I thought the printer was haunted by “The Ghost of Failed Prints” but this was not the case.

It turns out that the probe dropped whenever I moved the print bed by hand. After a while I figured out what was happening. Stepper motors make quite good generators. If you turn them they produce a voltage that gets sent back into the circuitry of the device they are connected to. Some of this was finding its way into the coils that move the probe up and down and triggering them.

The lesson here is that when you move things you should move them slowly, so that they don’t produce as much voltage.

Perfect fit - darn it!

I’m working on a new project. I start with the box and then put things in it and wire them together. My usual approach is to run a 5 hour print for the entire case and then find that some of the holes in it are the wrong size. So today I thought I’d do it properly. I printed out a tiny test print instead. Of course, when I do it this way round the holes are exactly the right size.

I say Pomorodo - you say Pomodoro

I didn’t know what a Pomodoro timer was until Andrew suggest that I might like to use a Rasbperry Pi PICO to create one. On my first search I typed in Pomorodo and thanks to the magic of search correction it found the right pages. I continued calling the device Pomorodo from then on, which would have been rather embarrassing if I hadn’t just spotted it today. A Pomodoro timer is used to time tasks in a technique that you can use to improve your focus. I’m making one that will talk to you.

Head Crashing

I’m making a new device. Can you guess what it is? Today I tried to print out the top plate. I hadn’t used the 3D printer for a while and it shows its displeasure with this by ramming the print head into the bed. I think the probe in the BL touch sensor (which is how the printer knows where the bed is) had got stuck.

After a fevered few minutes resetting the print height I managed to print out a reasonable version only to discover that the big hole (which is for a big button) was way too small. Oh well. There’s always tomorrow….