MAX7210 Display Warning

20210120_193356319_iOS.jpg

Sometimes I surprise myself with how stupid I am. And sometimes I surprise myself with how clever I am. These events seem to level out, which I suppose makes me a balanced kind of a person.

Anyhoo, today was one of the latter occasions. I’d bought some more MAX7210 displays from Amazon and today I wired them up and put them in little boxes. One worked fine, but the other was very broken. The display was corrupted and didn’t seem to respond to the microcontroller.

I took a proper look at the board and discovered that the input connector had been soldered to the output end of the board. These boards are designed to be chained together to make long displays. Normally the output is not connected.

I dug out a replacement connector and soldered it into place. And then the display still didn’t work. Wah. Then it occurred to me that if the connector was in the wrong place it might be that the whole board had been assembled upside down. This meant that the led arrays would have been fitted the wrong way up. I flipped them over and they worked. Go me!

Of course a super intelligent Rob would have checked the board before he put the devices together. I’m sure that’s what you’d do, dear reader. But I’m still a bit pleased with myself for getting it to work.

Using the ADC on a Wemos ESP8266 device

I want to use an analogue to digital converter in my Connected Little Boxes project to convert a rotary position as set by the knob on the left hand box in the picture into a number I can use to control the servo on the right hand box. I like the idea of moving physical movement from one place to another.

An analogue to digital converter (ADC) is a piece of hardware that takes in a voltage and gives you a number that represents the level of the voltage. ADCs are useful to measure things like the battery voltage levels and for converting analogue sound signals into a sequence of digital values.

A potentiometer is a special kind of resistor. Turning the shaft of the potentiometer moves a contact along a circular carbon film in a way that allows the output to produce a different voltage output depending on the position of the contact. If I connect the output of the potentiometer into the ADC of my ESP8266 I can write a program that will read the position of the potentiometer and use this to control the servo.

wemosADC.png

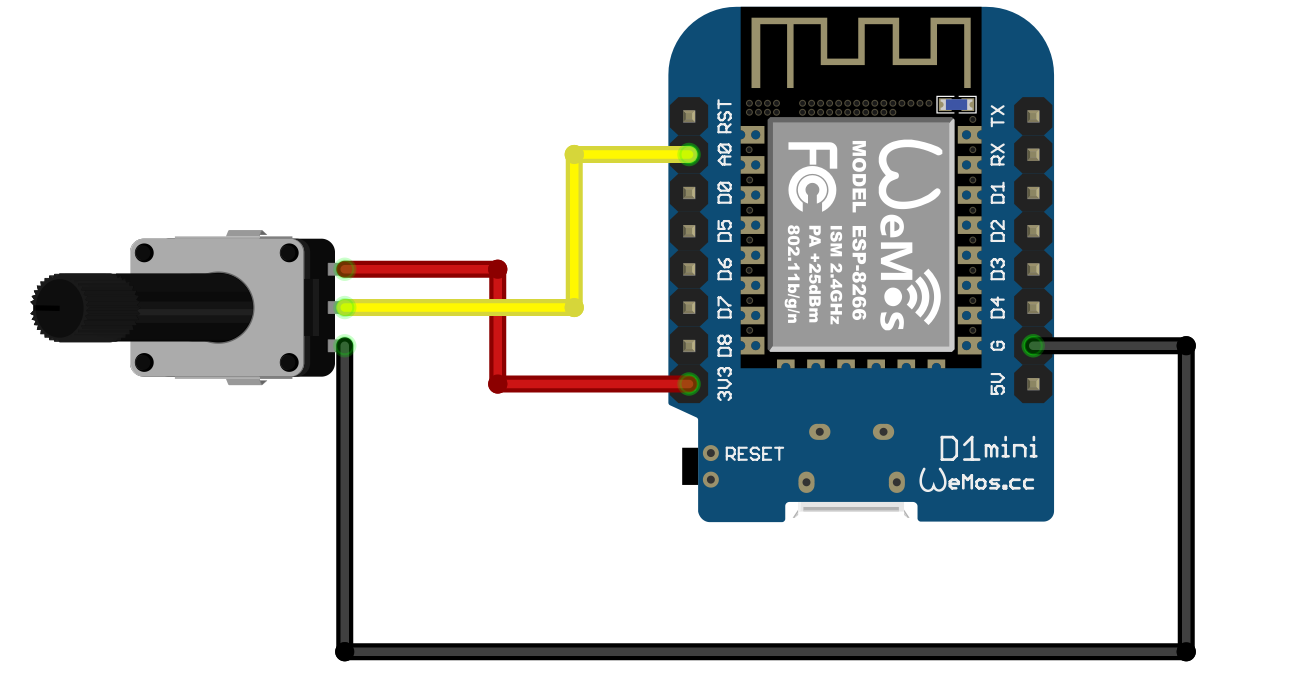
The ESP8266 chip has a single ADC device which reads signal levels up to 1.8 volts or so. The good news is that my favourite ESP8266 based device, the Wemos D1 mini, has a “potential divider” circuit on the board that allows the input to accept inputs up to the 3.3 volt power supply. You can wire it up as shown above. Remember to use the 3v3 pin rather than the 5v one. Turning the knob on the potentiometer will move the input on the A0 pin between 0 and 3.3 volts.

You can use the ADC in your program like this:

int reading = analogRead(0);

If the input sees 0 volts you get the value 0 set in the variable reading. If the input sees 3.3 volts you get the value 1023. The numbers are fairly steady, although I see a bit of noise which causes the values to “jitter” around a bit. I’ve added some code that ignores changes of around 5 or so in the value.

I send the reading value across to the little box on the right of the picture above so that the position of the servo tracks the knob. It works really well, but in making it work I learned something which you might find useful to impress people with at any parties (or Microsoft Teams meetings) that you might go to in the future.

ADC Problems with the ESP8266

It turns out that reading from the ADC on an ESP8266 gets in the way of setting up a WiFi connection. If the device is connecting to a WiFi access point and your program reads the ADC while this is happening the connection will not be setup properly. I’ve had to modify the code so that it only starts to read from the ADC once a connection has been established.

ESP Reset Message Strings

Have you ever wanted to print out the reason why your ESP32 or ESP8266 has just reset?

No?

Must be just me then. Anyhoo. If you do want to do this, here’s the code to do it. You’re welcome.

void getBootReasonMessage(char *buffer, int bufferlength)
{
#if defined(ARDUINO_ARCH_ESP32)

    esp_reset_reason_t reset_reason = esp_reset_reason();

    switch (reset_reason)
    {
    case ESP_RST_UNKNOWN:
        snprintf(buffer, bufferlength, "Reset reason can not be determined");
        break;
    case ESP_RST_POWERON:
        snprintf(buffer, bufferlength, "Reset due to power-on event");
        break;
    case ESP_RST_EXT:
        snprintf(buffer, bufferlength, "Reset by external pin (not applicable for ESP32)");
        break;
    case ESP_RST_SW:
        snprintf(buffer, bufferlength, "Software reset via esp_restart");
        break;
    case ESP_RST_PANIC:
        snprintf(buffer, bufferlength, "Software reset due to exception/panic");
        break;
    case ESP_RST_INT_WDT:
        snprintf(buffer, bufferlength, "Reset (software or hardware) due to interrupt watchdog");
        break;
    case ESP_RST_TASK_WDT:
        snprintf(buffer, bufferlength, "Reset due to task watchdog");
        break;
    case ESP_RST_WDT:
        snprintf(buffer, bufferlength, "Reset due to other watchdogs");
        break;
    case ESP_RST_DEEPSLEEP:
        snprintf(buffer, bufferlength, "Reset after exiting deep sleep mode");
        break;
    case ESP_RST_BROWNOUT:
        snprintf(buffer, bufferlength, "Brownout reset (software or hardware)");
        break;
    case ESP_RST_SDIO:
        snprintf(buffer, bufferlength, "Reset over SDIO");
        break;
    }

    if (reset_reason == ESP_RST_DEEPSLEEP)
    {
        esp_sleep_wakeup_cause_t wakeup_reason = esp_sleep_get_wakeup_cause();

        switch (wakeup_reason)
        {
        case ESP_SLEEP_WAKEUP_UNDEFINED:
            snprintf(buffer, bufferlength, "In case of deep sleep: reset was not caused by exit from deep sleep");
            break;
        case ESP_SLEEP_WAKEUP_ALL:
            snprintf(buffer, bufferlength, "Not a wakeup cause: used to disable all wakeup sources with esp_sleep_disable_wakeup_source");
            break;
        case ESP_SLEEP_WAKEUP_EXT0:
            snprintf(buffer, bufferlength, "Wakeup caused by external signal using RTC_IO");
            break;
        case ESP_SLEEP_WAKEUP_EXT1:
            snprintf(buffer, bufferlength, "Wakeup caused by external signal using RTC_CNTL");
            break;
        case ESP_SLEEP_WAKEUP_TIMER:
            snprintf(buffer, bufferlength, "Wakeup caused by timer");
            break;
        case ESP_SLEEP_WAKEUP_TOUCHPAD:
            snprintf(buffer, bufferlength, "Wakeup caused by touchpad");
            break;
        case ESP_SLEEP_WAKEUP_ULP:
            snprintf(buffer, bufferlength, "Wakeup caused by ULP program");
            break;
        case ESP_SLEEP_WAKEUP_GPIO:
            snprintf(buffer, bufferlength, "Wakeup caused by GPIO (light sleep only)");
            break;
        case ESP_SLEEP_WAKEUP_UART:
            snprintf(buffer, bufferlength, "Wakeup caused by UART (light sleep only)");
            break;
        }
    }
    else
    {
        snprintf(buffer, bufferlength, "Unknown reset reason %d", reset_reason);
        break;
    }
#endif

#if defined(ARDUINO_ARCH_ESP8266)

    rst_info *resetInfo;

    resetInfo = ESP.getResetInfoPtr();

    switch (resetInfo->reason)
    {

    case REASON_DEFAULT_RST:
        snprintf(buffer, bufferlength, "Normal startup by power on");
        break;

    case REASON_WDT_RST:
        snprintf(buffer, bufferlength, "Hardware watch dog reset");
        break;

    case REASON_EXCEPTION_RST:
        snprintf(buffer, bufferlength, "Exception reset, GPIO status won't change");
        break;

    case REASON_SOFT_WDT_RST:
        snprintf(buffer, bufferlength, "Software watch dog reset, GPIO status won't change");
        break;

    case REASON_SOFT_RESTART:
        snprintf(buffer, bufferlength, "Software restart ,system_restart , GPIO status won't change");
        break;

    case REASON_DEEP_SLEEP_AWAKE:
        snprintf(buffer, bufferlength, "Wake up from deep-sleep");
        break;

    case REASON_EXT_SYS_RST:
        snprintf(buffer, bufferlength, "External system reset");
        break;

    default:
        snprintf(buffer, bufferlength, "Unknown reset cause %d", resetInfo->reason);
        break;
    };

#endif
}

You pass the function a pointer to a buffer and the size of that buffer. The function then works out what kind of device you are using and then creates a message for that device. This is how you use it:

#define BOOT_REASON_MESSAGE_SIZE 150
char bootReasonMessage [BOOT_REASON_MESSAGE_SIZE];
getBootReasonMessage(bootReasonMessage, BOOT_REASON_MESSAGE_SIZE);
Serial.println(bootReasonMessage);

Using ESP32 and ESP8266 with the same source file

If you want to use the same solution on both ESP8266 and ESP32 devices you find that there are a few inconsitencies between their libraries and include files. I've made this tiny set of conditional includes which pulls in the properly named elements for each processor. It also provides a symbol called PROC_ID that returns the processsor ID in a way that can be used in both types of program.

#if defined(ARDUINO_ARCH_ESP32)

#include <Arduino.h>
#include <WiFi.h>
#include <DNSServer.h>
#include <WiFiUdp.h>
#include <WiFiServer.h>
#include <WiFiClient.h>
#include <WiFiClientSecure.h>
#include <HTTPUpdate.h>
#include <WebServer.h>

#define LED_BUILTIN 2

#define PROC_ID (unsigned long)ESP.getEfuseMac()
#define PROC_NAME "ESP32"

#endif

#if defined(ARDUINO_ARCH_ESP8266)

#include <Arduino.h>

#include <ESP8266WiFi.h>
#include <PubSubClient.h>
#include <WiFiClientSecure.h>
#include <ESP8266httpUpdate.h>
#include <ESP8266WebServer.h>

#define PROC_ID (unsigned long)ESP.getChipId()
#define PROC_NAME "ESP8266"

#endif

Just put this at the top of your program and when you build your program it will pull in the files that it needs.

Using an M1 Powered MacBook to program ESP8266 devices

I’m loving my new M1 powered MacBook Air. The hardware makes a perfect laptop. It just works, goes very fast and is always there. The battery life is more like an iPad than a laptop. It doesn’t run Windows 10, so it isn’t perfect, but I’m slowly getting my head around Mac OS (WHY IS FOLDER NAVIGATION SO HARD???) .

I’m still using the Microsoft tools I use most of the time - Visual Studio Code, Word and PowerPoint all work perfectly. I’m using the Safari browser at the moment, but I’ll switch to Edge when they release a version that uses the M1 processor.

Anyhoo, I’ve been building code on the MacBook for my ESP32 and ESP8266 devices. As I reported a while back, there is a fault with the serial port auto-discover in the version of Python used by Platform IO (my embedded development environment of choice). I got round this by deleting some lines from the Pytool program that caused the error, you can find out more here. Then I hard-wired the name of the target device into my PlatformIO project.:

Mac OS uses Unix style names for its serial ports. If you want to find out the name of the port that your Wemos is plugged into you can use this command at the command prompt:

ls /dev/tty. usb*

This displays a directory listing of all the usb devices that are presently connected. My Wemos was called /dev/tty.usbserial-140. Yours will almost certainly be different.

upload_port = /dev/tty.usbserial-140

Once you know the port you can then add a line to the Platform.ini file to explicitly target this port when you deploy.

I’ve also discovered another issue; deploying a program to an ESP8266 seems to fail with a timeout problem. The best way to fix this seems to be by reducing the upload speed by adding this line to your ini file.

upload_speed = 115200

It takes a bit longer to deploy, but it does get there.

Enter the Wemos D1 mini ESP32

Wemos D32.png

I really, and I mean really, like the Wemos D1 mini. Part of this is because I can get them for under two pounds each, but I do reckon that they make the best connected embedded platform you can get.

Unless you need Bluetooth, or want to talk using secure sockets. Or you fancy writing a MicroPython program longer than a few lines. Then you need an ESP32. Up until recently my weapon of choice for ESP32 applications was the DOIT platform. It’s cheap, it works and it has lots of pins. However, it does have one really annoying limitation. You have to press the program button, or the reset button, or some horrid combination of them each time you want to deploy a program to it.

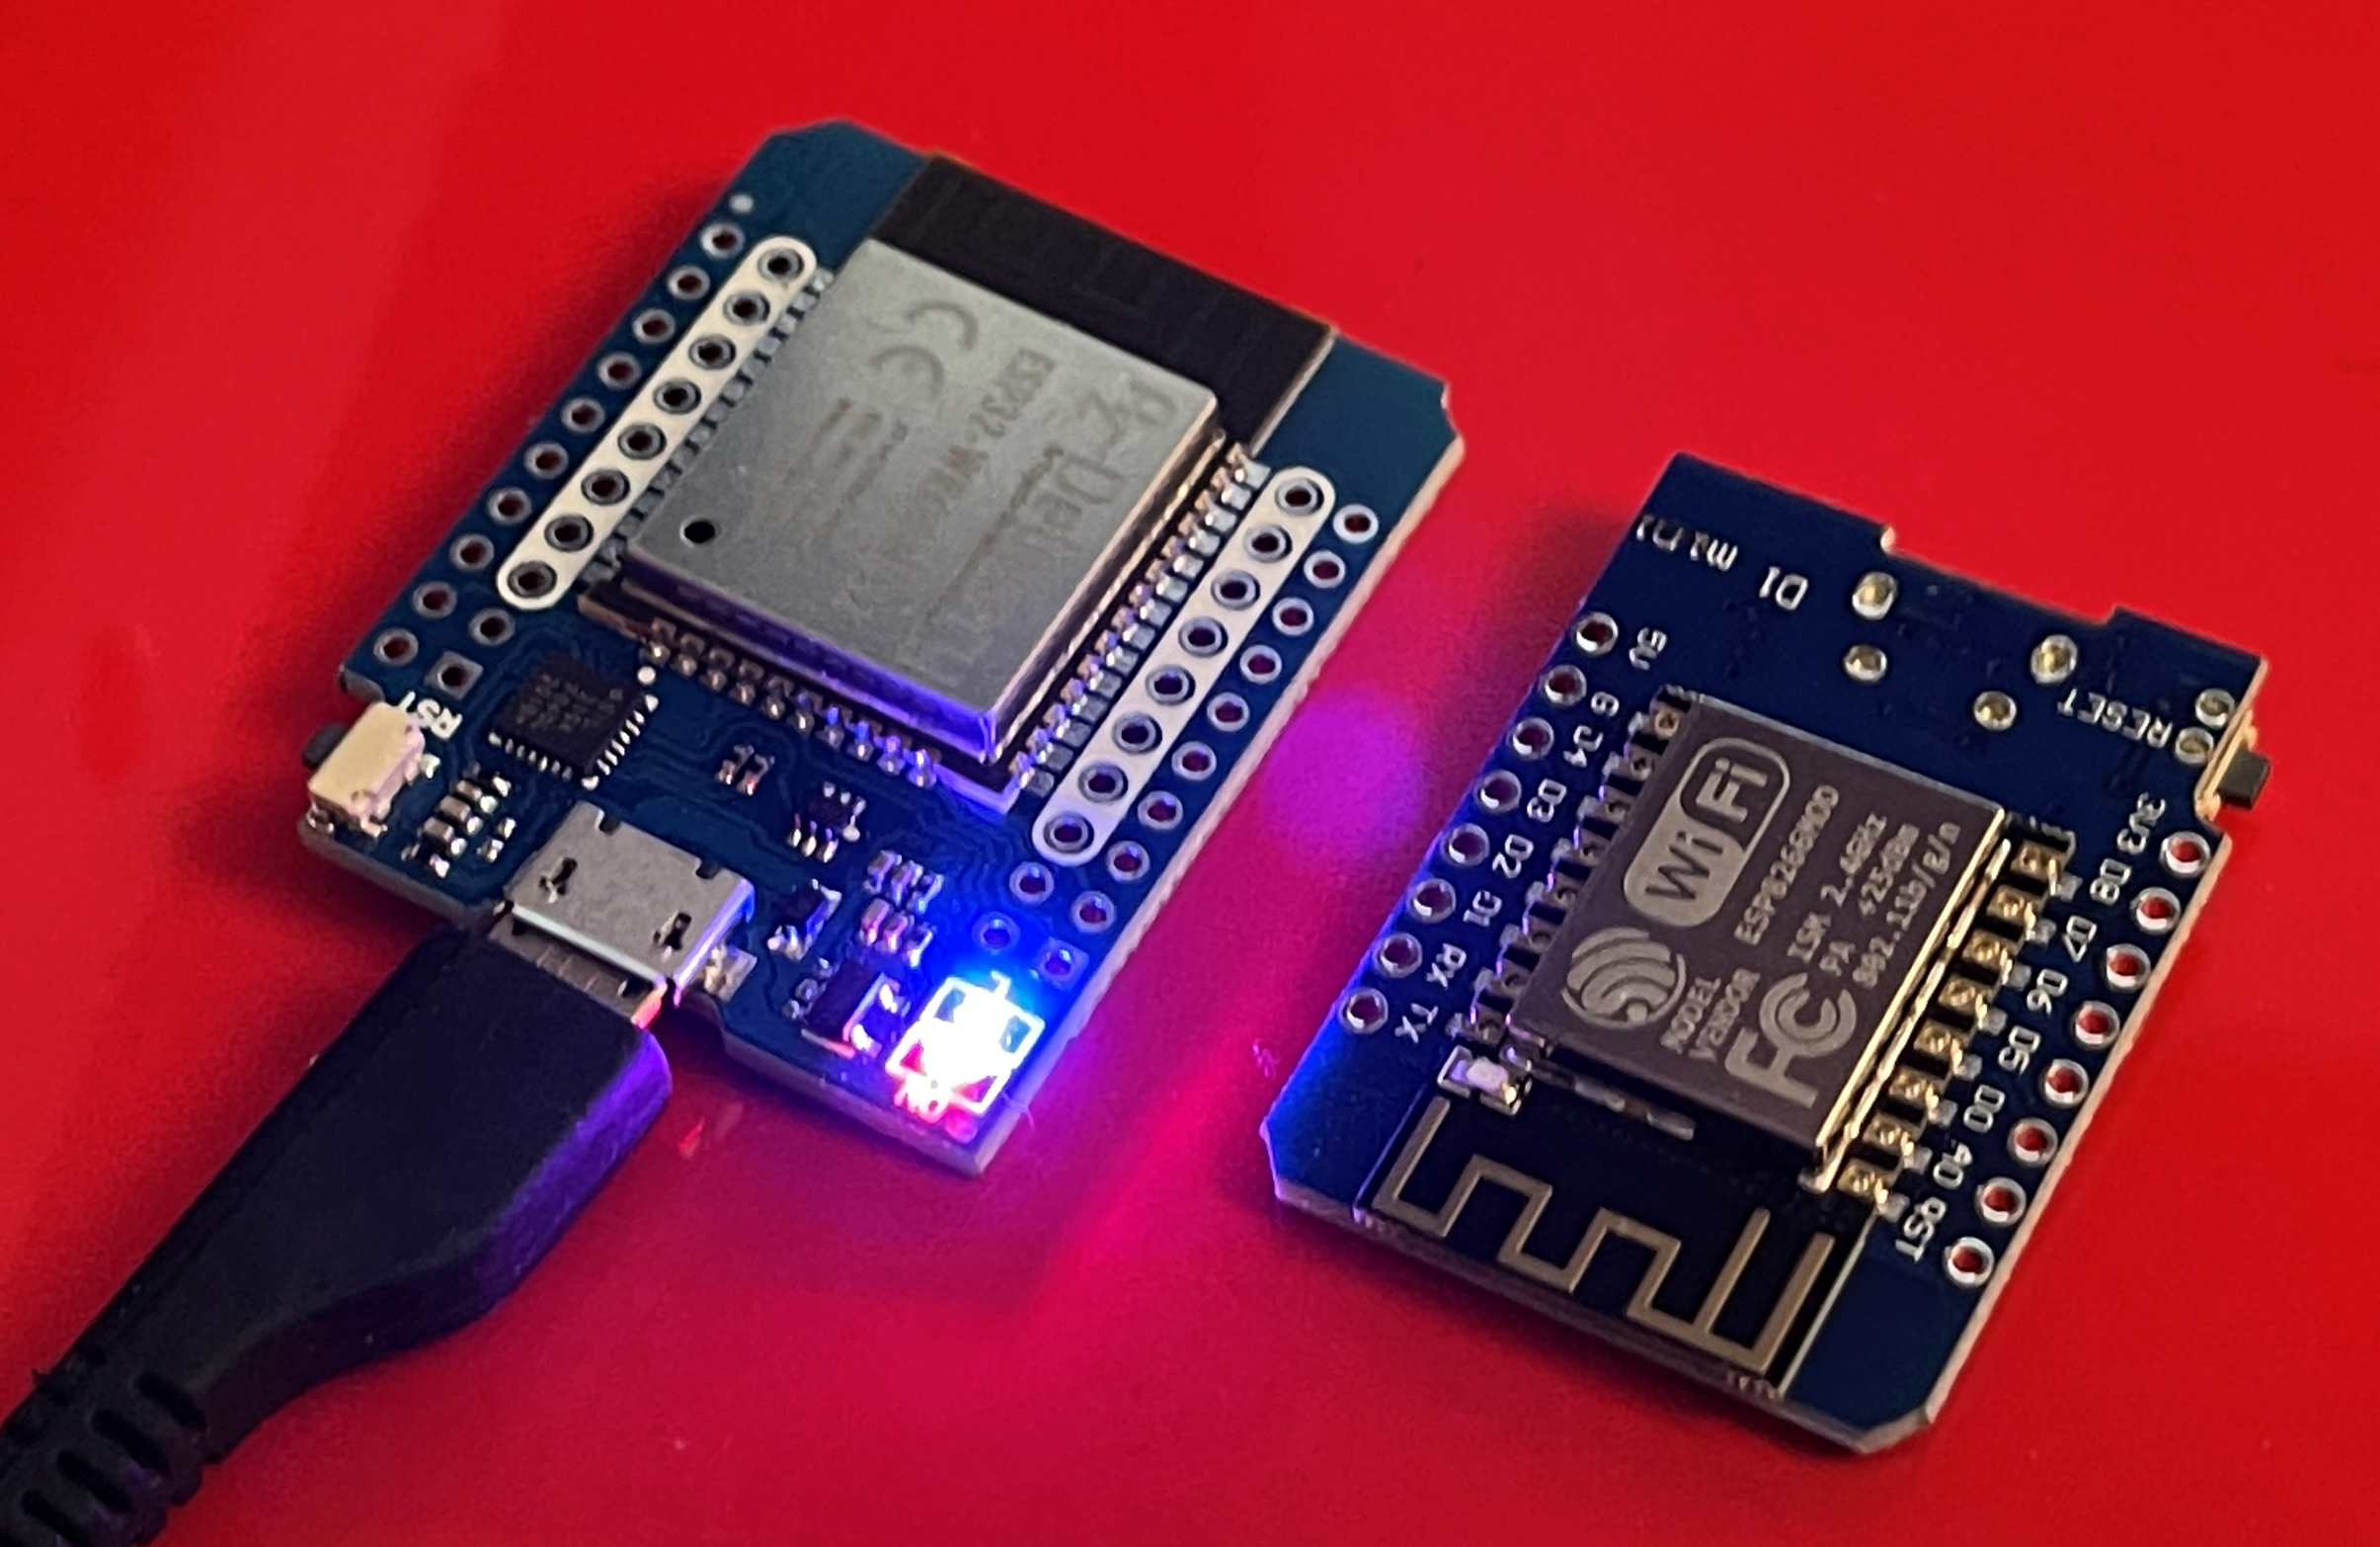
The Wemos D1 Mini ESP32 doesn’t have this limitation. You can deploy programs and it just works. It has lots of pins but you don’t have to use all of them. It is very similar in size to the original D1 Mini (above on the right), and the pins have been arranged so that you can connect original shields and make them work. It’s a bit more expensive than the original, but well worth the money I reckon.

Neopixels at the Strictly Come Dancing Final

final trophy.png

Like lots of other people I tuned in to watch the Strictly Come Dancing final on Saturday night. I was pleased that Bill Baily won. I saw him live a few years ago and he was awesome. I was also please to see the NeoPixel leds on the Strictly trophy. You can see them on the top of the trophy base in the picture above. I’ve got exactly the same strands in my Christmas lights at the moment…

Using WS2811 Light Strands with the WEMOS D1 Mini

wired lights.png

A very long time ago I spent some time doing stage lighting. Great fun and only occasionally extremely dangerous. Like the time when a friend of mine extended a wire with a plug in extension and he got the plug and the socket the wrong way round. He had the mains coming out of the plug and going into the socket. It was perfectly safe. Until the plug came out…

What has this to do with WS8211 light strands I hear you asking? Well, the strands are fitted with a plug at one end and a socket on the other. Because I know about these things, I decided that the plug would be the connector on the light strand that would receive the power and data signals. My decision was nicely reinforced by the way that the leds had a nice big arrow pointing inwards on this connection. Armed with this knowledge I wired everything up to find that it didn’t work.

Actually, I was kind of expecting this to be the case. Some leds like this need more voltage swing than can be provided by the 3.3 volts that the Wemos puts out. So I used a level converter to bring this up to nearly 5 volts. And of course it still didn’t work. After a bit of testing and a lot of head scratching I did what I should have done right at the start. I tried the led strand with something that was bound to work; in this case an Arduino Uno that puts out 5 volt logic. Of course they didn’t work with that either. So, in a spirit of “what’s the worst that could happen?”, I tried sending signals and power into the socket on the other end of the wire.

Of course it worked. So, if you want to use a Wemos D1 Mini with these led strands just make sure that you ignore the arrows and wiring common sense and send your signals into socket end of the strand. The really good news is that you can probably connect the Wemos directly to the led strand. My leds work without my carefully assembled level converter.

The only other thing to remember is that the RGB order is different for these strands. Blue and white will look fine, but everything else will look wrong because the red and the green colours are swapped. I’ve added a configuration option to allow the user of a Connected Little Box to set the type of leds:

switch(pixelSettings.pixelConfig)
{
    case 1:
    strip = new Adafruit_NeoPixel(pixelSettings.noOfPixels, pixelSettings.pixelControlPinNo, 
    NEO_GRB + NEO_KHZ800);    
    break;
    case 2:
    strip = new Adafruit_NeoPixel(pixelSettings.noOfPixels, pixelSettings.pixelControlPinNo, 
    NEO_KHZ400+NEO_RGB);
    break;
    default:
    strip=NULL;
}

Config 1 is “normal” NeoPixels and config 2 is the settings that work best for the strands.

Christmas Wrapping

Screenshot+2020-12-20+at+18.56.40.jpg

A while back I had a go with wire wrapped connections in devices. Today I had another go. It turns out to be a very good way to make small devices. Wire wrap wire is very thin and good to work with. It is also easy to connect wire wrap wire to solder points. You can also connect more than one wire to a single pin on a device.

The wire wrap tools is quite easy to use. The only problem that I’ve noticed is that because I’ve only got one colour of wire wrap wire all the connections look identical.

ESP8266 int alignment fun

OK. Pop quiz. What’s wrong with the following C++ code?

unsigned char * chPtr;
int * intPtr;

// point chPtr at a buffer somewhere

// get an integer out of the buffer
intPtr = (int *) chPtr;
Serial.println(*intPtr);

Perhaps a bit of context would help. I use commands like this to tell my Connected Little Boxes what to do:

{"process":"pixels","command":"setrandomcolour",
"pixelSpeed":10, "sensor":"button","trigger":"pressed"}

This command means “send the command setrandomcolour” to the pixels process when the user presses a button. Fade the colour over 10 “ticks”. This means that each time the user presses the button on the box the lights will change colour.

The box is smart enough to understand this tiny chunk of JSON but I don’t want to have to decode the command every time the button is pressed. So the program assembles a block of memory containing things like the “10” value for pixelspeed and this is read when the sensor event is triggered and used to control the command. Works very well. Except sometimes. Sometimes the code throws Exception(9) and the processor resets.

The error came from nowhere and I spent ages checking the code that I’d just written to find what I’d broken. After a while I took the trouble to look up what Exception(9) actually means, and that’s when I discovered the stupid thing I’d done.

The code above uses a pointer to an 8 bit location somewhere in memory and then fetches an integer from that place. it’s what gets the stored pixelspeed value for the pixels process to use. But the ESP8266 stores integers in a block of four memory locations as a 32 bit value and it insists that these are always aligned. In other words, you put the first value in the bytes at locations 0 to 3, the second at locations 4 to 7 and so on, using the convention that the memory is addressed starting at location number 0. If a program tries to load a value from an “odd” location the processor crashes.

This means that if store something in memory and then try to read it back as an integer I have a 1 in four chance of it working and a 3 in 4 chance of it failing. Up until now I’d been lucky, but today I wasn’t.

When you write an assembly language program you can use special directives to line the data up in the right locations. The same thing happens in C++ when you make a structure. The compiler will insert extra space to make things line up when they should. One way to fix it would be to make sure that I always line things up in my program but this would have been a bit of a pain, so I wrote the function below:

int getUnalignedInt(unsigned char * source)
{
    int result;
    memcpy((unsigned char *)&result,source,sizeof(int));
    return result;
}

You pass the function a pointer to anywhere in memory. It copies some integer bytes into a lined up integer value and then returns the value. It seems to work fine. It’s not the most efficient solution but I can live with that for now..

Self destructing setting storage

lids.jpg

It turns out that creating useful embedded devices seems to be around 80% setting storage and management. I’ve created a nice little setting manager that exposes the settings as C structures, stores them in EEPROM and allows settings to be updated via JSON messages or via direct commands. Settings are bound to the process or sensor that needs them and it works well.

I thought it might be nice to be able to make a complete dump of all the settings so that I can configure a device by sending them all once. This mostly worked. The mostly bit was caused by the way that the settings are stored in EEPROM as they are received. Writing to EEPROM takes quite a long time, certainly longer than setting information takes to arrive down the serial port. So my program loses track of the inputs and misses some setting values.

“No problem” I thought. I’ll create a new setting that tells my device not to persist the setting values as they are received. That way I flip this setting and receive all the values at full speed. Then I save all the settings after they have been updated.

I added the code and got it all going. It mostly worked again. This time it would store more settings but still lose the plot towards the end of the setting file. It took me a little while to work out what was happening.

The block of settings I was restoring contained an instruction to turn the setting persistence back on again. So, half way through downloading the settings the program promptly breaks itself…

Using SSL security with ESP32 and ESP8266

bigerror.png

The story so far…..

Robert has been trying to connect an ESP8266 embedded device to an Azure IoT Hub, something he has done many times with no problems. Except it no longer works. Having spent a day failing, perhaps it is time for Robert to have some success. Now read on…..

Yesterday was not a good day. Today was better. To summarise my problem: I want to use my embedded devices with Azure IoT hub so that I can exchange messages with services in the cloud. Azure IoT hub is a “proper service” in that it supports device registration and uses the Secure Sockets Layer (SSL) for connections. I’ve written my code so that it uses the secure WiFi client in the ESP8266 and it has worked before. But yesterday it broke and I couldn’t figure out why. Today I did. Go me.

It turns out that the solution is simple. Add the statement above to set your secure client to insecure mode. But why does this work and what does it do? Does it mean that my connection is no longer secure? Now read on again…..

There are two reasons for using SSL. The first is to make sure that the data that is being transferred securely. I don’t want someone to be able to peek into the packets and pull out passwords and data. The second reason for using SSL is to make sure that the devices is talking to the right host. Without this authentication it would be possible for someone to make a system that pretends to be Microsoft Azure, accept a device connection and then steal all my stuff.

The first part of the problem is solved by encryption. The systems each end of the connection use keys to encrypt and decrypt the data so that anyone watching it go past would just see gibberish.

The second part of the security, making sure my host is really Azure, is solved by certificates which are issued by certification authorities. Microsoft have a certificate for Azure and my my device can verify this. However, to make this work I have to make a copy of the public part of the certificate and store it in my device, which is not something I’ve bothered with in the past. It turns out that I’m not really concerned about someone spoofing Microsoft Azure just to see my data. There is always a balance to be struck between security and convenience, and this is where I draw the line. It may be the wrong place to draw it, but I’m OK with it so far.

This means that my devices don’t have local certificate copies. Up until recently (and with the ESP32 device) the lack of local validation doesn’t cause a problem. But something in the Arduino libraries has apparently changed (or I’m using a different library now). Anyhoo, to make it work now you have to tell the WiFiClientSecure instance created to manage the connection that you are using insecure mode. This doesn’t mean that your data is now being sent insecurely. What it means is that the device is not verifying the server any more. And then it works.

Azure IoT Hub for Free

orchids.png

Everything I achieved today I achieved before 9:30. It was all downhill after that. But I did achieve quite a bit. I’m making a bunch of connected devices and I want to use MQTT to link them together. I could set up my own MQTT broker on a local Raspberry Pi but that would only work around my house and I want these to work around the world. My weapon of choice for these things is Azure IoT hub which lets you connect remote devices to a central server (the clue is in the name).

It turns out that you can set up a Microsoft Azure account for free and then create an IoT hub which is also free and allows for up to 8,000 messages per day. I’m not sure how many messages I’ll need, but I’m hoping that will be enough for now.

Having created my free IoT hub the next thing I wanted to do was connect my devices to this. I’ve done it before and it worked just fine. I did it today and it didn’t. This was the cue to spend most of the day (or at least the portion up to the point where I gave up) trying t figure out why. Unsuccessfully. Wah.

Detecting different ESP devices in Arduino Code

This is one of these “Rob writes a blog post about something so that he can find it later when he forgets how to do it” moments. I’m writing some code using the Arduino platform that I’d like to run on both the ESP32 and the ESP8266. They both run C++ and have a lot in common. But some things are just different. For example they have different commands to ask a device for its unique ID is getFuseMac for the ESP32 and getChipId for the ESP8266.

Fortunately we can use the magic of conditional compilation to make our C++ code always do the right thing. The code below shows how it works.

#if defined(ARDUINO_ARCH_ESP32)
#define PROC_ID (unsigned int)ESP.getEfuseMac()
#endif

#if defined(ARDUINO_ARCH_ESP8266)
#define PROC_ID (unsigned int)ESP.getChipId()
#endif

The symbols ARDUINO_ARCH_ESP32 and ARDUINO_ARCHESP8266 are defined if the program is being built for the respective device. The C++ above defines a PROC_ID symbol that can be used in my code to get the right version.

Use OTADrive to remotely update your ESP devices

I’m making a bunch of devices that I’ve decided to call “clever little boxes”. I’ve taken the important first step and bought the domain name. Now I have to make everything else. I’ve decided that the best place to start is with the deployment. You might think that this is crazy, but actually it is the most important phase of your development. If I’m not able to easily update the devices in the field and manage their deployment I won’t have a product, just a demo. Also, modern product development is a continuous process. You don’t make something and ship it. You make version 1.0 and then create version 2.0 based on the feedback you get.

To help me with this I’ve started using otadrive. Once you have created an account you can store firmware images on the site and then your remote devices can download and install new firmware images from them. You’re given an access key and a web based interface for uploading firmware and managing the devices that need to be kept up to date.

You get a tiny bit of Arduino code you can drop into your device to check for new versions. It works a treat. The only snag in my mind is that the site doesn’t seem to have a business model. At no point in the process of configuring and deploying versions have I been asked for any payment. This worries me for two reasons:

  • I might suddenly be hit with an enormous price list which makes the whole thing unviable.

  • The site might vanish overnight taking with it my entire network of devices.

I’m not that concerned just at the moment though. And if things get tough I can look at this on GitHub which might be where I end up putting everything.

Pin numbers are not port numbers

esp8266 pins.png

In a blog post last month I confidently asserted that the output pins on an ESP8266 didn’t have enough “oomph” to drive the neopixels on an Adafruit 8x8 panel. I’m sure you remember the post.

Anyhoo, it turns out that the post (rather presciently titled “Making Mistakes”) was wrong. What I should have written is that if you use the wrong pin on your device it won’t work. Just because a pin is labelled D1 doesn’t mean that it is connected to GPIO1, as the diagram above makes very clear.

So now I can use an ESP8266 to drive my panel, which is nice.

Makertober Day 29: Wiring up

wiredup.png

This is the completed light box, all wired up. I’ve printed a tiny little mounting plate that holds the ESP8266 device and allows it to be fitted onto the mounting pillars. I’m doing the wiring by soldering directly between the devices.

broken ring.png

I like using solid-core wire tor connections as it is easier to work with. But you have to be careful as it puts more strain on whatever it is connected to. Above you can see what happens when things go wrong. The solder pad for DI (data in) on the pixel ring has detached from the PCB and turned this ring into scrap. Fortunately I have a few spares.

fittingscrews.png

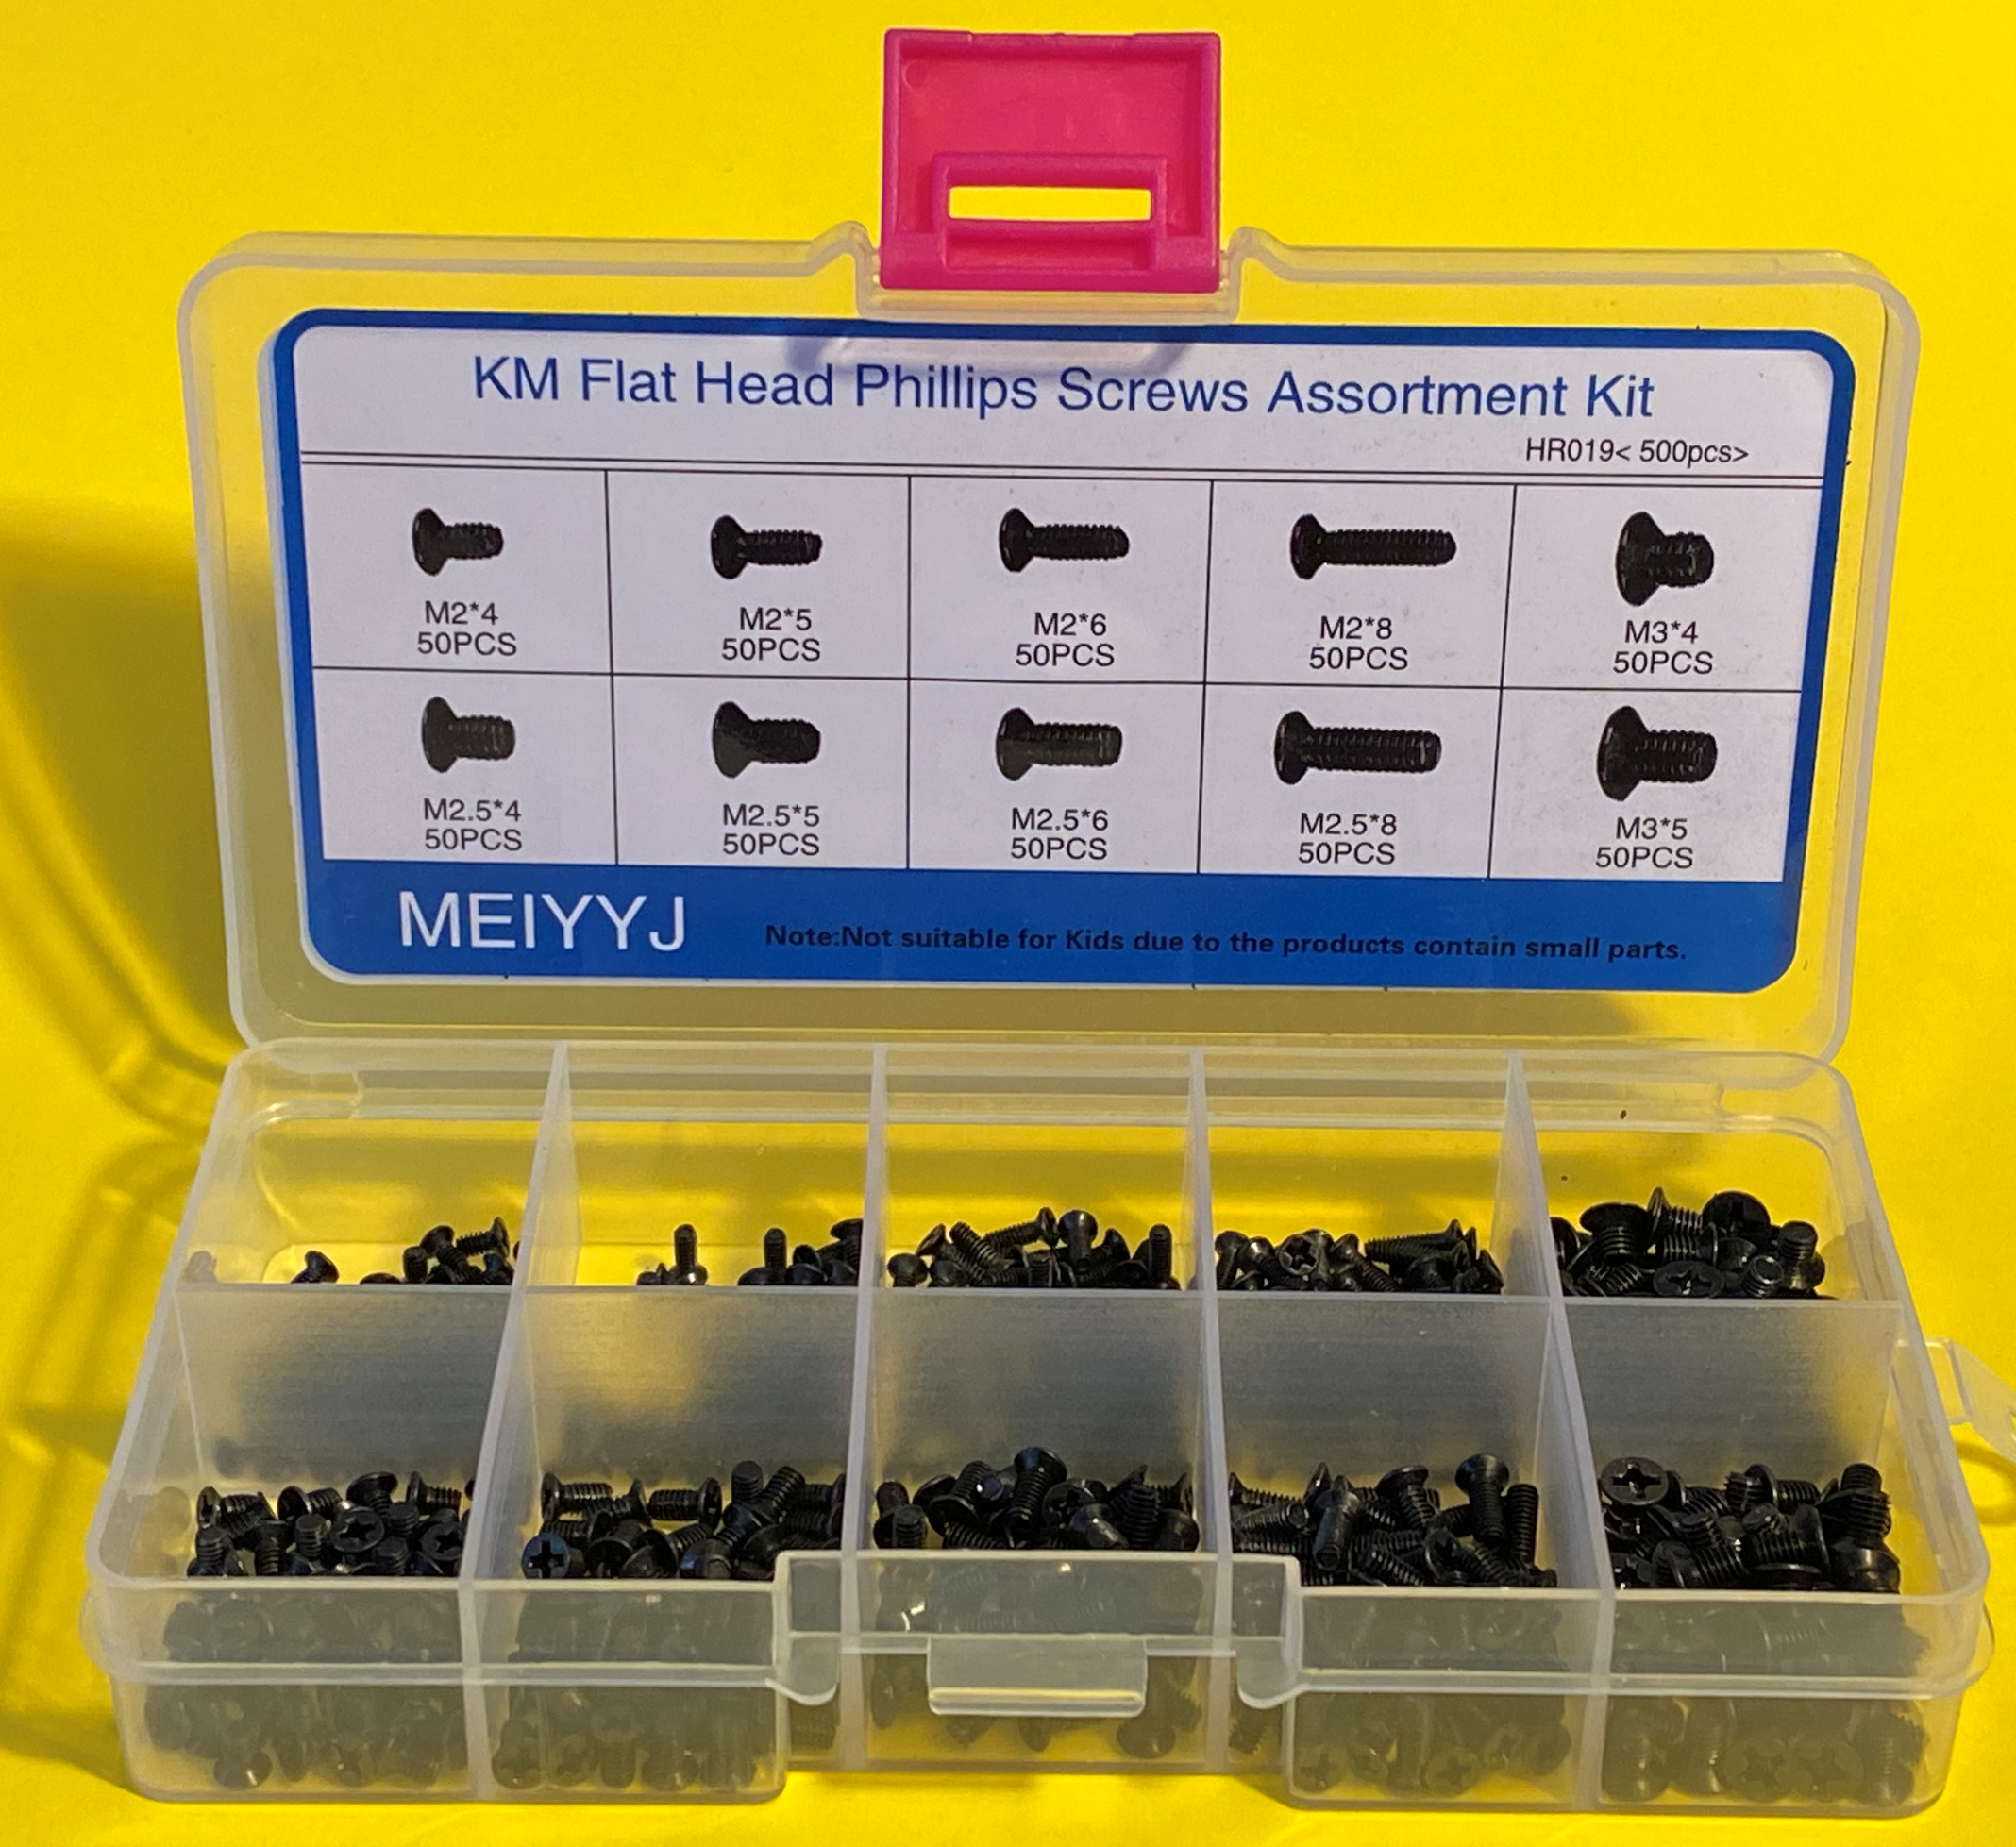
I’m fixing things together using tiny self-tapping screws. These can be hard to get hold of. I found this rather nice kit on Amazon for a reasonable price. The screws as supposed to be used when repairing laptops, but they work into 3D printed parts rather well. After a while I suppose I’ll use up all the screws of one particular size, but at least I’ll know which size to buy next time.

Maketober Day 24: Make a C++ class library for Arduino

robsSettings.png

Once you’ve written a bit of code you start to come up with libraries that you’d like to reuse in other projects. They might be things like drivers for particular pieces of hardware or useful storage or menu routines. If you are writing C++ code for your Arduino it turns out to be very easy to create library files. The Arduino development environment builds on what the C++ language uses to manage libraries.

It all hinges around the “library” folder in your Arduino installation. This is usually placed in the Arduino folder in your documents folder (as you can see above). You can also see that I’ve got lots of existing libraries. Every time I’ve downloaded a library it has ended up here. There is also a library file called Robs_Settings. That’s one that I made myself. If you have a look in this folder you will find the C++ source files that make it work:

settingfiles.png

For each library I have a .h file that contains definitions of the behaviours and a .cpp file that contains code. The idea is that a program that wants to use the library features will include the .h file so that it knows how to call the behaviours in the library. Then, when the program is built the compiler will find the .cpp file, compile the actual code and then all the different components will be linked together. When you start the compiler running you can tell it where to look for library files.

The Arduino environment knows the location of the library folder and will scan this folder when you open the “Include Library” option in the Sketch menu. It will show you any libraries that you have downloaded along with the one that we’ve just created.

arduino include.png

When I include the Robs_Settings library the Arduino environment scans the library folder and creates an include statement for each of the .h files that it finds in the folder:

included libraries.png

If you compare the code above with the contents of the settings folder you will see how this works. Now you can use any of the code in the library in your application.

Note: You might think that just adding the include directives above would make it possible for your program to use the included files. This is not so. The Arduino IDE does some behind the scenes shenanigans to link these includes to your library which will result in you getting errors when you build the program.


Makertober Day 19: Python as a prototyping language

pixelpanel.png

I’ve been waxing lyrical about the joys of using Python to create embedded applications. It turns out that there is no better way to put programs into an embedded device as long as your program is less than 300 lines or so and you don’t mind it chugging a bit.

Today I managed to hit both of these brick walls at the same time, when the NeoPixel sprite program I’m making both ran very slowing and out of memory. Oh well. The good news is that having used Python to figure out how the program should work I can now take the code and convert it into C++.

This is not a bad approach to development. Python is great for trying out ideas and the way that you can type statements into the console to find out what they do makes prototyping very easy. C++ is a bit harder to work with quickly, but it s a nice place to write big programs that go very fast.