Pick and Mix Nuts and Bolts

I’m building an Air Quality sensor. As you do. I need a variety of different nuts, bolts and washers to hold bits of it together. Normally this would be a pain, as I’d have to buy twenty of something I only need four of.

But now B&Q (the big diy warehouse in Hull) have a “pick’n’mix” display for things like this. It’s like it used to be with the sweets at Woolworths. A full bag like the one above is around two pounds fifty, which is fantastic for making things.

Amazon Echo buttons are surprisingly easy to use

You might thing it’s surprising that I’m this late to the home automation party. What with my love of gadgets and all. I guess laziness trumps gadget love in the end.

However, a few weeks ago, on the back of a really tempting Amazon offer, I got myself a batch of Teckin smart sockets. They fit into your mains socket and then you plug the device to be controlled into them. And then the device is connected to the internets.

A socket can switch up to 15 amps (it says) although I’ve not tried one with the kettle just yet. The only snag with them is that they are slightly larger than a normal mains plug which means that they tend to foul the switch on a wall socket. This is not a problem for me. I’m plugging them into distribution boards, but you might find it irritating.

They work well, once you get over the fact that the lights in your house are now being controlled by a server in China. You can control them from your phone, put them into groups so that they can all be switched at the same time and even see how much current a particular socket is drawing.

So, in no time at all I was in business. Rather than flicking an old style switch I could just get out my phone, unlock it, find the application, navigate to the required group and then tap on the screen. Much simpler. Really. Actually, that’s why I’ve been a bit late to home automation. It actually doesn’t seem to make things that much better.

I made life a bit easier by connecting them to my Amazon Echo device. So now I can just ask Alexa to turn the lights on and that works fine. But what I really want is a button that I can press to turn the lights on. And finally, I’ve got that. Amazon now makes Echo buttons. These were originally touted as a fun way of playing games with Alexa. They are not to be confused with Amazon Dash buttons, which are being discontinued.

I picked up a couple of buttons and they are nicely made, robust devices that connect to your Amazon Echo via Bluetooth. I had a go at the games and I wasn’t that impressed. They gameplay was pretty uninspiring and there was a lot of lag between actions and responses. But you can also use an Echo button as a trigger for a routine. So I’ve made a routine that turns on the lights and bound the button to that routine. It’s very easy to do, you can do it on your phone. The only snag is that there is no way of “toggling” the state of something via a skill. So I’ve had to use two buttons, one for on and one for off. If I write my own skill I can probably get around that, but for now I’m happy and a bit closer to the cutting edge than I was.

Adventures in Colour at the Connected Humber Hardware Group

We had a great time at the Connected Humber Hardware group meetup tonight. We talked air quality, transistor design, top hats (of course) and making colours.

There’s nothing like playing with something to build your understanding of what is happening. Jay has been making remote controlled lights and has built a remote controlled a three colour led. Individual colours worked fine, but mixing them didn’t give the colours that we were expecting. This turned out to be because the individual red, green and blue light sources in the led were all very different in brightness. However after a bit of experimentation with series resistors he managed to get a reasonably balanced result, as you can see above. What’s more this serves as a lovely illustration of how primary colours can be combined to make others.

Great fun. If you want to take part (and why wouldn’t you), our next meeting is on the 3rd of April at 6:00. You can find our more about our meetups here.

Using an Edge Triggered Serial Interface with the ESP8266

The Air Quality sensor that I’m working on uses a GPS receiver and particle sensor. Both these devices use a serial connection to deliver their values into the processor. This poses a problem, in that the esp8266 (the chip that I’m using) doesn’t have very many serial connections. The usual solution is to use a software simulation of a serial port instead of a “proper” hardware one. The difficulty with this approach is that software serial ports slow down the processor because the processor has to stop and wait for each incoming character.

To solve this problem I’ve written an interrupt driven serial port that uses the edges of the serial data stream to trigger readings, which means that it doesn’t hold things up as much. You can find out more in the video above. You can download the code and play with it here.

Amazing facts to impress your friends....

If you want to really impress someone just tell them this:

“If you want to use MQTT with PubSubClient and talk to an Azure IoT Hub over secure sockets you should use Version 2.4.2 of the LOLIN Wemos framework or your program will crash when it runs out of memory during socket open.”

Then again, it might just be me that would be impressed by this.

Building an Air Quality Top Hat and Letting the Smoke Out

I’m building an Air Quality Measuring Top Hat for my Red Nose Day Lecture in Rhyme next week.

I think I’m the first person in the world to do this. No idea why.

Anyhoo. I’m going to equip the hat with a bunch of coloured leds to indicate the quality of the air around the wearer. Yesterday I started building up the hardware. I was driving all the leds with one of my trusty Wemos 8266 devices. Half way through my first test of the leds I noticed smoke rising from the device. Now, I don’t know much about electronics (obviously) but I do know that all electronic devices are actually powered by “magic smoke”. I know this for one simple reason.

If you let the magic smoke out of a device, it stops working.

It turns out that I hadn’t turned on my main power supply for the leds, so all the power was being drawn through the Wemos device; specifically the blackened and unhappy looking component above. Which got very hot, let out its magic smoke and stopped working.

Oh well.

The good news is that the Wemos devices only cost around two pounds each. I’ve ordered ten more…

Test your hardware before you use it

Here’s a little pro-tip that I could have used yesterday:

Test your hardware before you solder it into your device.

I was using a brand new Wemos device that I just took out of the bag, soldered into place and then fired up. It didn’t work. Closer inspection shows that a wayward surface mount resistor has got underneath another component and as a result the board is useless.

I't’s not a huge loss, I’m only paying 2.50 for my Wemos devices at the moment, but it does mean that I have to un-solder the failed device and solder another in place, which is a bit of a pain. From now on I’m going to test my new device just hanging off a usb connector before actually fitting it. Something I used to do, but seem to have forgotten. Of course, the perfect way to do this would be to test all the devices as soon as they arrive from China, that way I might be able to send back faulty ones.

Oh, and the another thing to hold dear is:

Throw away broken devices. They are never worth keeping.

Once it had its moment of glory under my camera, the failed Wemos went straight into the bin. It looks pretty much perfect in every way, and I guess an expert in surface mount technology could do something with it, but I’m not that person, and I don’t want to confuse it with a working one.

Porchlight 1.0

Porchlight 1.0 is up. I’ve discovered that 16mm cable trunking is perfect for holding lengths of Neopixel leds. So I’ve stuck the lights up over the porch using the adhesive foam on the back of the trunking and we’ll see how it goes. I’m using over the air updating so that I can send new programs into the lights without having to go near them. I’m surprised how well that works.

Haynes Electronic Games Advent Calendar

I got in real trouble a couple of days ago when it was discovered that there still some days from last year’s chocolate advent calendar that I’d not got around eating.

What can I say? I forget stuff.

But this is something quite different and definitely not edible. It’s an advent calendar that starts with a simple circuit that lights a LED and ends up on Christmas Eve with a fully working version of the Simon memory game. Along the way there are some nice little side projects. It’s all made possible by a tiny pre-programmed PIC processor, a breadboard and a bunch of components that make the set not bad value for the price.

The implementation is pretty good, the instructions are fairly clear although I’d liked to have seen proper circuit diagrams as well as the Fritzing pictures that show you where to plug the wires. And, talking of wires, it would have been nice to have had a set of pre-made jumpers of appropriate sizes and colours rather than just a little coil of red wire that will have to be cut and stripped for every circuit. I can see that the effort of making the wires will put off all but the most determined experimenter, and probably also destroy the pair of scissors that are used for the job. At least there is no soldering.

It’s really nice to see things like this coming out though, and I’m going to work through all of the daily exercises while eating each chocolate from my other calendar…

The case of the missing shift key

Can you spot what’s missing here?

Sundeep got in touch today. She’s looking at getting a very cheap, simple, laptop to develop Arduino software. She asked me what I thought of the GEO Book 1, which is presently on sale at the very attractive price of 99 pounds. It’s got a Celeron processor, a mere 2G of memory and uses rather slow eMMC memory for the rather paltry 32G of storage that it provides.

But it only costs 99 pounds.

I had a look around and the reviews of it were not great, but these reviews were for a device priced at 160 pounds, not 99.

As it happened, I was in PC World buying another hard disk (I’ve run out of space for my photos) and they had the GEO on show. So I took a look.

First impressions were good. The display is fine, the construction smart enough and there seemed to be a reasonable turn of speed. I sneaked behind the rolling demo and fired up Word to get an idea of the performance. Everything fired up reasonably well. Quick enough to be useful. Then I tried to type something and it came out kind of wrong. So I tried again. My text was being mangled. Then I took a proper look at the computer.

There is no SHIFT key on the right hand side of the keyboard. As a touch typist I find this key rather useful. When I type W I use the shift key with my right hand and press w with my left. This did not work. I thought I was going mad at first, and that I’d failed to spot something fundamental. But no. There really is no SHIFT key on the right hand side.

I can’t believe they’ve made a computer like this. I was thinking of getting one of the devices just to see what you can do with a really cheap machine. I had high hopes. But not if I can’t type on it. If you fancy getting your hands on a Windows 10 machine that is so cheap that you could regard it as disposable then I can just about recommend it. But if you want to type properly on the keyboard you’ll need to be careful.

There might be some cunning keyboard mapping code that you could add to steal one of the other keys on that row to work as a shift, and you can of course plug an external keyboard the USB port, but for me I’m afraid that the GEO is a no-go. Even at such an amazing price point.

Learn PCB Design at Connected Humber on Thursday

This could be your design….

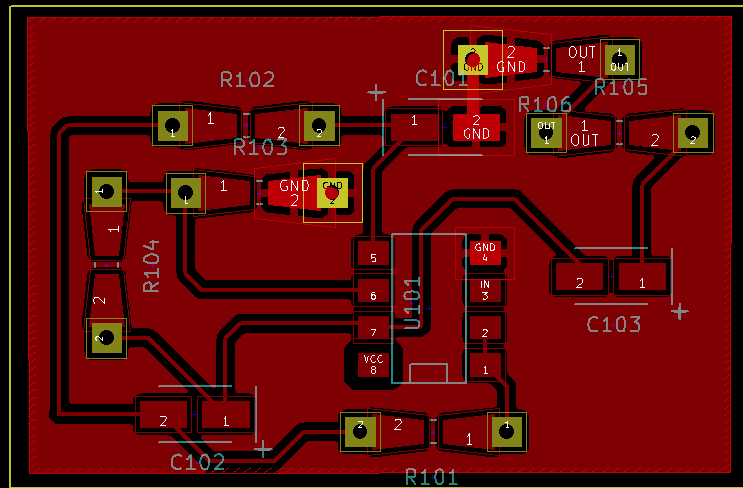
This week we are having a rather special Hardware Group meetup at c4di. We will be looking at the creation of printed circuit boards (PCBs). We will be using a freely available tool which can be used on lots of different computers.

If you have any interest in making stuff you really should come along. It is now very cheap to get PCBs made and they make construction much, much easier. And of course they look really professional.

We start at 6:00 at c4di in Hull on Thursday 15th November. You can join our group on GetTogether here.

Switch Electronics in Hull

Don’t try clicking on the Add to Cart option…

A while back I had the urge to own some cables that had crocodile clips on each end. They are very useful if only have two hands and you want to connect a bunch of things together. I found some in ebay at a good price, ordered them and they arrived in good time. Just what I wanted. Already found them useful.

Before I threw away the envelope I had a quick look at the accompanying slip. Turns out the company that sent them is based in Hull, around fifteen minutes from my house. I went there yesterday and bought a bunch of stuff.

Awesome.

Since the demise of Maplin I’ve been wondering where I’m going to get all the electronic bits and bobs that I occasionally have a need for. Buying from the internet is all very well, but it does introduce a bit of a delay into projects as you wait for them to arrive.

Well, Switch Electronics have solved all that for me. Their prices are pretty keen and they have lots of interesting components, even a special “Maker” section. If you’re based around Hull I’m sure you’ll find them very useful.

November the 1st Hardware Meetup

Another first Thursday of the month, another Hardware Meetup at c4di. This time I had an agenda of my own. I’ve just found out that you can get printed circuit boards made for really low prices. Really low. This has stirred within me an intense desire to find out how to make them. (posh prose eh?)

Anyhoo, it turns out that among the Hardware Group membership there are folks with experience with the tools that you can use to make your own PCBs using a free tool called Kicad. We’ll be doing a PCB design special event at the next meeting, on the 15th of November. If you’ve got any interest in building your own hardware you really should come along. The price of having lovely boards made specially for you is so low as to make them an extremely attractive prospect for makers.

You can sign up for the next meetup, and keep track of what we are doing, by joining our new group on Get Together.

Looong Day

Being up town at 7:00 am does have it’s compensations….

Today was a looong day. Headed out of the house at 6:30 am to review some newspapers for the BBC Radio Humberside Breakfast show and got back home at 8:45 pm after a Hardware Meetup at c4di. In between I did some software development on the Air Quality sensor which can now talk LoRa, MQTT and seems to work. I make that that a 14 hour working day, and it was wonderful. And to think I don’t have a “proper job”.

We had a splendid turnout at the hardware meetup, we’ve got people getting started with Arduino devices and learning how to code for them .Tonight we made an “accidental reaction timer game” and discovered how to store music in a C++ program. Who knows what we’ll come up with next time. We’ve got others entering into earnest discussions about sensors, Stephenson’s Screens and software services. And that’s just the things that begin with s.

If you want to come along and see what we’re up to next time, we’ll be at c4di at 6:00 pm on Thursday 1st of November. Find out more here.

Stocktaking

At the hardware group on Thursday, when we were talking about hardware for new members. We have a kit of parts that we make available for those who want to have a play with Arduinos and I realised that I had absolutely no idea how many devices I had in stock. So on Friday I spent a while going through all my little boxes from China and counting devices.

I then thought it might be a good idea to label some boxes for all the various bits and pieces. I thought I could use a whiteboard maker to write the stock levels on the printed labels. When I use something I can then just rub off the number and write another one. You can trace the evolution of the labelling process above through:

  • Using these printed labels with big letters is fun

  • I’d better switch to smaller text, running out of labelling tape

  • Ah. No labelling tape left. Let’s just write letters on insulating tape…….

Connexin Live

I can’t help thinking that HullOS has a much better ring to it…

A couple of weeks ago I was at the Hull Arena marvelling at how Hull could put on such a fantastic digital awards ceremony. Today I’m at the same place marvelling at how Hull can host a splendid technical event. One of of the first thing the delegates were told about Connexin was that they are a Hull company. Born and bred. And proud to be here.

Connexin are a local company with global plans and big hitting partners in the form of Cisco. A Cisco person had even flown all the way from San Francisco to speak at the event. The theme was something very dear to my heart; Smart Cities. We heard from Hull City Council and Hull University about their ideas for the future and from folks from Newcastle about what they had been up to.

These are challenging and exciting times for local government. Challenging because budgets are being squeezed as never before, and exciting because technology is showing real potential for improving the lives of the people that the councils serve.

It was great to hear all these inspiring plans being laid in Hull. I couldn’t stay to the end unfortunately, I had to go and see how the Hardware Group at c4di was getting on. The answer, by the way, is very well. We’ve got three new members who’ve turned up and want to have a go with the Arduino. I’m putting together some kits for them for the next meeting. You can come along and have a go too if you like. The next meeting is on the 11th of October at c4di, starting at 6:00 pm.

Cloud Connected Camping Lights

I was in the Pound Shop over the weekend looking for camping lights. What with we me going camping in a month or so. I'm going to the Electromagnetic Field event at the end of August, and I've been buying sleeping bags and contemplating life under canvas for a few days. 

I found a likely looking light in a camping shop for a fiver but being from Yorkshire I thought I'd take a look at cheaper solutions. I found the lights above, packed in a nice little box, for a pound a pop. Astonishing value, so I bought four. 

Then I got to thinking about making the light more interesting. I've done this kind of thing before and I had some pixel rings and Wemos devices lying around, so I thought I'd have a go. Worst case I'd break a light that cost me a pound. 

This is the light dismantled. I undid the screws that held the base on popped the top off and then slid the transparent cover down and off the bottom of the light. Then I used a knife blade to pop the plastic reflector off the top to reveal the pcb that holds the 11 white leds. I'm going to replace this with a 16 led neopixel ring which just fits. You can get these rings for around 8 pounds, or much less if you're prepared to wait for them to arrive from China. 

The plan is to fit the led ring a shown above, drill some holes in the plastic support and run the wires behind through them, providing a connection and also holding the ring in position. I can bring in the hot glue later if I want to make things even more secure. 

I held the led ring in position, scratched marks on the reflector and then drilled the holes. I'm not very pleased with the bottom hole, but I don't think anyone will see it. I'm only using three of the connections, but I drilled four holes so I didn't have to remember which was the one I don't need. 

These are the wires that I made up for the connections to the led ring. I used solid core wire. I'm connecting to the ground, 5Volt and Data input lines using black, red and white wires. The colour of the wires doesn't matter much, as electricity doesn't seem to care about wire colour.

If you read the Adafruit help pages for the Neopixel ring they talk sensible things about series resistors and capacitors that you can add to improve the signal to the led ring and reduce the chances of damage. I'm leaving those out because I like to "live on the edge", but you might want to add them if you build a light like mine. 

This is the led ring after I fitted it to the reflector with the wires pushed through the appropriate holes. Looks quite tidy to me. Next up we have to take a look at fitting the processor board to the light. 

This is how the lamps are made. They have a slide switch which controls power to the led ring. It's a bit hard to see, but there's a series resistor on the positive side which is wired from the battery terminal to the switch. I'll use the switch to turn the device on and off. 

I'm going to add an ESP8266 device on the Wemos platform. I love this device and configuration, and it just fits. It will give me WiFi for connectivity and my plan is to port my wedding light software onto the Wemos platform. 

This is the device with the signal and power wires soldered in. For some reason I was nervous about soldering solid core wires onto the Wemos PCB and so I soldered in some jumper cables instead. I've done this before and it's a good trick. Rather than soldering a socket and then plugging into it (and having the worry that the plug might come out) instead I just solder the plug straight in. I'll cut the plugs off the other end and wire things up by twisting wires together, soldering them and covering with heatshrink tubing. Probably not as posh as using proper connectors, but much cheaper and at least as reliable.

I'm using one data pin to control the lights. Just because I'm moody, I decided to solder this wire in directly. I stuck the Wemos device onto the back of the reflector using some sticky velcro tape that I got from Maplin. I'm really going to miss that shop.

This is the completed processor fitted to the reflector. I've done the wiring and so I now just have to power up the device to get it going. This is also a useful stage to reach because now that I've connected the power lines for the leds and the processor together I can plug the Wemos device into the PC using a USB cable and test that the lights work. So I did this. There will now be a short break while I get the software together. 

Writing the software took longer than I expected because I found a bug. However, once I'd fixed that I turned my attention to the base of the light. I soldered some new wires to the switch and onto the battery terminals. Now I just have to connect the red and black cables to the ones on the processor and I'm good to go. 

This is the lights and the power all soldered together. I've made the wires much longer than they need to be, this is so that it will be easy to pop out the reflector and re-program the Wemos when I find another bug.

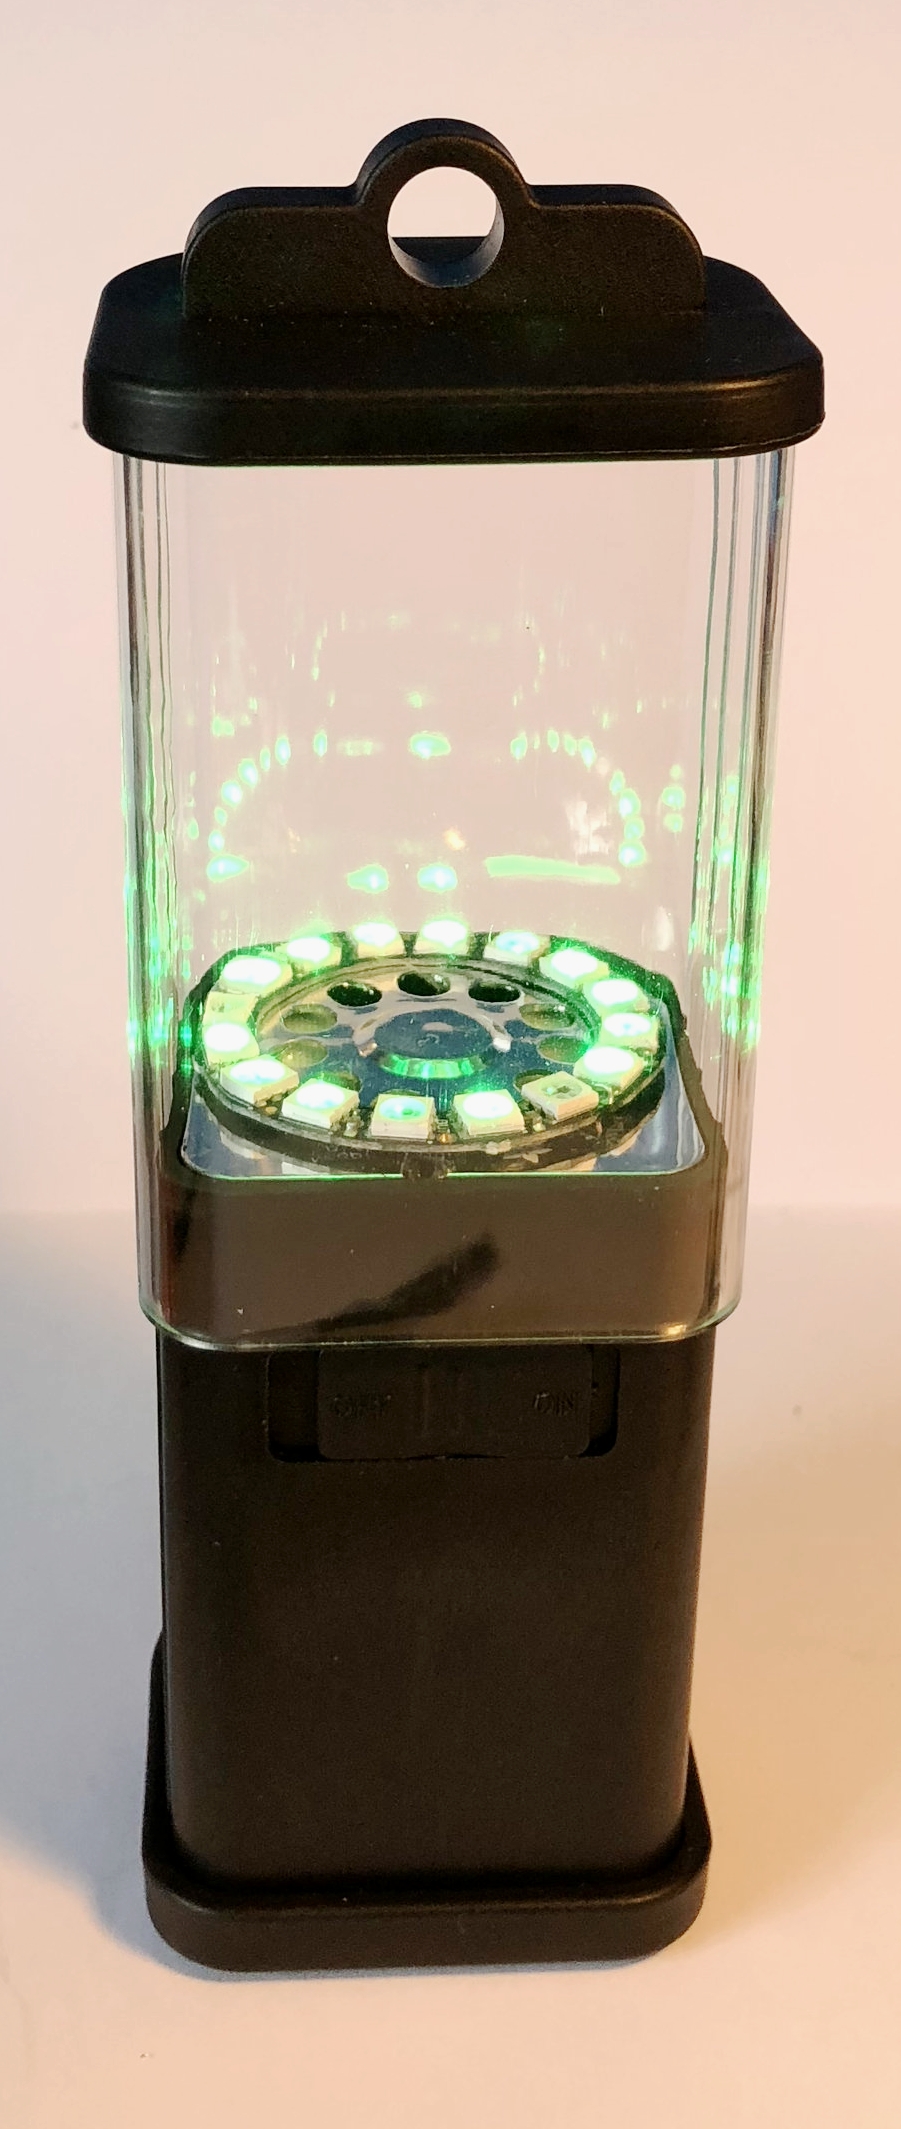
This is the light in action, just after I'd asked it to turn green.

I'm presently using MQTT to connect to the Azure IOT hub and sending text commands to configure the light. The commands are a subset of the HullOS language that I've been using on the Hull Pixelbot. Next I want to make a controller device that pushes commands up into the cloud to tell the light what to do. 

If you're looking for something to play with I can strongly recommend this light. There's a reasonable amount of space to play with - I'm thinking of adding a temperature sensor so that the light can change colour depending on how warm it is. I've discovered that I can perform my light flickering at the same time as wait for MQTT server commands and it all seems to work splendidly. I'll put the code up on GitHub when I've tidied it up a bit. 


With a bit of care you could  take the original 11 pixel ring and cut the tracks on the pcb so that each led could be controlled individually, perhaps by an Arduino Pro-Mini to get a really cheap controllable light device. 

Make your own Theremin. Sort of.

A Theremin is a musical instrument that you control by waving your hands. It's used a lot to provide spooky sounds for science fiction and horror movies. A "proper" theremin uses a tuned circuit that is which is controlled by the player waving their hands near a couple of antennas. 

I thought we could have a go at making something similar using just a light sensor and an Arduino, so I've come up with the circuit above to get started. You can find the detailed instructions here. We've been using these little exercises at the c4di Hardware Group, which met again today and will meet again on Thursday 5th July. Sign up here if you want to come along and make some annoying noises....