Cloud Connected Camping Lights
/
I was in the Pound Shop over the weekend looking for camping lights. What with we me going camping in a month or so. I'm going to the Electromagnetic Field event at the end of August, and I've been buying sleeping bags and contemplating life under canvas for a few days.
I found a likely looking light in a camping shop for a fiver but being from Yorkshire I thought I'd take a look at cheaper solutions. I found the lights above, packed in a nice little box, for a pound a pop. Astonishing value, so I bought four.
Then I got to thinking about making the light more interesting. I've done this kind of thing before and I had some pixel rings and Wemos devices lying around, so I thought I'd have a go. Worst case I'd break a light that cost me a pound.

This is the light dismantled. I undid the screws that held the base on popped the top off and then slid the transparent cover down and off the bottom of the light. Then I used a knife blade to pop the plastic reflector off the top to reveal the pcb that holds the 11 white leds. I'm going to replace this with a 16 led neopixel ring which just fits. You can get these rings for around 8 pounds, or much less if you're prepared to wait for them to arrive from China.

The plan is to fit the led ring a shown above, drill some holes in the plastic support and run the wires behind through them, providing a connection and also holding the ring in position. I can bring in the hot glue later if I want to make things even more secure.

I held the led ring in position, scratched marks on the reflector and then drilled the holes. I'm not very pleased with the bottom hole, but I don't think anyone will see it. I'm only using three of the connections, but I drilled four holes so I didn't have to remember which was the one I don't need.

These are the wires that I made up for the connections to the led ring. I used solid core wire. I'm connecting to the ground, 5Volt and Data input lines using black, red and white wires. The colour of the wires doesn't matter much, as electricity doesn't seem to care about wire colour.
If you read the Adafruit help pages for the Neopixel ring they talk sensible things about series resistors and capacitors that you can add to improve the signal to the led ring and reduce the chances of damage. I'm leaving those out because I like to "live on the edge", but you might want to add them if you build a light like mine.

This is the led ring after I fitted it to the reflector with the wires pushed through the appropriate holes. Looks quite tidy to me. Next up we have to take a look at fitting the processor board to the light.

This is how the lamps are made. They have a slide switch which controls power to the led ring. It's a bit hard to see, but there's a series resistor on the positive side which is wired from the battery terminal to the switch. I'll use the switch to turn the device on and off.
I'm going to add an ESP8266 device on the Wemos platform. I love this device and configuration, and it just fits. It will give me WiFi for connectivity and my plan is to port my wedding light software onto the Wemos platform.

This is the device with the signal and power wires soldered in. For some reason I was nervous about soldering solid core wires onto the Wemos PCB and so I soldered in some jumper cables instead. I've done this before and it's a good trick. Rather than soldering a socket and then plugging into it (and having the worry that the plug might come out) instead I just solder the plug straight in. I'll cut the plugs off the other end and wire things up by twisting wires together, soldering them and covering with heatshrink tubing. Probably not as posh as using proper connectors, but much cheaper and at least as reliable.
I'm using one data pin to control the lights. Just because I'm moody, I decided to solder this wire in directly. I stuck the Wemos device onto the back of the reflector using some sticky velcro tape that I got from Maplin. I'm really going to miss that shop.

This is the completed processor fitted to the reflector. I've done the wiring and so I now just have to power up the device to get it going. This is also a useful stage to reach because now that I've connected the power lines for the leds and the processor together I can plug the Wemos device into the PC using a USB cable and test that the lights work. So I did this. There will now be a short break while I get the software together.

Writing the software took longer than I expected because I found a bug. However, once I'd fixed that I turned my attention to the base of the light. I soldered some new wires to the switch and onto the battery terminals. Now I just have to connect the red and black cables to the ones on the processor and I'm good to go.

This is the lights and the power all soldered together. I've made the wires much longer than they need to be, this is so that it will be easy to pop out the reflector and re-program the Wemos when I find another bug.
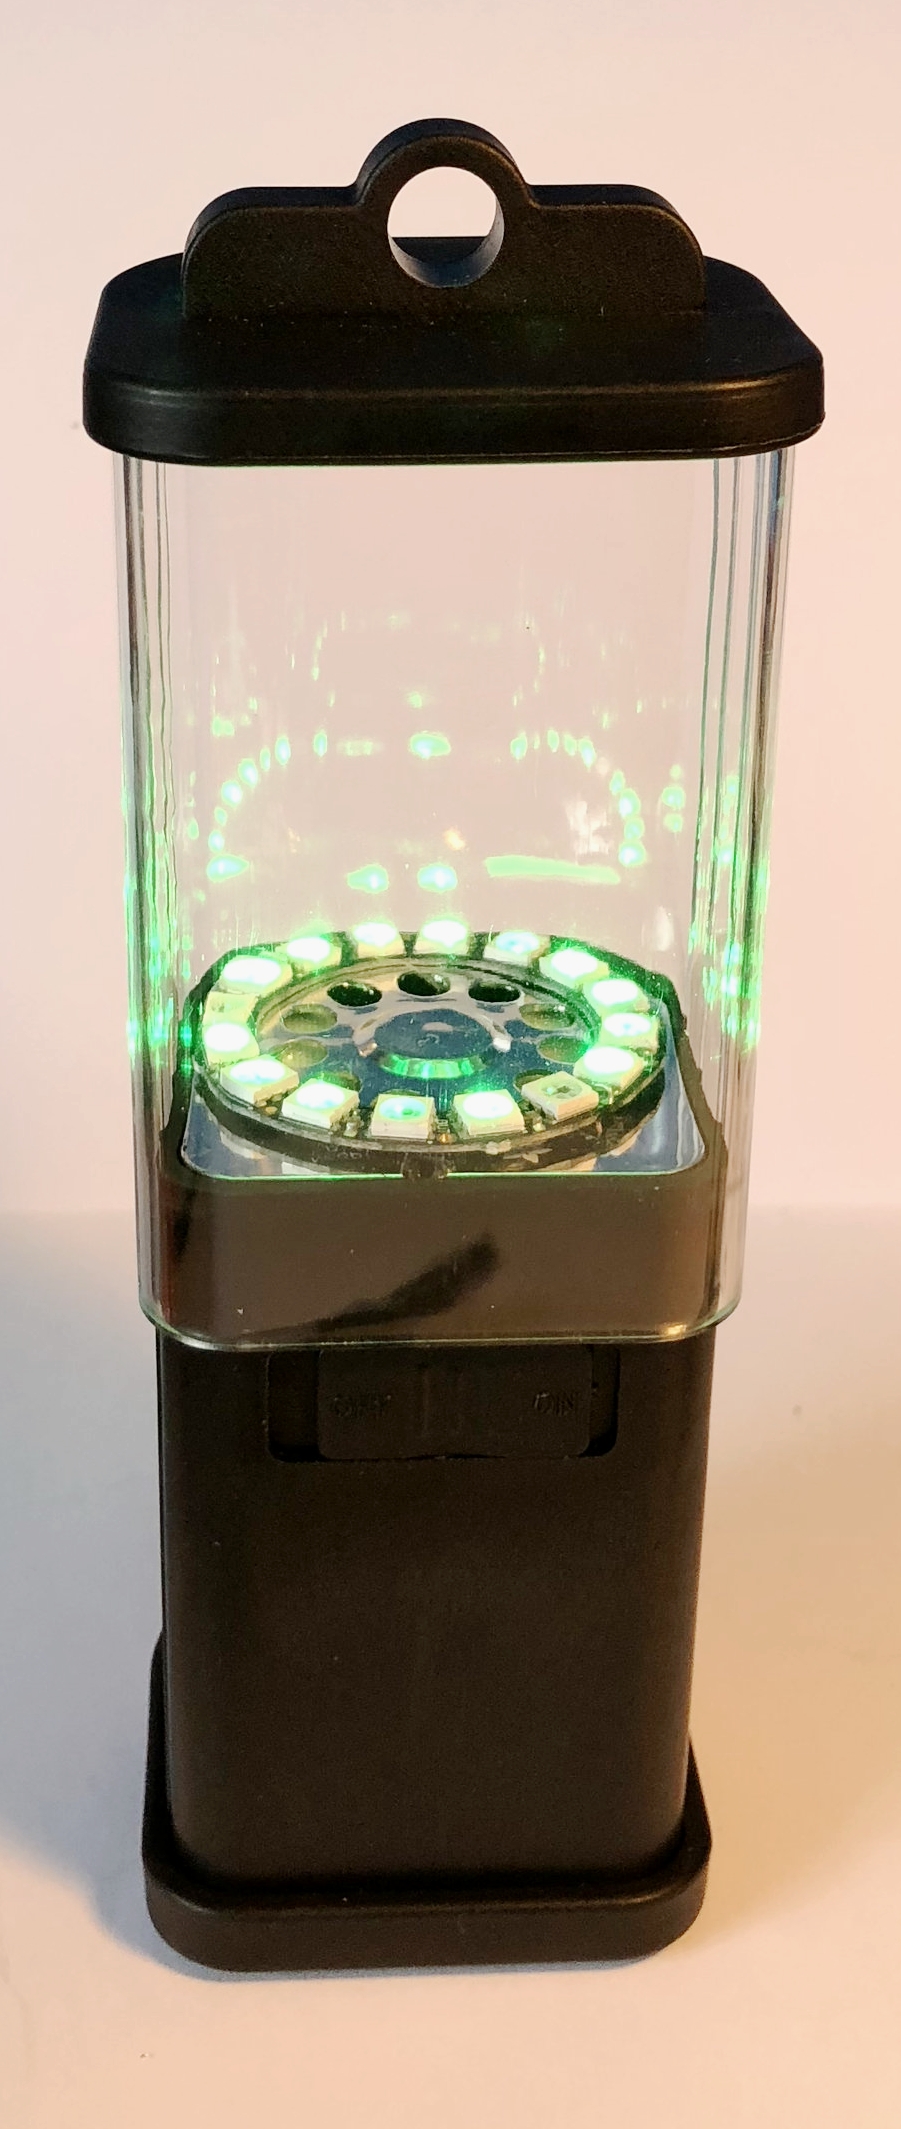
This is the light in action, just after I'd asked it to turn green.
I'm presently using MQTT to connect to the Azure IOT hub and sending text commands to configure the light. The commands are a subset of the HullOS language that I've been using on the Hull Pixelbot. Next I want to make a controller device that pushes commands up into the cloud to tell the light what to do.
If you're looking for something to play with I can strongly recommend this light. There's a reasonable amount of space to play with - I'm thinking of adding a temperature sensor so that the light can change colour depending on how warm it is. I've discovered that I can perform my light flickering at the same time as wait for MQTT server commands and it all seems to work splendidly. I'll put the code up on GitHub when I've tidied it up a bit.
With a bit of care you could take the original 11 pixel ring and cut the tracks on the pcb so that each led could be controlled individually, perhaps by an Arduino Pro-Mini to get a really cheap controllable light device.
