This online Arduino Programming Tool is great

Now you can program your Arduino Uno straight from the hullpixelbot.com site

This is an awesome and very useful tool:

https://github.com/dbuezas/arduino-web-uploader

it allows you to deploy Arduino Uno applications directly into a device from a web browser. Just what you want to do if you happen to have an Arduino Uno controlled robot that needs software. Like I do.

It means that you can now create and program your Hull Pixelbot without needing to download any code. You can load the HullOS operating system into your robot and then use the Hull Pixelbot Python-ish editor to deploy the code.

Slow baud rates and the Raspberry Pi Pico

Hull University campus looking good

It’s strange the things you discover when you try to do something. Today it was all about slow baud rates.

What’s a baud rate? I hear you ask. Well, baud apparently stands for “binary asynchronous unit of data”. Or it’s an abbreviation for the name Emile Buadot who was a French pioneer of digital communication and had an amazing moustache and beard. Emile was sending text down a single wire and he was doing it one bit at a time. Assemble enough bits and you can match patterns of ons and offs to particular characters. The data stream would begin with a start bit (to tell the receiver that a character was coming) and then have a bunch of signal levels that represent the character being sent. One thing that was important is that the sender and the receiver needed to agree on the rate at which the data was sent. Otherwise things get garbled. So they invented the baud rate (number of bits per second) and created some standard speeds (110,300,600,1200, 2400, 9600, 115200 and so on…) Baud rates are still used today. The GPS receiver in your mobile phone will be sending position information into your phone processor via a serial data stream with a particular baud rate.

When I connect a Hull Pixelbot to a computer I have to set a baud rate for the serial connection. I use the horrendously slow “baud rate” of 1,200 bits per second. This is because the program that the robot receives is stored in EEPROM in the robot (EEPROM stands for “Electrically Erasable Programmable Read-Only Memory). This is so we can turn the robot off and it will still remember the program it has been given. EEPEOM is awesome, but it is also very slow to write. The hardware has to bash the bits into the hardware components in the memory device and this takes time. I could have added handshaking - where the robot sets a signal to tell the host computer to stop sending - but instead I did something quick and dirty, which was to slow down the robot baud rate to the point where the EEPROM could keep up.

This kludgy decision came back to haunt me today when I tried to use an Arduino programmed Raspberry Pi PICO at 1200 baud. The PICO seems to get upset when you try to talk to it via a serial port running at 1200 baud. Not sure why, but the result is that my robot code doesn’t work properly. Oh well. I’ll just have to speed up the serial port and add some handshaking. I believe this is called “paying off technical debt”….

Migrating Arduino C to PICO C

Nothing to do with the subject of the post. Although the I guess you can see the “SEa”

You’d think it would be easy to move a C program from the Arduino platform to the Raspberry Pi PICO. After all, we have the wonderful libraries from Earle F. Philhower, III and the fabulous PlatformIO framework you can use to manage your project (don’t forget to perform this stuff before you try to build anything). And anyway, C is the same everywhere. Right?

Wrong.

When I write the Arduino stuff a while back I made one or two questionable design decisions. One of them was to use the char data type to hold 8 bit values. This was kind of OK back in the day (and by this I mean the 1980’s) but it turned out to be a stupid thing to do. Because some C compilers think that char holds a signed value (-128 to 127) and some think it holds unsigned (0 to 255). Of course the Arduino C compiler goes one way and the PICO C compiler goes the other way. Neither are wrong - the C language standard doesn’t specify this - and you could argue that anyone daft enough to perform maths with variables that are supposed to just hold character codes deserves all the trouble they get. But we are where we are, which in my case was looking at a program that has been working for years and has suddenly gone nuts.

I actually fixed it quite quickly once I figured out the stupid thing I’d done. The Pico debug probe proved very useful for this. I was able to set breakpoints in the timer interrupt handlers and then watch as various counters were updated. When I saw the code subtract 1 from 0 and get the answer 255 I knew exactly what had happened…..

Breath detecting with an environmental sensor

Turns you can do it. I’ve been wondering how I can detect people blowing into a trombone. As you do. A microphone is one possibility, but that involves analogue to digital conversion and sound processing and stuff. And owning a suitable microphone. I do however have a bunch of BMP20 environmental sensors. These contain an air pressure detector. They are supposed to be used for weather data and determining your height above sea level. Would it work for breath?

The answer is yes. If you put a sensor in a closed box (see above) and then blow into the box you can make a detectable difference to the pressure inside. All you have to do is sample the air pressure at the start and then look for a change of around 5 or so during gameplay.

It worked really well for a while. Then the BMP280 stopped working. I had a look in the box and discovered why. It was rather disgusting. Breathing into a box produces not just air, but a lot of water vapour too. The inside of the box and the sensor itself was covered in what you could politely call “dew” but was actually something slightly different. Trombones have a “spit valve” on one end to release all the stuff that accumulates. I’m happy to have proved the principle. I guess I could engineer some baffles or a waterproof membrane over the sensor to keep it dry, but the thought has occurred that in these virus laden times, passing around some thing that you take in turns to breath into might not be a great idea.

So I’m building a version of the controller that uses buttons rather than breathing.

Add graphs to your IoT projects

I’m building a trombone controller. And why not? I’m using a distance sensor to track the position of the trombone slide. The output is a bit noisy. But how noisy? A graph would help, but how do I get that? Very easily as it turns out. I just added a print statement to my Circuit Python application:

print(raw,",",average)

This prints out my raw and averaged values with a comma between them. Then I used Thonny to run the program in the trombone for a while and moved the slider. Then I stopped the program, copied the output of the terminal window into notepad and saved it with the file extension “.csv”. (Comma separated values).

Then I opened the file with Excel (other spreadsheets are available) and made the above graph. It shows how my rolling average (the red trace) cleans up a lot of noise but makes the values lag slightly (look at the how the red trace rises slightly after the blue one).

If you aren’t sure what your signals look like this is a very easy way to do it. The Arduino IDE has a graphing feature built in that I’ve used once or twice, but there’s nothing like dropping your values into a proper spreadsheet for analysis. And it is very easy to do using the magic of cut and paste.

When in doubt, slow your ESP32 CPU down

I’m doing some work with this little thing. The aim is to make it work with my Bluetooth printer so that I can take pictures and print them. While I was getting it going I got frustrated by the way that the camera connection kept failing.

At first I thought it was a brownout problem caused by insufficient power over the usb connection. I’ve got a fix for that here.

But no, even with a healthy power supply the problem kept recurring. So I tried something different. I turned the speed of the CPU. My theory was that if the camera was being a bit slow responding to requests from the ESP32 it might be a good idea to slow those requests down a bit.

It worked a treat. You can see how to do it in the Arduino SDK above. This does of course mean that the program will respond a tad slower but I’ve not found that to be a problem. If you’ve got intermittent behaviour in your device you might like to try it. It has the added useful side-effect of reducing power consumption.

Print over Bluetooth using an ESP-32

Not bad for around twenty pounds

The thermal printer I ordered a while back has arrived. I’ve been playing around with it. What I want to do is control the printer over Bluetooth from an ESP-32 device. Then I can see about getting an ESP-32 with a camera and getting pictures off that and into the printer. First thing I did was fire up BLE Scanner for the iphone and take a look at the services provided by the device. I used this to send some ASCII codes to services I thought might work (you can do this with the program - it’s great fun) and managed to get the printer to print out “hello”. Which was nice.

Then I went to the source code for my Furby Bluetooth connection program and modified it to use the services that the printer supports and managed to make that print “hello” too.

Then, as I was rolling up my sleeves to start building the printer control software it dawned on me that someone else might have done this before. And someone has. He’s called Larry Bank and you can find his splendid library here. I had to make one tiny change to his code. My printer has the name “MPT-II”, which was not on the list of the printers supported by the driver. I fixed this (in a way that I’m not particularly proud of) by editing the file Thermal_Printer.cpp in the src folder for the library installation and changing the first printer name in the list to MP-II. It was on line 59 of the file in the version I was using.

const char *szBLENames[] = {(char *)"MPT-II",

It works a treat. The library is very comprehensive. It can do different sized text, barcodes and even print images. The next thing to for me do is to get an ESP-32 device with a camera and discover how to get images off it. However, if you have Arduino app which you just want to use with a printer this is a very self-contained, cheap and portable way to do it.

Fun with Breadboards

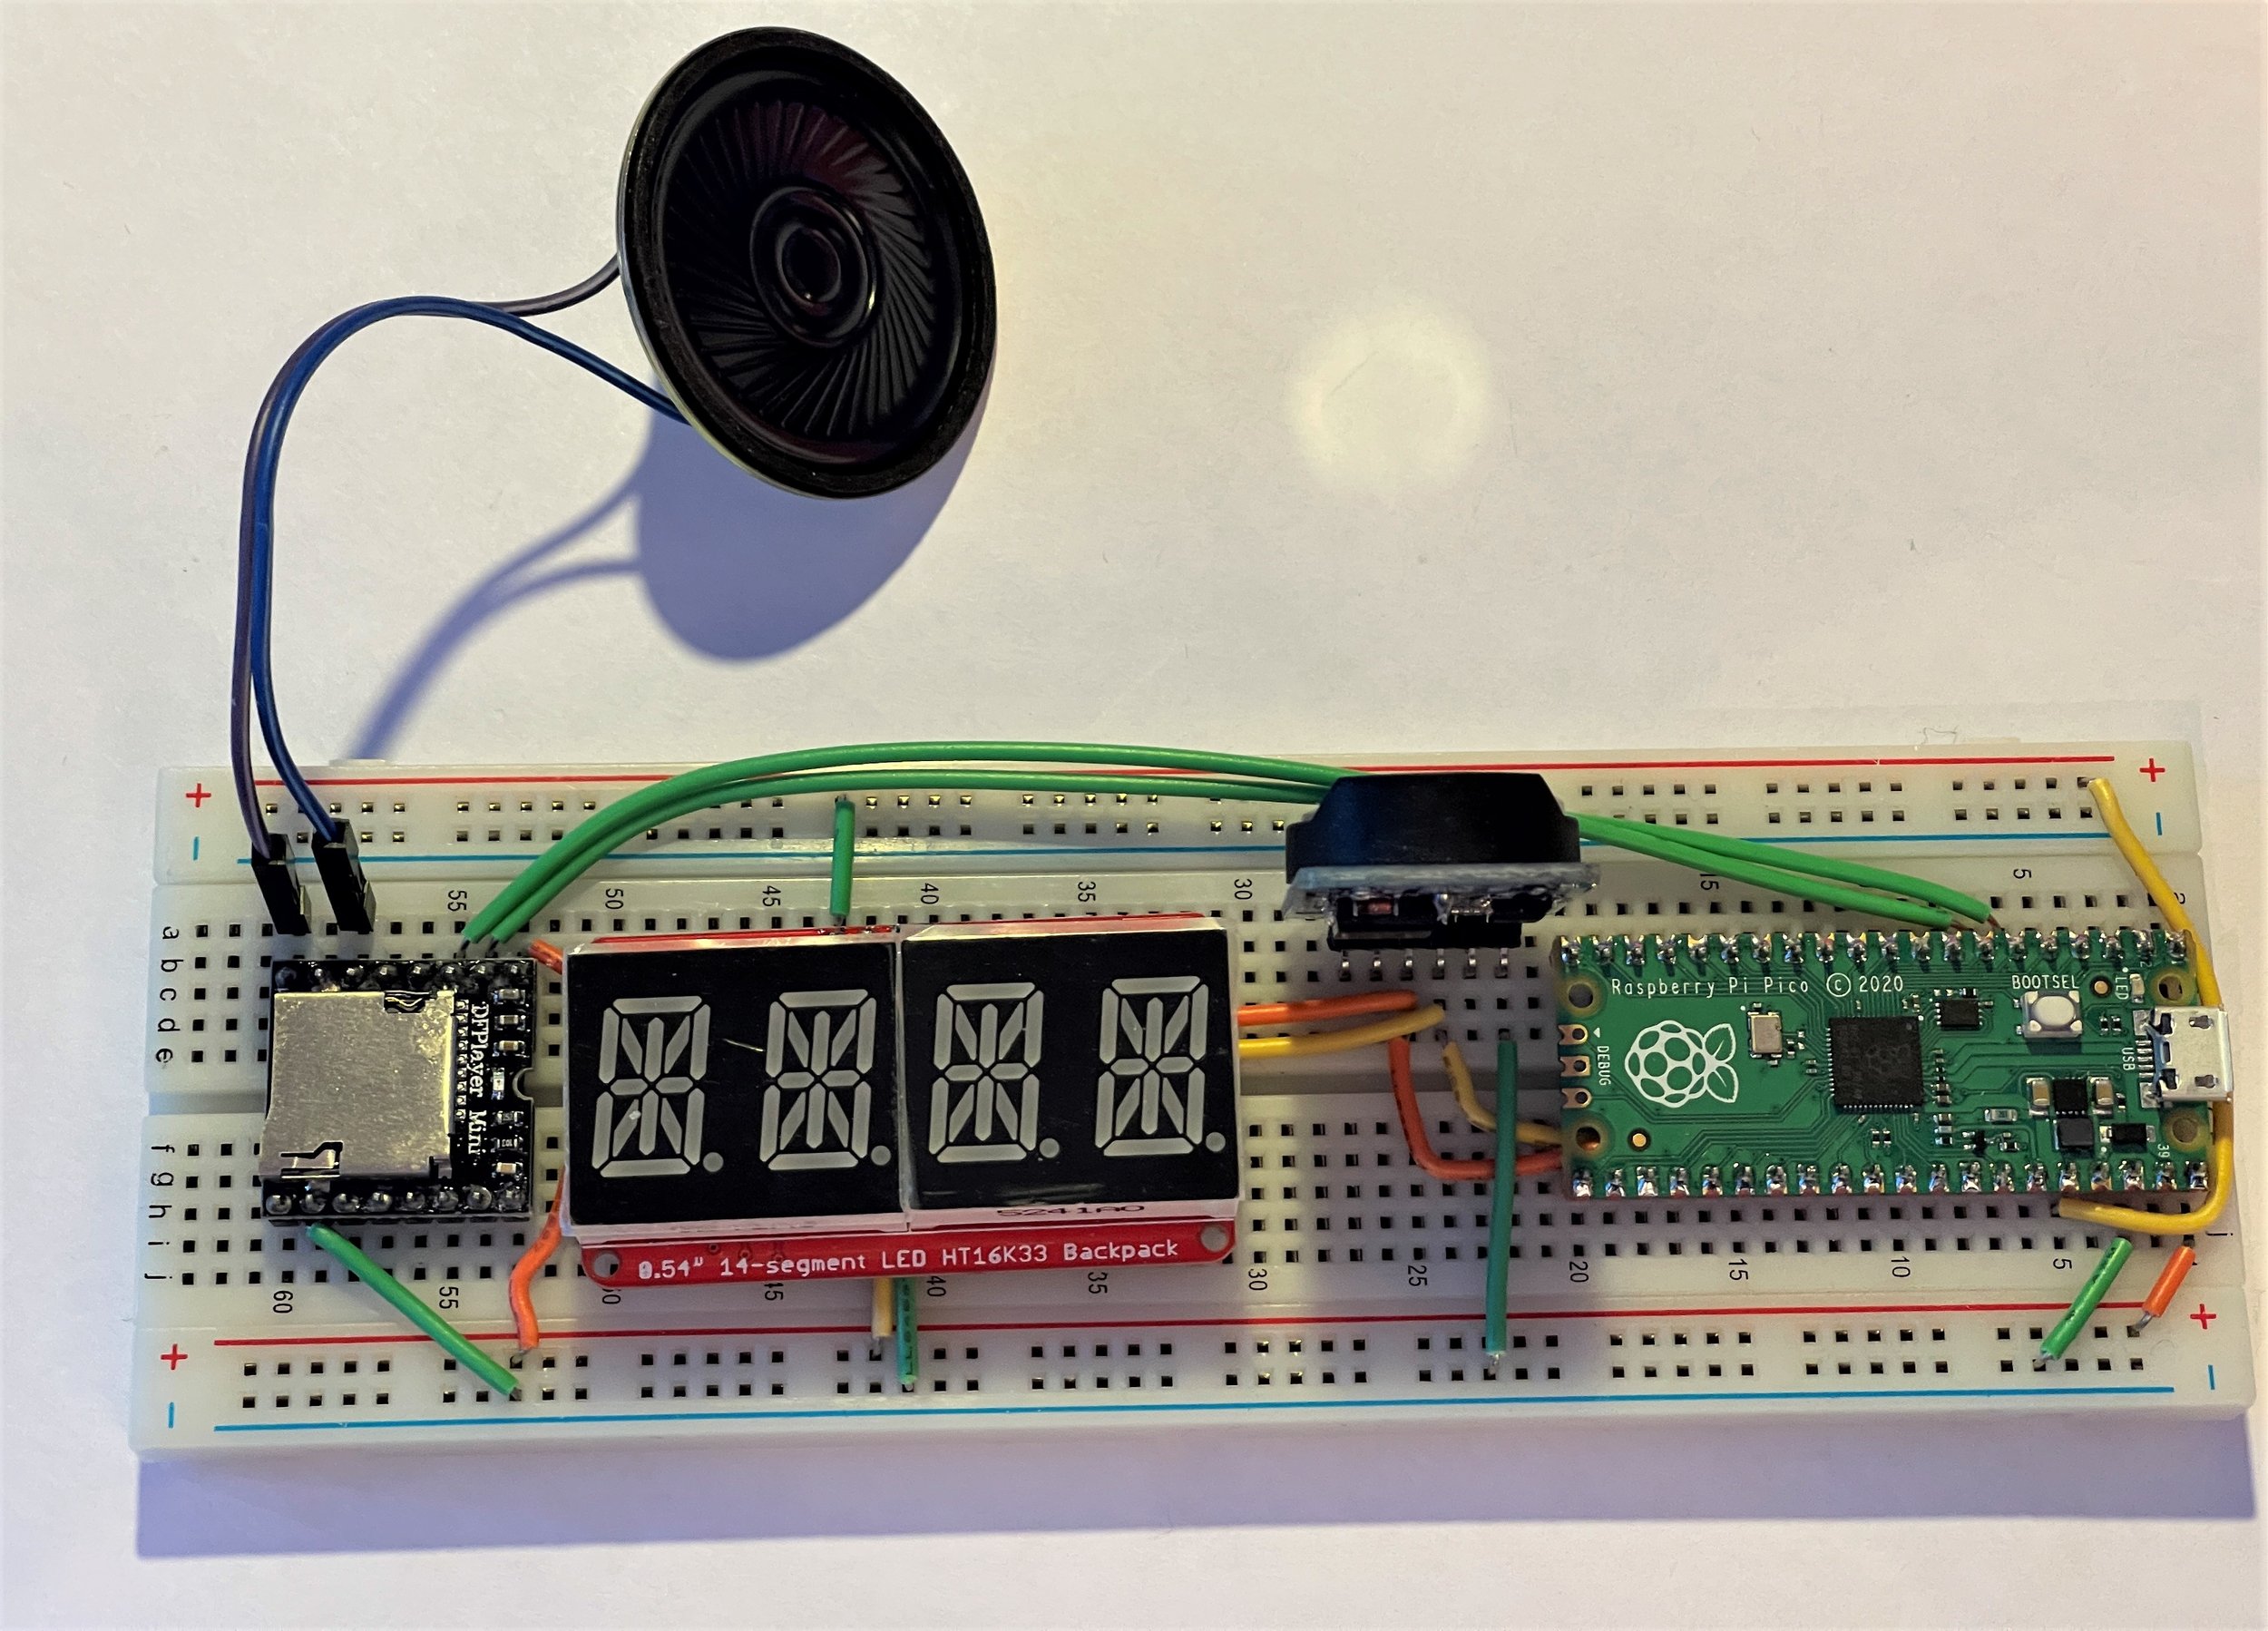
I’ve started on the hardware for my Pomodoro timer. I thought I’d build the circuit on a breadboard before I wired up the finished version in the case. I started off trying to do everything super neat. Then I discovered that some of the connections did not lend themselves to neatness, so I ended up just adding all the wires that would make it work.

I think it is called a breadboard because people look at it and go “crumbs”…….

Hungry DFPlayer

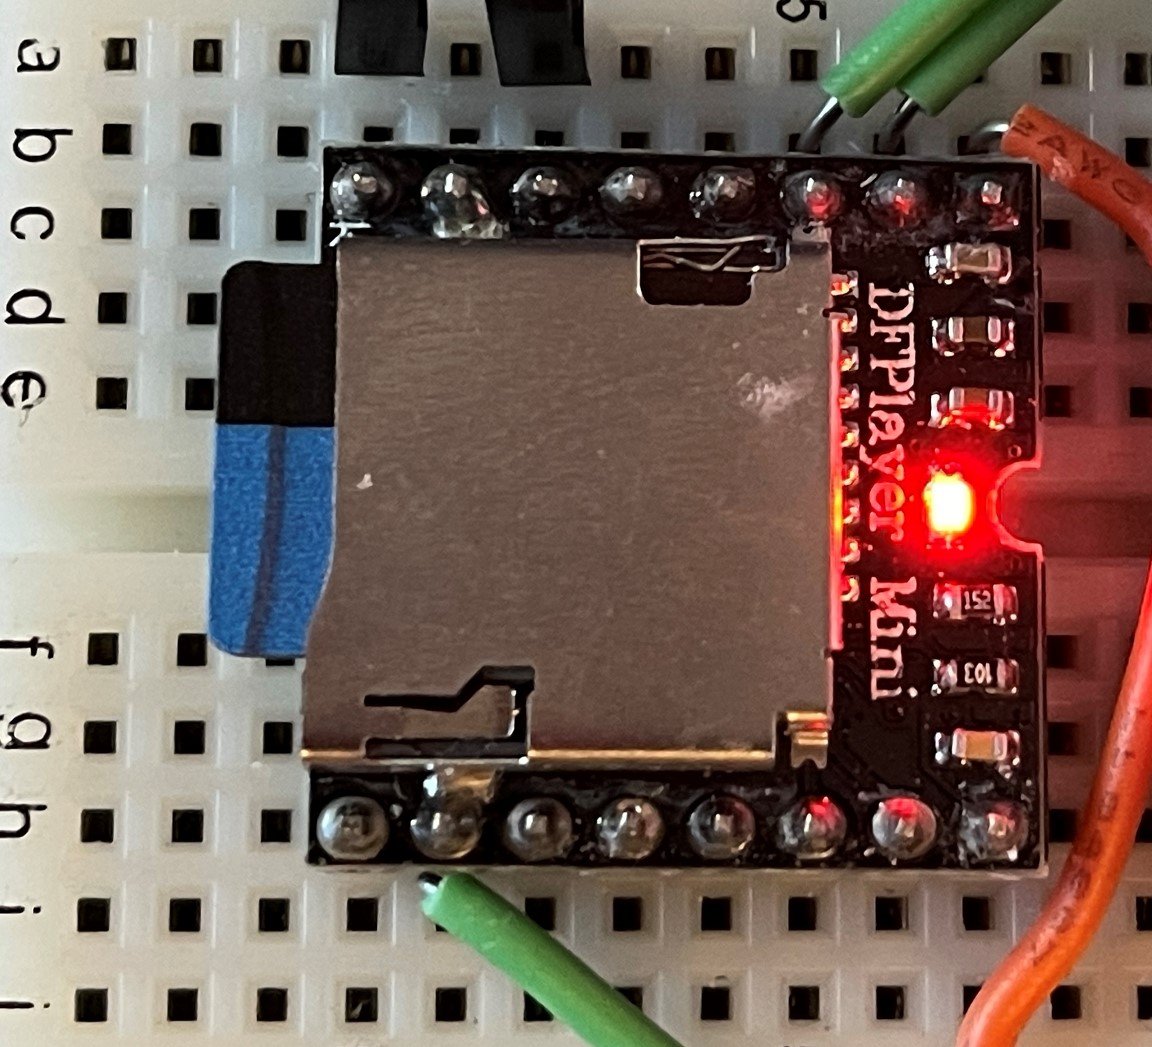
The DFPlayer Mini is an amazing device. Particularly as you can pick one up for around a pound on AliExpress. It will pull mp3 files off a MicroSD card (which is the most expensive part of the system) and play them for you. It outputs good quality stereo and even includes an amplifier that will drive a pair of speakers up to useful levels.

I’m using it in a device that I’m building. I’ve got a Raspberry Pi PICO triggering the audio playback over a serial connection. I loaded an MP3 file onto the SD card for testing. I used the track Fireflies from Owl City for no particular reason. The music started playing, which pleased me. Then, around 20 seconds in the drums and the bass kicked in and the whole thing crashed. Which did not please me.

It’s a power supply thing of course. I was powering it from a USB port on my PC which is a bit weak. I switched to a different port and it worked fine. There’s an important lesson here that I’ve mentioned before. If you’re making something and it starts to misbehave try a different power source.

Restoring Arduino servo movement

clb turner.png

Servos are a great, cheap, way of giving your devices a bit of physical movement. You can pick little ones up for around a pound each and a single Arduino can control quite a few servos. You can make a Connected Little Box control a servo. In the example shown above you turn the knob on the left and the servo on the box on the right turns, tracking it. However, there are two bad things that a servo can do:

  1. Not move as far as you might want it to.

  2. Burst into flames trying to move to a point that it can’t get to.

The writers of the Arduino servo library have decided that point 2 is actually more important than point 1. So they’ve changed the way that the servo libraries work. This caused some of our servos to misbehave. How did we fix them? Read on…..

When you want a servo to move you give it a pulse of a particular length. The servo converts this pulse into a value which is matched against one that represents the position of the servo output shaft. The servo attempts to turn the shaft so that the two values are the same, causing it to move to a particular position. If something tries to move the shaft away from this position the servo will push back. If the pulse size changes the servo will move the output shaft in response. So far, so wonderful.

But what happens if the computer gives a pulse that is converted to a value that the servo shaft can’t match? The answer is that the servo will try to move to that position and get stuck on the way, stubbornly pushing until coils heat up and melt, gears break and so on. And then you have to buy a new servo.

The original Arduino libraries for the servo assumed a range of movement that some servos can’t match. So they’ve reduced this range. The range boils down to two values that used to be 544-2400 but are now 1000-2000. The new range makes servos a lot safer, there is less chance that they will move into dangerous positions, but it does significantly reduce the amount of movement that you get. The good news is that you can override the pre-set values when you attach to your servo:

servo = new Servo();
servo.attach(2,544, 2400);

The statements above show you how to do this. The first statement creates the servo. The second attaches the server to GPIO pin 2 and restores the range of movement to the values used in the bad old dangerous days.

Debugging with Magic

Trying a new blogging approach. Blogging when I have something to say, rather than fretting about making a post every day……

Only a code magician can fix a program by renaming a variable. That’s me.

I’ve just encountered an hilarious (and by hilarious I mean horrible) bug with an upgrade to the ESP8266 compiler. I’ve been building my Connected Little Boxes software for quite a while now and it just works. Today I noticed that I had upgrades to the Espressif SDK in Platform IO. So, like a fool (and I do mean that) I pressed OK to upgrade them.

And suddenly my newly built program broke. It would start running and then spontaneously explode with Exception(29). Which means that my program is twiddling a memory location that is not where it should be.

First step was to recompile the code for the ESP32 processor (my code works on both). That worked fine. OK, so it is not necessarily something stupid that I’ve done. Back to the ESP8266.

It’s hard to debug code running in a separate device, but after a few minutes (I am pretty good at this - although I was slowed down as bit by the way that the bug vanished when I enabled debug mode) I’d isolated it to this statement:

RegistrationProcessDescriptor.status = REGISTRATION_OFF;

It runs during startup and turns off the registration process. But I guess you’d already worked that out because my commenting game is so good. Anyhoo, when this statement runs the device explodes.

OK. Welcome to planet weird. First thought is that RegistrationProcessDescriptor is not pointing to the right place. But it is. Otherwise the call to the exploding function would not have worked. So, second thought is that REGISTRATION_OFF is a silly value. It isn’t. It’s 1004 since you asked. And status is an integer property in case you were wondering, so everything make sense and the code has been working perfectly for ages…..

Of course I’ve fixed it. I’ve renamed the variable RegistrationProcessDescriptor to RegistrationProcess. Something deep in the compiler must be getting upset about long variable names and dropping dodgy code. There were a few clues:

  • It works with a different compiler

  • It worked when I changed the code a bit (by adding debug)

  • The variable name was a bit longer than ones I normally use

I’m not happy that the problem occurred, but I’m pleased I was able to fix it.

Connected Little Boxes web flashing now live

flash.png

Well, that was fun. One thing I’ve always said about tricky projects is sometimes you have to “go and live there” to solve the problem. Well, that’s where I’ve been for the last month or so. I’ve been grappling with the JavaScript serial interface and the espytool with the aim of creating a website that can directly flash my Connected Little Boxes software onto a brand new ESP8266 or ESP32 device.

And I’ve finally gone and done it. If you want to put my software onto one of your devices (I’ve tested it with Wemos D1 Mini and Wemos 1 ESP32) you can go here, plug your device into your PC or laptop and then flash my software into it. For this to work you have to be using a Google Chrome or Microsoft Edge browser.

I’ve also created a simple terminal (called Simpleterm) that you can use to configure a Connected Little Box from your browser. You can find Simpleterm here. You can use Simpleterm to talk to any device that uses a serial port.

The Connected Little Boxes website will be further developed over the next few weeks to add more projects. I’d love to know what you think. And it’s nice to be back in the blog…

Simple encryption with the ESP32

esp32andesp8266.jpg

Early versions of the software for my Connected Little Boxes stored all the settings in an area of EEPROM memory. This is because the settings code was originally written to run on an Arduino Uno which only provides EEPROM as persistent storage.

Now that I’m using a the ESP8266 and ESP32 I can use a proper file system to store the settings for a device. This is nice, but has left me with a problem. On the Arduino Uno I was quite happy to store passwords in EEPROM. My software won’t let you read back the contents of password settings, you can only put values in. If you want to read the settings you’d have to get hold of the device and then swap the internal program for one which shows you the contents of the EEPROM. But with the new code I’ll have a bunch of files on the device which someone might be able to just take a look at.

So I started looking at really simple encryption. Not really encryption as such, just something to make it impossible for someone reading one of the settings files to be able to read back the values of protected settings. It’s not really proper encryption as the key and the code which uses it are both stored in the device so anyone with the time and the inclination could break it. However, I think what I’ve done is OK for its purpose.

#if defined(ARDUINO_ARCH_ESP32)
#define PROC_ID (unsigned long)ESP.getEfuseMac()
#endif

#if defined(ARDUINO_ARCH_ESP8266)
#define PROC_ID (unsigned long)ESP.getChipId()
#endif

#define ENCRYPTION_SALT 1234

void encryptString(char * destination, int destLength, char * source)
{
    randomSeed(PROC_ID+ENCRYPTION_SALT);
    int pos = 0;
    char * dest = destination;
    destLength= destLength -1;
    while(*source)
    {
        int mask = random(1,30);
        *dest = *source ^ mask;
        dest++;
        source++;
        pos++;
        if(pos==destLength)
        {
            break;
        }
    }
    *dest=0;
}

This is my encryption code. You give it a string and it scrambles the text. I’ve done it this way so that the characters codes still remain in the printable ASCII range. I use the processor ID number of the device and a salt value for each device to seed the built-in random number generator. I then use the magic of exclusive-or to scramble the text. The decrypt process is exactly the same code.

It seems to work OK. I only encrypt the passwords themselves. This reduces the amount of data that a cracker has to work with. You could crack it using any one of a number of attacks, but what you can’t do is just read out the text from a settings file and then use it, which is the level of security I wanted.

The way I see it, once someone gets hold of your physical device all bets are off security wise. Particularly if the algorithm is in the public domain too. That’s why I advise you to make a guest WiFi network for your IoT devices so that you can reduce the effects of a security breach.

Visual Studio Code on Raspberry Pi is awesome

Visual Studio Code Raspberry Pi.png

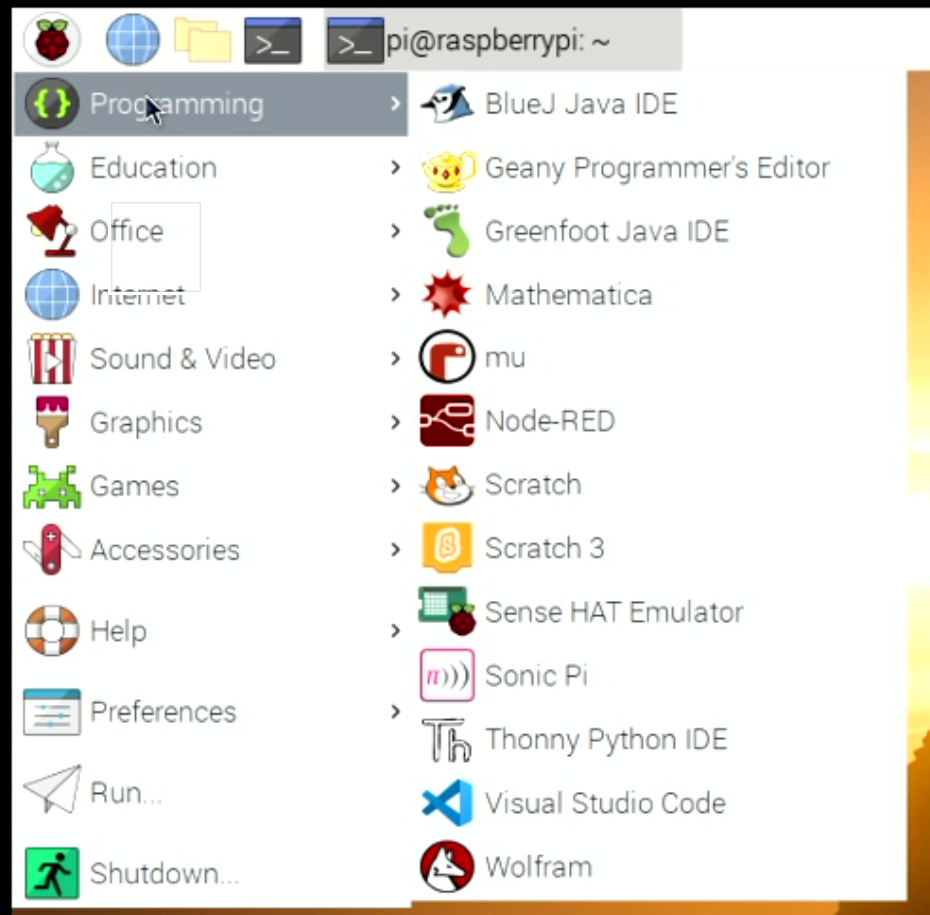
I’ve been using Visual Studio Code remote development on my Raspberry Pi devices for a while, but what I’d really like to do is just run Visual Studio Code on the Raspberry Pi itself. And now I can.

sudo apt update 
sudo apt install code -y

All I had to do was open up a command prompt and type the two commands above. And then I had an extra option for programming and using all the lovely Visual Studio Code plugins.

This is wonderful, wonderful, news. I’ve installed the Platform IO plugin and I now have a completely self-contained system for development on the Pi. I’m using the Pi 400 device which has a fair amount of processing power. It’s not as fast as my desktop - but then it cost a tiny fraction of the price. And it does get there in the end. Such good news.

Using Wire.h and SPI.h in Arduino project libraries

The Wire.h and SPI.h Arduino libraries are kind of important. They’re used by programs to communicate with devices over the I2C and SPI busses. I hardly ever use them personally, I rely on people much cleverer than me to create libraries that I can use to talk to the hardware I want to use.

I’ve been creating a “Connected Little Boxes” driver for the BME280 environmental sensor (a personal favourite of mine). I’d added the AdaFruit libraries and at that point my program broke. The compiler kept complaining about the Wire.h and SPI.h libraries not being available. Except that they definitely were. I could see them.

I’ve had this before, it is very frustrating. It’s one of those horrible situations where you have to know the “magic” trick to make it work. The magic thing to know is that if any of your libraries use Wire.h or SPI.h you must Include them in the main source file (i.e. the program file that contains your start and loop functions).

#include <SPI.h>
#include <Wire.h>

This makes the linker happy and allows your program to build.

Using the Second Serial Port on the ESP8266

Wemos Printer .png

The ESP8266 processor chip has one and a half serial ports. One has both TX and RX connections, so that it can both send out data and listen for incoming data. This is port usually connected to via USB to the host computer and used to send programs into the device and to have conversations with our running programs. We can use this port to connect to other things but this makes it hard to interact with our device.

The other “half serial port” on the ESP8266 is a port that can only transmit data. That’s fine for me at the moment as I only want to send data to a printer. The TX signal for this port is connected to D2 on the ESP8266 and which is wired to pin D4 On the WEMOS D1 Mini, as shown in the diagram above. For numbering reasons (computer people like to start counting at zero) the second printer port is numbered Serial1. You can open and use it in the same way as the other port:

Serial1.begin(19200); // open the port at 19200 baud
Serial1.println(“hello”);

Your program can try to read from this port, but it won’t see any data.

What about SoftwareSerial?

At this point you might be asking “Why doesn’t Rob just create a software serial port and have done with it?”. Good question. A software serial port is a piece of code that twiddles a data output as if it was being driven by serial port hardware. This is called “bit bashing” because the code “bashes” the data out.

The only problem with a software serial port is that it usually requires the sole attention of the processor when it s being used. I thought when I first saw these that they might do cunning things with timers and interrupts that meant that they had no impact on performance, but this is not the case. If you use SoftwareSerial you will find that your program is effectively stopped while it sends and reads data. That might be OK for you, but not for Rob. I don’t want the lights on my Connected Little Box device to flicker when it prints something. So I much prefer a physical port which sends each byte of data without the involvement of the processor.

Rob’s Amazing Interrupt Driven Serial Port

On a slightly different topic, if you need to connect a very large number of serial ports to an ESP8266 device and you don’t want to use Software Serial to read them all (which usually doesn’t work if you have more than a couple of inputs) you might like to take a look at my “edge triggered serial port” code here. This is a Software Serial implementation that only stops the processor when it sees the edges of serial data.

It's still always the power supply

printertest.jpg

In a post a while back I surmised that if weird things are happening it is because of a problem with the power supply. It’s still true.

I’ve decided to add a printer to my Connected Little Boxes. I thought it might be fun to be able to print little messages on paper. I dug out my little printer and connected it a Wemos device. I did a tiny test and it worked fine. So I set to and built a printer module into the Connected Little Boxes framework. And it didn’t work. That’s not actually surprising. I’m deeply suspicious of code that works first time. It usually means that I am due a bunch of pain further down the tracks. This time it looked like I was getting all my pain up front, which is fine with me as long as I can fix it.

I did some tests and it looked like a buffer/timing problem. Short strings printed fine. I could print“12345678” but if I tried to print “123456789” it failed. The buffers were all the right size, the logging said the printing had completed OK. The little lights that I had connected to the printer data signals all flickered hopefully. The only thing missing was printed output. Wah.

I did what I usually do when I hit a problem like this. I went and had a cup of tea. I’ve discovered that if you hit a problem where the universe seems to be broken the best thing to do is walk away from it for a while. I’m lucky in that I haven’t actually got a customer waiting impatiently for the product and the printing feature is not the subject of a piece of my coursework that is due in (the other reason for fretting about deadlines).

After my second biscuit I’d figured it out. It was my old nemesis the power supply. The printer I’m using is thermal and prints a line of text all at once. The more you print the more paper it has to heat up and the more power it needs. I was powering it from the USB connection on my PC which can’t deliver much current. In fact, it delivers just enough to print “12345678” and no more.

I tested this by trying to print “1 2 3 4 5 6 7 8”. This is a longer string, but it needs as much heat to print as a shorter one. That printed fine. So I connected a proper power supply and off it went. As much string as you like.