Gadgeteer LED Matrix

DSCF8700.jpg

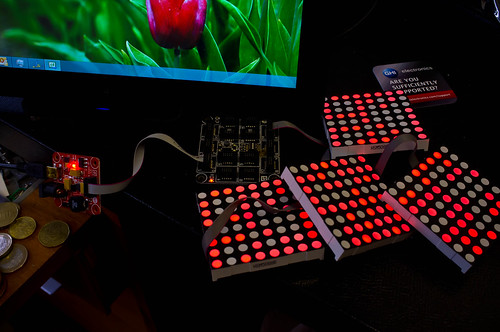
Earlier this week I was lucky enough to get hold of some LED Matrix modules for Gadgeteer. These give a decent sized array of 64 leds. They are really easy to program, and they use the GHI DaisyLink protocol, which means that they can all be controlled from a single Gadgeteer port. Each device links to the next to make a kind of daisy chain, which is where the name came from I guess. Each of the display modules contains an ARM processor which you can load with your own software (although you’ll have to be a pretty good developer to do that).

One other neat thing is that I managed to power four of them (as you can see above) using a single USB output from my PC. I was worried that having 256 leds powered from a single port might cause problems with the current available but they work fine.

At the moment my program just displays random patterns (like those computers they had in 70’s movies) but I’m going to have a go at displaying scrolling messages and even lo-res pictures. I reckon you could even get a very simple pong game working on a 16x16 display.

Staying with Gadgeteer, if you want to find out all about how my Tweet Printer works, there is a full writeup on the Gadgeteer website (http://www.netmf.com/gadgeteer/) where it is a featured project at the moment. I actually gave the first printer to the Gadgeteer team, I’m presently building a replacement.

Amazing Pulse Gadgeteer Device

image

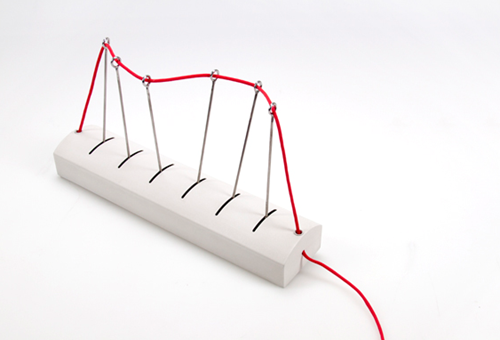
Scarlet put me on to this amazing device that transforms internet data into a graph. It was made using six servos which are driven by a .NET Gadgeteer processor. You can use it to show you the weather forecast, how busy your Twitter feed is, or anything that you can pull from the web and make into numbers.

You can find out more about the Pulse device here.

More Twitter Printing Fun

DSCF8307-Edit.jpg

South Holderness Technology College came to see us today. Emma organised everything excellently and I was first man in this morning, as I then had to zoom off to Doncaster for an Exam board. I was printing my tweets again, and everything worked splendidly. (This means that I am probably due a session where everything fails in the near future…)

They were a great audience, and I promised some references:

You can find out more about the Gadgeteer here: http://www.netmf.com/gadgeteer/

If you fancy buying some hardware you can get the kits from Cool Components.

If you want to make your own 3D printer like Una you can get a kit from Ultimaker.

Charlotte told me about a competitor to my Twitter printer (or perhaps my Twitter printer is a competitor for it). The LittlePrinter puts things onto paper, and will have a mobile client that you use to configure it. However, everything is pushed from a cloud based server which is supported by the hardware supplier. When they go bust you lose everything, and it is hard to see how they can make money once they have got the profit on the hardware. That has already happened to my Chumby and my Nabaztag rabbit. My plans for my Twitter printer include a web configuration page so that the user can always control the device directly, rather than any kind of on-going requirement for support.

Gadgets at St. Bede’s

DSCF8305.jpg


DSCF8304.jpg

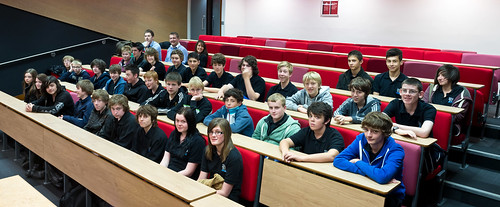
This is the audience, thanks too much for to the volunteer who helped me build the camera.

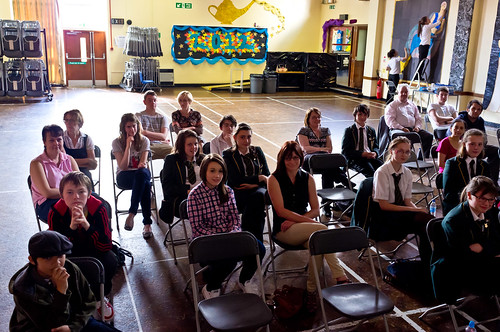
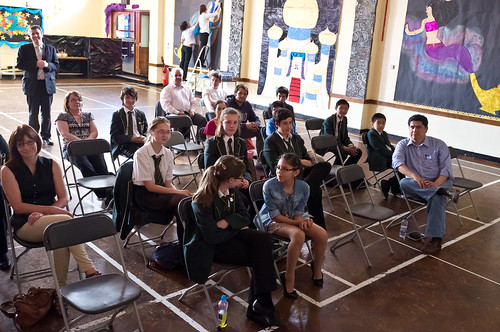
Did a school visit today. For the last couple of years we’ve been doing talks at St. Bede’s about computing and good stuff, Today I was showing some of the fun and games that you can have with Gadgeteer and 3D printing.

IMG_0340.jpg

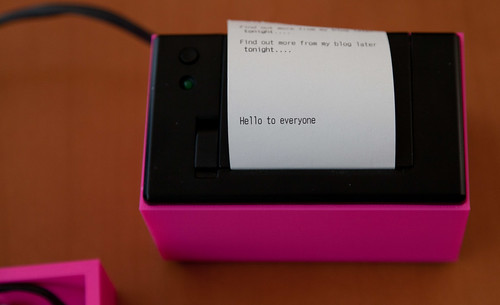
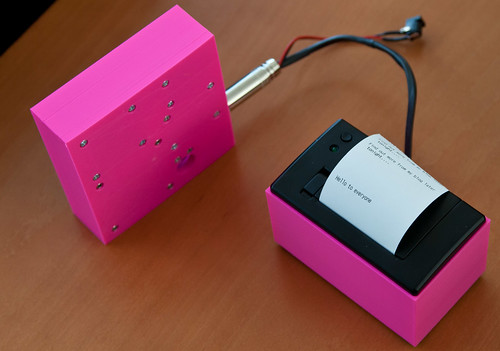
This is the output from my “Tweet Printer”. It connects to the internet and prints out my tweets. And it works.

IMG_0341.jpg

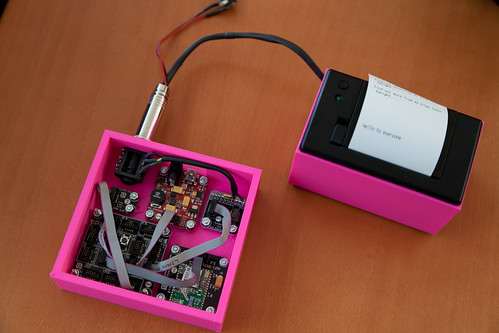
These are the working components, a FEZ Spider, WiFi board and custom printer connector, based on the only plug and socket that we had in stores, which is probably a bit big (and would sound really funny if you plugged headphones into it…

IMG_0344.jpg

Another view, at the bottom you can see the hole for the GHI 7 led display which shows the progress as the device finds a WiFi network, connects to it, sends a web request and then decodes and prints the tweet.

It even works by using my Lumia 900 in Internet sharing mode, which means that I can see my tweets immortalised on paper everywhere I go. If I fancy doing something different, for example a printed weather forecast or shopping list, then I just have to change the software. All I need to do now is print a lid for the box. And find some smaller plugs, and make a new printer box with room for the power supply socket.

If you were at the talk and want the slide deck, you can find it here.

Making Boxes for Gadgets with an Ultimaker Printer

IMG_0302.jpg

Ultimaker and Gadgeteer would seem to be a match made in heaven. Gadgeteer gives you a bunch of hardware devices that you can connect together and program using .NET and Ultimaker gives you a way of making a box to put them in. I’ve spent today finding out just how easy it is to do this, and just how much fun. I spent some time last week printing my name, which was fair enough I suppose, but today I wanted to get started making some boxes for gadgets.

I started off using the AutoDesk 123D software but in the end I gave up on it. It is a great program for making ornaments and trinkets, but didn’t seem to make it easy to create engineering type drawings. I wanted everything to be just the right size and correctly positioned, and the program didn’t seem to make it easy to do this. So I switched to FreeCAD, following up on advice from Andy in a comment on the post last week. This has the feel of a proper CAD program (although I’ve never used a proper one, so I don’t have much to compare it with). Finally I figured out that the best way to make something complex was to use the Sketch view to draw something on a plane, and then extrude that into the model. That way I could cut quite complex shapes.

FreeCad.jpg

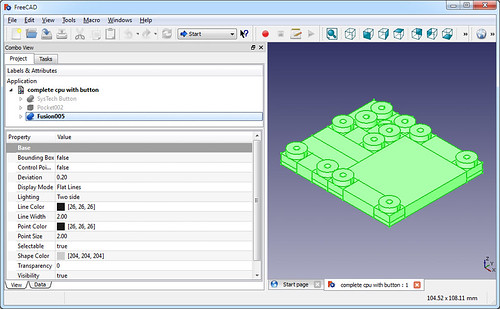
This is the view of my finished product, It has mounting blocks for a Sytech processor, power connector and button. The blocks are all individual components which I can assemble on a grid any size. The nice thing about the Gadgeteer devices is that they are all based on a grid mounting, with everything happening on 1cm boundaries. This makes it very easy for me to create some pins that I can use anywhere. The design above needs a little work, as the round mounting pillars are a bit too wide for the Gadgeteer standard, but for most of the devices I’ve found they work just fine.

Once I had made my design I had to convert it into an STL file (no problem, FreeCAD just does this) and then make the set of printer instructions. I used Cura for this. Finally I put my design on a memory card and turned the Ultimaker loose. I’m slowly getting the hang of 3D printing. Now that I’ve fixed all the leaks my problem is that sometimes the very first layer is not sticking to the printer bed. This means that the printer just extrudes plastic into the air and nothing gets made. I think I know how to do it now though, you have to adjust the print head so that when it is closest to the surface there you can just about pull a single piece of paper back and forth underneath it. And you have to make sure that this is the case across the entire printer surface.

IMG_0307.jpg

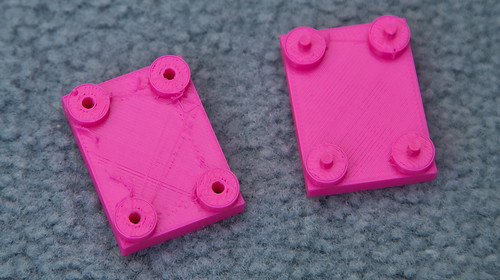
These are my early prototypes. For the first one, on the right, I tried to extrude pillars that I could just drop the board onto. I had a theory that I could just tighten a nut down onto the pillar and it would just self tap a thread into the pillar. Didn’t work. The pillars are not that strong and they snapped off. But for me the really amazing thing was that the Gadgeteer board just fitted onto these pillars. All the dimensions I had carefully put into FreeCAD were being reflected exactly in the finished article. Kudos to the Ultimaker crew, they have made a printer that prints things exactly the right size. If anything had been even slightly out of whack nothing would have fitted. As it was, once I’d cleaned off the excess plastic, I could just drop the board on.

IMG_0306.jpg

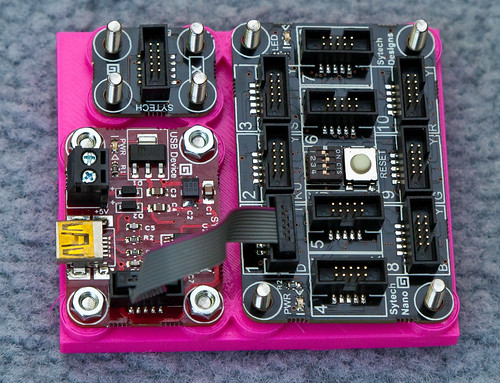
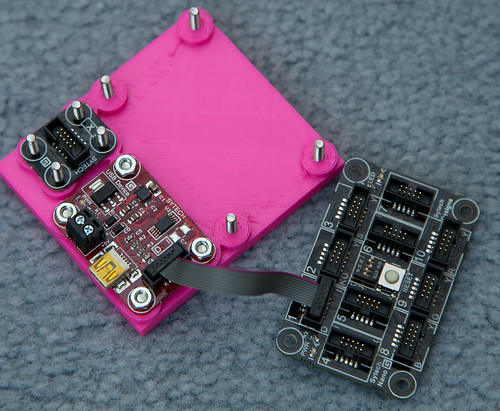
Version 2, which is where I am now, has bolt holes through the plastic pillars which I can then use to screw the boards down onto. I’ve made a three board carrier which you can see above and again, everything just lines up. Astonishing.

I’ve even managed to break one of the golden rules in 3D printing, and print overhangs that let me countersink the bolt heads in the surface underneath.

IMG_0309.jpg

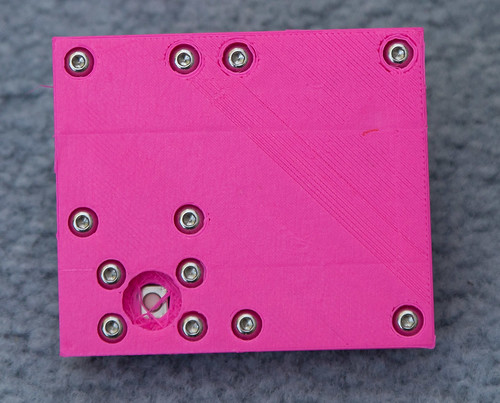
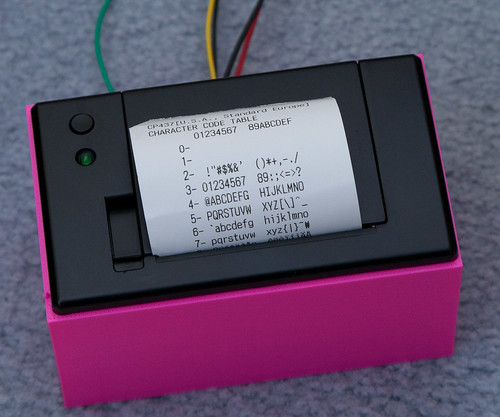
This is the view from the other side of the board. The heads are all countersunk. the big hole in the bottom is meant to be there, it is a push button. The idea was to make a round button to fit into the hole. Unfortunately, being an idiot, I’ve got the large and the small holes the wrong way round, so that my button will just drop onto the floor. Still, I’m very pleased with the results from just a day of playing with the software and the printer. Last night I also made a case for my thermal printer, which turned out rather nice too.

IMG_0298.jpg

Once I get everything sorted I’ll put the designs on the interwebs somewhere for anyone who is interested. Just a great way to spend a day….

Making Things

A gadget that makes gadgets is probably the ultimate gadget. So a few weeks ago I sold a whole bunch more cameras (I seem to do all my saving by means of the “camera bank”.) and ordered an Ultimaker. Peter reckoned that this was the best of the 3D printers and I was attracted to it by the level of detail that you could print with, and the fact that it came in a kit, which I could spend the upcoming bank holiday working on with Number One Son.
WP_000020 (1).jpg

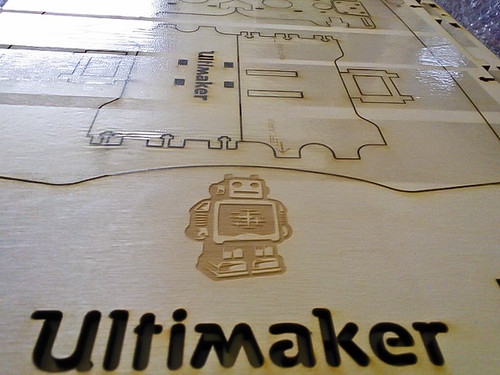
Several weeks later a heavy box arrived which contained motors, circuits and some lovely laser cut birch plywood which would be fitted together to make the finished printer. So, armed with the very detailed instructions and beautifully packaged and labelled pieces we set to work.

It was great fun. Like Lego, but bigger and with bits that light up, bits that get hot and bits that move. And you learn lots of new terms like “Bowden Tube”, “Peek insulator” and “STL file”. And at the end of it you have a thing that makes things. The principle is very simple. At one end you push a plastic fibre which goes down a tube to the “extruder head” which contains a heater and a very fine nozzle.
IMG_0091.jpg

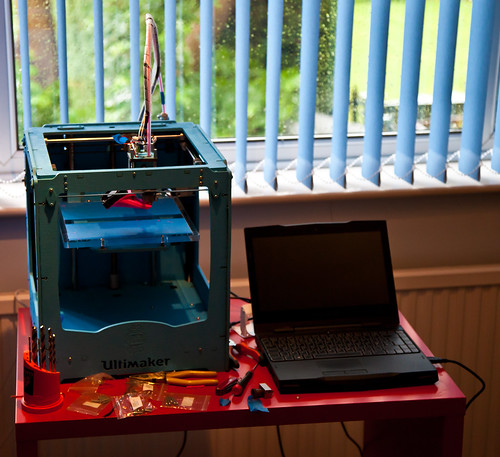
This is the finished product, I painted it blue. The machine “prints” in 3D by moving the head over a build surface, adding successive layers of extruded plastic to create the design you fed into it. It is fascinating to watch the head buzzing around. Number one son made a video of it printing out a Companion Cube here.

One of the great things about the printer is that it can print extra bits for itself. If you look at the picture above you can see a bright pink fan ducting on the print head which I printed and then fitted to replace the one that the printer ships with. The new duct does a better job of focusing the cool air onto the print so that it hardens more quickly. If I have an idea for a better design I’ll simply print that out and then fit it.

Tonight I decided to print out a new locking assembly for the “Bowden Tube”. This is the tube that guides the raw plastic fibre into the extruder head. I was especially interested in this because it contains a screw thread, and I wanted to see how this would turn out. The print did not go well, mainly because I left the printer heated for too long, and some fibre in the tube melted and formed a plug that stopped the flow. I had to strip down the print head, clean out the blockage and then rebuild everything. Two hours of messing around with bits and bobs. And I loved it. At the moment it is extruding very well, but I’ve got a little leak of plastic around the nozzle which I’ll have to seal up. I’m looking forward to adding some sealant and then trying again.
IMG_0095.jpg

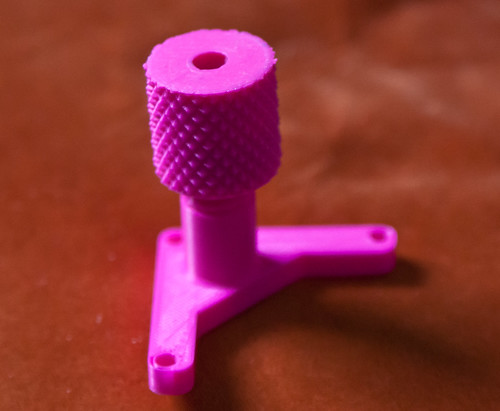
This is the assembly I printed tonight, with a knurled nut on top of the fitting and a thread that works really well. Perhaps I should get some different coloured plastic to work with…

The main reason I got my Ultimaker was not to print parts for it (which would be kind of recursive) but to make cases for other gadgets. The Gadgeteer platform provides a lovely way of making devices, but they will still need a box. As long as the box is smaller than 8 inches in any direction (the build volume of the Ulitimaker) I can design and print it. We already managed to print out a box for number one son’s Raspberry Pie device.

This is not a technology ready for prime time. But it is a tinkerers delight. You don’t just get to play with the bits, you get to make more bits to play with too. There might be people out there who will say that in the future everyone will have an Ultimaker, and that one day the machines will make themselves. This might happen at some point, but great as it is I can’t see my little blue box printing out a Stepper Motor or a Microcontroller any time soon. To me it is very similar to the very first TVs that were made by John Logie Baird. They worked by spinning disks and flashing lights and were thoroughly impractical for proper viewing. But they got people engaged with the idea of being able to view things over long distances. The Ultimaker is just like this. It is slow (although really fast for a 3D printer), noisy and not 100% reliable, but that doesn’t matter. What it does seems as magical as watching someone 100 miles away must have seemed in 1925. When people really figure out how to do this, how to make different colours and build more quickly, then I can see that there really will be one in every household. And another piece of Star Trek technology will have arrived in our lives.

We will be launching a spin off from Three Thing Game (Three Thing Thing) later this year when we will get people building gadgets using Gadgeteer (keep your diaries clear for the 27th – 28th of October folks) and I’ll bring along the printer so that we can make some boxes for whatever gets made.

Oh, and if you want to find out more about Gadgeteer, Peter has produced some superb posts about the platform.
Getting Started with Gadgeteer

image

WE had the folks from Microsoft Gadgeteer here to see us yesterday. They brought with them all kinds of cool interfaces that I’m looking forward to playing with, after I’ve finished marking. If you’ve not come across Gadgeteer before it is a .NET Micro Framework based platform for creating, well, er, gadgets.

If you’ve ever wanted to create a data logging, remote controlled, catflap. Or a GPS-enabled TV remote, or a motion detecting chicken counting camera, etc etc, then Gadgeteer gives you the modules to plug together to make the hardware and Visual Studio and C# to write the software, including in device debugging of your code.

There are a huge number of modules available now including camera, LCD panel, gyro, compass, lights, switches, multi-io boards, barometer, soil moisture sensors, heart rate sensors,  Bluetooth, WiFi, GPS, GPRS, infra-red, ethernet, USB Host and USB client. Plus you can bring out the individual signals from the processor and use them directly.

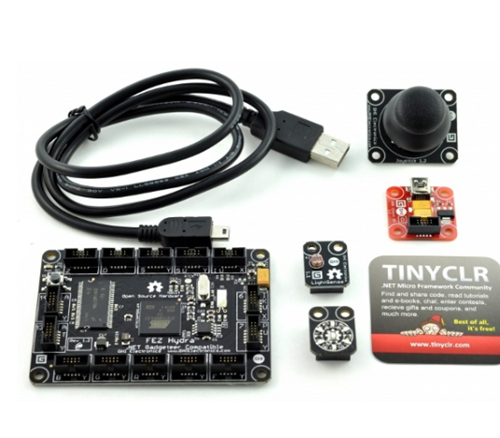
You can get started with the Fez Hydra Basic Kit, which you can see above. This costs around the same as a video game and a half. The sensors range from a fiver to quite expensive (for things like the VGA adapter, if you need it). If you want to get started in embedded development, or have an idea for a device and want to make it come to life, the Gadgeteer is a great place to start, particularly if you already have C# skills.

We have been using the Gadgeteer’s older brother, the .NET Micro Framework, for the last couple of years and it has been a very successful means of introducing students to the joys of making hardware do stuff. If you want to have a go with this kind of thing you should take a look.

If you are a student at Hull and you have have a really good idea for a device, and you want some hardware to play with over summer, then come and see me and I’ll see if I can find a kit to loan you.

Media Magnet

DSCF6366.jpg

Jake Zukerman of BBC Look North sets up Lindsay for another take….

In between all the lectures and labs and other stuff for today we had BBC Radio Humberside drop by for a chat with some of our students and then BBC Look North came by to find out more about Three Thing Game and Platform Expo. The radio session was a hoot. Steve Redgrave (someone I’ve known since before he was famous) came along and did a storming interview with a bunch of our First Year students who told him all about the joys of studying Computer Science at Hull.

The filming was fun too, although I never know where to put my eyes when someone is taking video of me. If I look at the camera I worry about seeming too intense, and if I look around I worry about seeming too shifty. And then there is the vexed question of which is my best side….

Anyhoo, it all passed off well enough. Yesterday we had a reporter and a photographer from the Hull Daily Mail come to see us and today I was delighted to find that the article had made it to print, with a great picture of some of our students and some quotes from a bloke referred to as “Rob Mile”. I’ll take that as close enough..

Later on Darren did a very good session about PS Suite, which is the new Sony game development they will be releasing later this year. We’ve got special permission for our students to use it in the Three Thing Game competition, and Stuart Lovegrove of Sony Studios in Liverpool will be taking a look at the things that they have made.

All gripping stuff. And then tonight I’ve managed to build a Gadgeteer device that can talk to my Eggbot. Exciting times.

Gadget Box

Gadgets

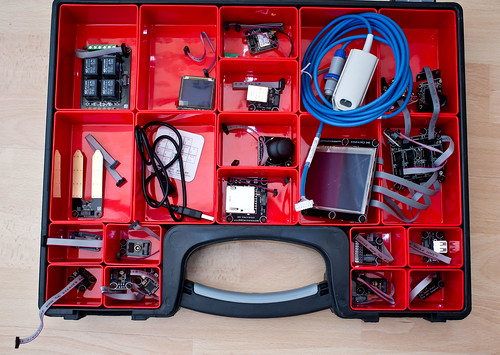
Yesterday I got a box for all the Gadgeteer bits and bobs that I’ve been lent to pay with. In amongst the cables we have a soil moisture sensor, barometer, a bunch of switches and multi-coloured lights, compass, gyro, GPS sensor, SD card reader, network interface, Joystick, LCD panel, OLED panel, network connector, processor board, video camera, power relays and usb host connector. I’ve already built a little camera (that’s the demo application). Now I just have to think of something else to build.

.NET Gadgeteer Fun and Games

Gadgeteer Spider

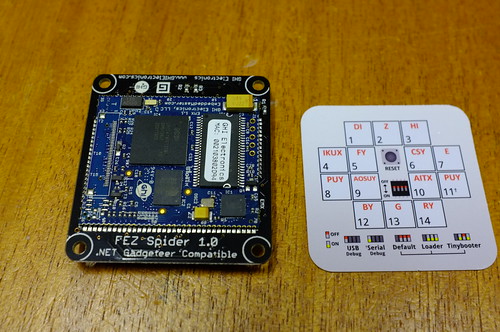
I love getting parcels in the post. Particularly if they contain things like a complete set of .NET Gadgeteer devices and interfaces. There are loads of interface devices, including touch screens, GPS sensors, barometers, thermometers, gyroscopes, moisture sensors and even a thing that which looks like it will measure my heartbeat.

The potential for fitting things together and doing great things with them is wonder, wonder, wonderful. I’m going to take them home for Christmas and see what we can build. I foresee a return of the Blog Controlled Christmas Lights.