Creating Cheese Lander in Snaps
/Yes. Cheese Lander is back! I'll be using the mostly world famous game in my Monday Games Snap series to demonstrate how to make a Windows program using Snaps that will almost certainly not make you rich and famous. But it might make you poor and notorious. The aim of the game is simple. Move the bread to catch the cheese before it reaches the bottom of the screen. If you miss the cheese, you lose. If your bread is moving too fast when it hits the cheese, you lose. If I'm in a bad mood, you lose (actually this might not be the case).
Last week we took a look at one of the Snaps sample game programs (read that before you read this). This week we're going to take that game code and move it into the "startup" program that runs when a Snaps application starts running. Then we're going to add some bread, cheese and a suitably starry background with a view to getting things moving next week.
Open up the BeginToCodeWithCSharp sample project and take a look at the Solution Explorer in the top right hand corner:

Open the BeginToCodeWithCSharp project and then find the My Snaps Apps folder. Inside that you'll find a source file called MyProgram.cs. Open this file.
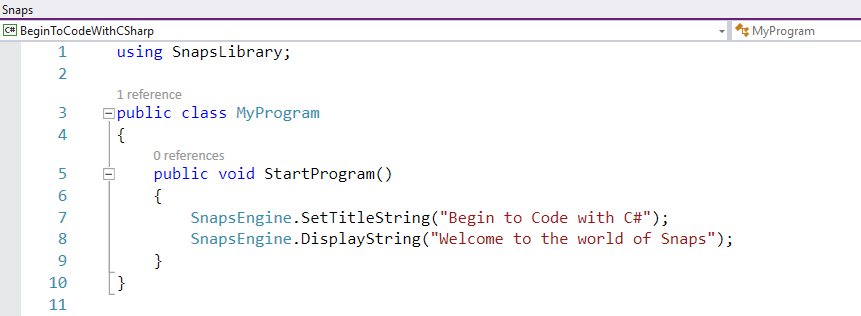
This is the StartProgram method that runs when a Snaps application starts up. It's the one that runs first because it is in a class called MyProgram and that is always the one that contains the initial StartProgram. Let's replace this StartProgram with the game code that we created last time:
public void StartProgram()
{
SnapsEngine.StartGameEngine(fullScreen: false, framesPerSecond: 60);
ImageSprite ball =
new ImageSprite(imageURL: "ms-appx:///Images/ball.png");
SnapsEngine.AddSpriteToGame(ball);
while (true)
{
SnapsEngine.DrawGamePage();
}
}
Copy the above method out of this text and paste it over the StartProgram in the Visual Studio editor so that it looks like this.

Now, when we run the program we get a nice round ball in the top left hand corner:

Balls are OK, but we want cheese. I've put all the image assets for the game into a file you can download from here. The images include the cheese, the bread, the starfield background and the game message screens. Download the zip file and put the images from it somewhere (I put mine on the desktop).

Now find the click on the cheese in your download folder and then drag it into the Images folder for the solution.

If you do the drag correctly you'll get a warning message because the demo programs (like all my products) come with cheese pre-loaded. However, we want to use the newer cheese because it is the right way up, so click yes to overwrite:

Now we can change our program to draw cheese rather than a ball.
ImageSprite ball =
new ImageSprite(imageURL: "ms-appx:///Images/cheese.png");
Now, when you run the program you'll see a piece of cheese, rather than a ball. Yay!
Now drag all the other images assets into the images folder.If you find that moving individual items is too much of a drag (ho ho) you can select multiple items and drag them all at once.
Now you've got the image assets, lets add the background to the game. We can use a new ImagesSprite for that. We can call the new sprite background:
ImageSprite background =
new ImageSprite(imageURL: "ms-appx:///Images/Background.png");
background.Height = SnapsEngine.GameViewportHeight;
background.Width = SnapsEngine.GameViewportWidth;
This creates a new sprite called background. It also sets the width and the height of the sprite to match the size of the game viewport, so that it exactly fills the screen, which is just what we want the background to do. We can add the new sprite to the game, remembering that sprites are drawn in the order that they are added to the game. So we draw the background first, and then put the cheese on top.
SnapsEngine.AddSpriteToGame(background);
SnapsEngine.AddSpriteToGame(ball);
The complete program looks like this:
using SnapsLibrary;
public class MyProgram
{
public void StartProgram()
{
SnapsEngine.StartGameEngine(fullScreen: false, framesPerSecond: 60);
ImageSprite background =
new ImageSprite(imageURL: "ms-appx:///Images/Background.png");
background.Height = SnapsEngine.GameViewportHeight;
background.Width = SnapsEngine.GameViewportWidth;
ImageSprite ball =
new ImageSprite(imageURL: "ms-appx:///Images/cheese.png");
SnapsEngine.AddSpriteToGame(background);
SnapsEngine.AddSpriteToGame(ball);
while (true)
{
SnapsEngine.DrawGamePage();
}
}
}
Run this and we'll see some cheese against a starry backdrop. But the cheese looks a bit big for the screen. Now it turns out that a recent meeting of the International Standards Organisation for Cheese Related Gaming has standardised cheese and bread sizes for the cheese landing games as a twentieth of the width of the screen and an eighth of the width of the screen respectively. Fortunately the Snaps framework provides a method that will scale a sprite and retain it's aspect ratio:
ball.ScaleSpriteWidth(SnapsEngine.GameViewportWidth / 20);
Add the statement to scale your cheese, and then add the bread sprite and scale that too. This will put bread and cheese on the screen. Next week we'll make them move about a bit.
