Finding Serial Ports in Python on the Raspberry Pi

Nothing to do with the post. But another picture I like

One of the more annoying quirks of using usb serial ports is that they move about a bit. The precise port that you get when you plug the same device into your computer is subject to change. This can be annoying; particularly if you want to make something that just works. With all that in mind I present this:

def get_port(self, portNames):
result = None
for portName in portNames:
    try:
        print("Connecting to " + portName)
        result = serial.Serial(portName, 115200)
        print("    Connected")
        return result
    except :
        print("    Connect failed to " + portName)
return result

The get_port function is given a list of ports that might have something behind them. It then works through the list trying each one and returns either a port that worked or None.

ports = ["/dev/ttyACM0","/dev/ttyACM1","/dev/ttyACM2"]
serial_port = self.get_port(ports)

You call it as shown above. The ports variable contains a list of addresses. When the function completes it will either have a useable port or None. I’ve found it quite useful.

Writing a MIDI application on a Rasbperry Pi PICO

I seem to have written 500 lines of Python which is now running inside a Raspberry Pi PICO. I’ve no real idea how much space this occupies on the device, all I can say is that it works really well. I’m using the Thonny IDE which has a setting for Circuit Python and works a treat.

I’m building a MIDI keyboard device (that’s what the box here is for). One of the great things about this is that the when you use the Adafruit adafruit_bus_device and adafruit_midi libraries from here you have a MIDI device that works with MIDI applications on your PC (I’m using Pure Data), but you also retain the serial port connection from the PC to the device. So you can write Python to send MIDI messages at the same time as use the console for talking to your program. Very useful and rather fun. And I’m loving writing Python again.

Playing with Launch Pads

A while back George brought along a device to the Hardware group that I’d not seen before. It was a panel covered in buttons and lights.

That’s buttons and lights. Awesome. He said it was called a “launchpad” and you used it in music production. I wanted one.

Fast forward to this week, and I’m thinking of getting into making music and stuff. And if you want to do that you really need a copy of the Ableton Live software suite. Which is expensive. However, it is possible to find a cut-down version of this software bundled in with music devices, including launchpads. Add to this the fact that Amazon had the Launchpad Mini Mk2 (including software) for a tempting 38 pounds at the moment and I figured it was time to make a strategic purchase.

It arrived today. The hardware is very nice. A matrix of 64 buttons which can display one of four colours (the latest model can do lots more colours but costs a lot more) . It also comes with a licence card that gets you a copy of the latest version of Ableton Live.

You just plug the device into your computer and it shows up as a MiDi device. You can use it in Ableton to trigger sound effects and music sequences. There’s even a low power mode that turns the led brightness down. This allows you to use it as a controller on an iPad via the iPad USB adaptor.

Plus (and this is really interesting) there’s a library on GitHub that lets you use the launchpad with Python programs. I’m thinking it might be a really neat way to manage robots if I ever get round to making the robot rugby game work. The buttons colours could show player status and also allow them to be started and stopped.

It’s a nice gadget and, if you can pick one up for the price I paid, well worth a look. The music stuff is fun, you could use it to trigger sound effects and whatnot as you record podcasts but it also makes a neat user input device too.

Getting Started with Micro Python on ESP32

I got my little game working on the Raspberry Pi yesterday, and today I got to thinking how I could make it work on something a bit, er, cheaper. It’s not so much that I begrudge paying the price for the Pi, more that I can think of more demanding things to do with the Pi than just run the game. My thoughts turned to the ultra-cheap ESP32 devices that I’ve been playing with. The only snag is that I’ve written the entire game in Python for the Raspberry Pi, and I don’t fancy re-writing it in the C++ that these devices normally run.

So, why not run Pyhon on an ESP 32 device?

This turns out to be really easy. If you’ve installed ESP32 devices as part of your Arduino development environment you will have a useful little program called esptool.py on your machine. To convert a device to Micro Python you just have to plug in one of those ultra-cheap devices, find out what serial port it is connected to (in my case com4) and then use the command below to program the chip with Micro Python.

esptool.py --chip esp32 --port com4 --baud 460800 write_flash -z 0x1000 micropython.bin

This loads the image in the file micropython.bin into the device. To get a Python image, go to the download site and look for ESP32 devices. I used the one in the file esp32-20190714-v1.11-146-g154062d9c.bin

Above you can see what happened when I ran the command.

When you restart your ESP32 you will be able to talk Python to it via a command prompt. That’s fine, but what you really want is an IDE that lets you write and deploy Python programs.

The best one I’ve found is called Thonny. It’s works with “normal” Python nicely enough, but it also has an option you can use to point it at an embedded device:

In the options menu above I’ve told Thonny to search for a device running MicroPython and connect to that. Now, when I run a program it is deployed into the device and executes from there.

The MicroPython installation provides a tiny filesystem that can hold python programs. When you run a program it is transferred into that filesystem and runs from there. There are two special program files on the device, boot.py and main.py. The program in the boot.py file is executed when the device powers up, followed by the one in main.py The Thonny program has an option (in the Device menu) to save the program you are editing one of these files. This makes it really easy to make your Python program run when the device is powered up. I made my game program the main.py one and now I have my original Python program running inside a device that only cost around a fiver.

It wasn’t quite as simple as just copying the files over. The api (application programmer interface) to use GPIO ports and Neopixels are different in the two devices and I discovered that MicroPython does not provide a random.shuffle method. This meant that I had to create my own shuffling function, which wasn’t too hard.

Anyhoo, I now have my program running in Python on a tiny embedded device. Which is rather nice. I’ll put the code up on GitHub later this week.

Sensor Base Design the Hard Way

If I ever join you climbing a mountain, I’ll probably be the one wearing roller skates and carrying a piano.

Sometimes it seems to me that I have a stubborn determination to do things the hard way. For example, today’s task was to create some designs for an outdoor air quality sensor. I wanted a circular fitting to go in the base of a pipe and a support that would attach to the fitting and hold the processor and air quality sensor.

Some people (I think I call these people the “sensible ones”) would reach for their CAD tool and begin designing. Not me though. I reached for my Python interpeter and the ezdxf library that lets you write Autocad files from your code.

I wanted to use the “nut holder” approach to fitting where the laser cut plastic (which is what I want to make the stand out of) holds nuts that a bolt engages with to grip it. I’ve used these on the Hull Pixelbot quite successfully. I was quite proud of the “nut holder generator” that I’d written for the Pixelbot, it even makes each change of direction into a tiny curve, which apparently reduces the chances of the plastic cracking after it has been cut. However, my original code only drew the holders in one direction, whereas for the holder I wanted to put them all around the edges of a circle, as shown above.

Cue lots of bits of paper covered in drawings of triangles, sines and cosines and cursing over code. Eventually I managed it though, and the next step will be to get the plans cut into plastic so that we can make some sensors.

Test Air Quality with the EMF Badge

The air here seems ok

One of the (many) wonderful things about the electromagnetic fields event I went to was the badge that everyone was given. This was an embedded device with a nice colour screen and a powerful processor that just happened to be a mobile phone as well…… I thought I’d turn it into an air quality display. So I 3D printed a case and make some modifications so that I could fit an air quality sensor and a battery to power it on the back of the badge. This is the back of the badge:

The hardware construction went fine, and I had the badge and the sensor exchanging messages quite nicely. Then I tried to write the software and it all went wrong. So I gave up and decided to enjoy the event instead….

However, I’m not a quitter. So, after a lot of fun and games, I’ve finally submitted my air quality app to the badge store for the emf badge. You can find it in amongst the other apps in the store here. It seems to work a treat and I can wear it around my neck with pride. Although I guess this would probably look a bit silly around Hull, where a lot fewer people seem to be wearing emf badges than there were at the event.

Anyhoo, one significant (at least for me) takeway is that if you want to use the serial port in MicroPython in binary mode (i.e. not have the driver mess around with carriage return and linefeed characters), you can use a special option to request this:

sensor_port = UART(2,9600, bits=8, mode=UART.BINARY, parity=None, stop=1)

This option is, of course, undocumented on the MicroPython pages for the UART class, leading to endless hours of “fun” for developers (like me) who spend ages wondering why their binary checksum values are all wrong…..

Begin to Code with Python Videos

I've made some silly videos. They're for those sensible people who've bought copies of Begin to Code with Python (subtle plug on the left). 

They cover how to install Python, how to install PyGame and finally, how to obtain the demo programs and install the tiny Snaps framework. 

They were a giggle to make, with a bit of luck they will be a giggle to view. And maybe even useful.

How to install Python on a Windows 10 PC for the Begin To Code with Python book
Installing the Pygame framework for use in the book Begin to Code with Python
Installing and working with Snaps on a system for the Begin to Code with Python book

Writing DXF files from Python

I spent a bit of today creating design files for the latest version of the Hull Pixelbot. This version is going to be laser cut from perspex. This should make it much easier to produce large numbers of robots. Of course I'm not using a CAD package to produce the designs. It's a matter of personal pride that the Hull Pixelbot is entirely a software creation, and the designs are actually built by a Python program. 

The 3D printable version of the designs is created by a program running inside the FreeCad drawing program, but for the laser cut version I'm trying something different. I've discovered the ezdxf library that enables you to create dxf files (the ones that can be used to tell the laser cutter what to cut) directly from Python. 

So, after a bit of fiddling around I've got the start of the designs for the top and bottom of the robot.

Visual Studio 2017 and Python

Visual Studio 2017 came out yesterday. And today I downloaded my copy. I was keen to find out what was happening with the Python support. 

What can I say? I like Python.

Anyhoo, Python is not in the release version of Visual Studio 2017, which is sad. But, you can still get all that crazy Python goodness (along with Intellisense and a lot of other neat stuff) by going here and following the link to download a pre-release version of Visual Studio 2017 with Python built in (which actually works alongside your "proper" install). Which is great.

Coding Conundrums

We've been running the "Wrestling with Python" sessions again. Each Tuesday we get together with some local teachers and continue the process of getting up to speed with the Python language. We've reached the point where we are having a go at programming puzzles. And it is proving quite fun.

I've put the "Coding Conundrums" up on the Python site so anybody can have a go. You don't have to use Python, in fact I'm sending the same puzzles around our department to give folks some programming puzzles to get their teeth into. I reckon that programming is something that you have to work at continuously if you want to get (and stay) good at it. Bit like learning a musical instrument.

I'm also starting to properly like Python. Most of my Python programming takes place in the forbidding environment of the FreeCad graphic design program. I've got no debugger, scant error messages and Python programs can be terribly "brittle", in that a small mistake can cause them to shatter into a million pieces. But I must admit I'm really liking it.

Happenings in the Department

Muyiwa.jpg

Muyiwa Olu  gave a really good (and Rather Useful) seminar this week about the Python language. It is great to see someone being enthusiastic about a platform they obviously enjoy working with. I reckon that every programmer should have a bit of Python in their lives, because it is just such a fun language, and it was lovely to see some of the features brought to life. A great presentation from one of our second year students. 

You can find the slide deck for the session here

Next week we have Charlotte talking about Computer Science internships and her time at Airbus Industries writing software, including some Python code...

This week we also had our first meeting of the new "Embedded Development Club". Quite a few folk turned up, if just half of them come back next week with some kit to play with then we'll consider that a win. You can find the slide deck for the presentation here

And tonight we have a Hardware Meetup at C4DI. It's all go.

Python Wrap

Python wrap sounds like the kind of dish you don't pick off the menu, or perhaps a piece of music that you really don't want to hear. But in this context I'm talking about the last of our "Wrestling with Python" sessions for a while. They have been great fun to deliver, and it has been lovely to watch people come to terms with the artful business that is programming. 

This week we were making good on our promise of a "Soup to Nuts" implementation, going from problem description to working code.  And we added some File Handling, just to make it even more useful. You can find the slides and completed code here.

We'll be running more of these next year. 

Python: Soup to Nuts

I think I picked up the phrase "Soup to Nuts" when I was in the 'states a while back. I used it in a session today and all was confusion and hilarity. It simply means "all the way from the beginning to the end". 

We're doing some "Soup to Nuts" work at the moment in the Wrestling with Python sessions. I've put together something that looks a bit like the kind of assignments that are being used in schools in the UK and we are all going to work through it over the next few weeks.

If you fancy having a go you can find the assignment here.

Yet More Python Wrestling

Today we restarted our Wrestling with Python teaching series. We've been doing these for around a year now, and some stalwarts returned to the wrestling fray, along with a few newcomers too. 

For this course we are trying out PyCharm. This looks like a great place to write Python code. My advice if you are just starting is to not worry too much about all the options, but work through something just to get the feel of it. You can find the exercises that we did here

If you are a local teacher who fancies free food and programming company of a Tuesday night there is still some space left, get in touch if you fancy coming along.

One Final Wrestle....

We had our final wrestling session with the teachers tonight. Next week we are having our Three Thing Game@School event with a whole bunch of folks coming into the department from local schools to try their hands at writing Python games. We've made a template game (see above) for them to get started with and yes, it does involve cheese. And crackers.

You can find the resources and the sample games here

Wrestling with Pygame and Cheese

This pictures is entitled "Unsuccessful Cheese Movement Number 1"

This pictures is entitled "Unsuccessful Cheese Movement Number 1"

The "Wrestling with Python" sessions on Pygame are progressing well. Today we got some cheese moving around the screen under keyboard control. Next week we will add some more sprites and get some proper game action going. You can see on of the first attempts at moving things above. Perhaps we should clear the background after each draw.....

It occurred to us (in a rather nervous-making way) that we are exactly four weeks away from the big event on campus when folks are going to come in and make and show off games. But everyone is learning stuff and having fun, so actually I'm quite looking forward to it. 

If you want to find out what we have been doing you can download the content from here

Python Wrestling Time Out

PyScripter.PNG

We had our last "Wrestling with Python" event today. For the last six weeks or so we've been teaching teachers how to write Pythong programs. It's been great fun, although as a class they are a bit badly behaved, and I have had to shout at them once or twice to be quiet......

Anyhoo, today everyone who came along got completion certificates and went away happy. Or at least I hope they did. |f you want to find out what we were up to you can download the slides and the lab notes from here.

One of the things that we mentioned was PyScripter. This is a great tool for Python development on the PC. You can navigate your source code and it provides debugging support too. You can put breakpoints into the program, single step through the code and view the contents of variables. It is a free download and makes you into a much more effective developer.  Well worth a look. 

We have some plans for Python games in schools a bit later in the year. It's going to be great fun. 

Python Constructor Trickery

We are still doing our Python evening courses. Today we are learning more about classes. Which seems appropriate for teachers. We have been looking at how to create and manage data in program objects.

It turns out that Python is very laissez-faire when it comes to object construction (just like it is about most things). As a stalwart C# developer I find this all a bit scary. In C# you have to tell the compiler everything about the design of an object that you might like to create. In other words:

class Player

{

public string Name;

public int Score;

}

This is a C# class that I could create to hold details of a player of a game (perhaps golf or cricket). Each instance of the class will hold the name of the player and their score.  The C# compiler has been told to store a string in the Name property and an integer in the Score. So I can create objects that represent the fact that "Fred" has scored 100 runs, or whatever. And C# will make sure that the value of Name is only ever a string and the value of Score is only ever an integer. I like this a lot. It means that it is very hard for me to get my name and score storage into a mess. If I try to store a string where a number should be, for example put the value "Twenty Five" into the Score property,  then my program won't even get to run. 

In Python you can add things to any object at any time and the system pays no attention to the type of the values until a wheel comes off during program execution. 

class Player:

def writeMessage(self):

print('Nobody here but us chickens')

This Python code defines a Player class that just contains a single method that prints the message 'Nobody here but us chickens' when it is called. Fair enough, but not terribly useful. I can create an instance of the class if I want:

p = Player()
p.writeMessage()

These two statements create an instance of the Player class (referred to by p) and then ask it to print its message. Fair enough. If I want to store data in the class I can just set some attributes, and they are added automatically when the program runs. 

p.name = 'Fred'
p.score= 99

Now my instance of Player holds a couple of attributes, the name and the score of that player. I can go on and add lots of other attributes if I like. The problem is that I could end up in a mess. Suppose that I decide to mark one particular player as the captain of the team. I can add an attribute to denote this:

p.isCaptain = True

Now I can tell which one of the players is the captain, right? Well, yes and no. But mostly no and always dangerous. I might now have a situation where only one player (the one that I have marked as captain) has the isCaptain attribute. The rest of the players in my system don't have the attribute set to false, they just don't have the attribute. This will become a problem if my program ever does something like this:

if p.isCaptain:

print('hello captain')

This statement cause the program to crash if it ever encounters a player without the isCaptain attribute. A C# program would not allow this to happen, since you would be unable to create a player that didn't have the isCaptain attribute.

Python programs are easier and quicker to write because you don't have to tell the compiler everything up front, but the penalty is that they are vulnerable to errors that C# programs can't ever have. My way of fixing this is to make a constructor method for player that allows you to set the initial values there:
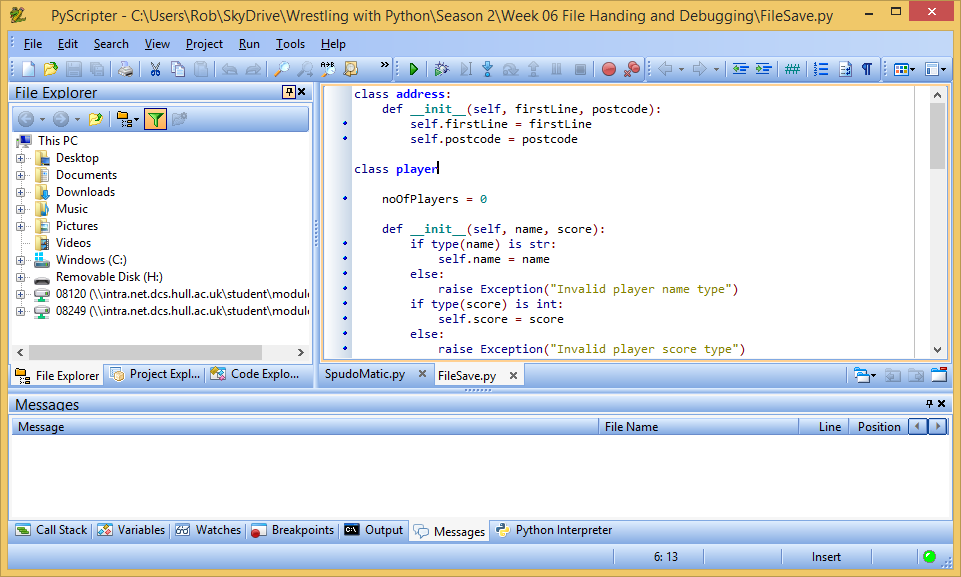
class Player:

def __init__(self, name, score):

self.name = "" + name

self.score = 0 + score

self.isCaptain = False

The __init__ method (yes, there are two underscores before and after the word init) is given the name and the score values and sets them into the player. It also sets a default value for the isCaptain property. I can now construct a player and set up the attributes in one statement:

p = Player('Fred', 99)

You may be wondering why I have statements like:

self.score = 0 + score

This is the trickery bit. I'm setting the score of the player to whatever the user of my constructor sent in. They could do something stupid like:

p = Player('Fred', 'har har')

In this case the score value is being delivered as a silly string, which is not what I want. But because the constructor tries to add this parameter to the integer value 0 this means that the program will fail and stop with the message:

self.score = 0 + score
TypeError: unsupported operand type(s) for +: 'int' and 'str'

I could write extra code to check for the type and raise my own exception, but this seems somehow simpler. I'm using this in all my Python constructors now. Maybe there's a better way of doing it, but I don't care because my way works for me. 

Number one son reckons that surviving in languages like Python, which are great fun but inherently dodgy, is just a matter of coding standards. This has now become one of mine.